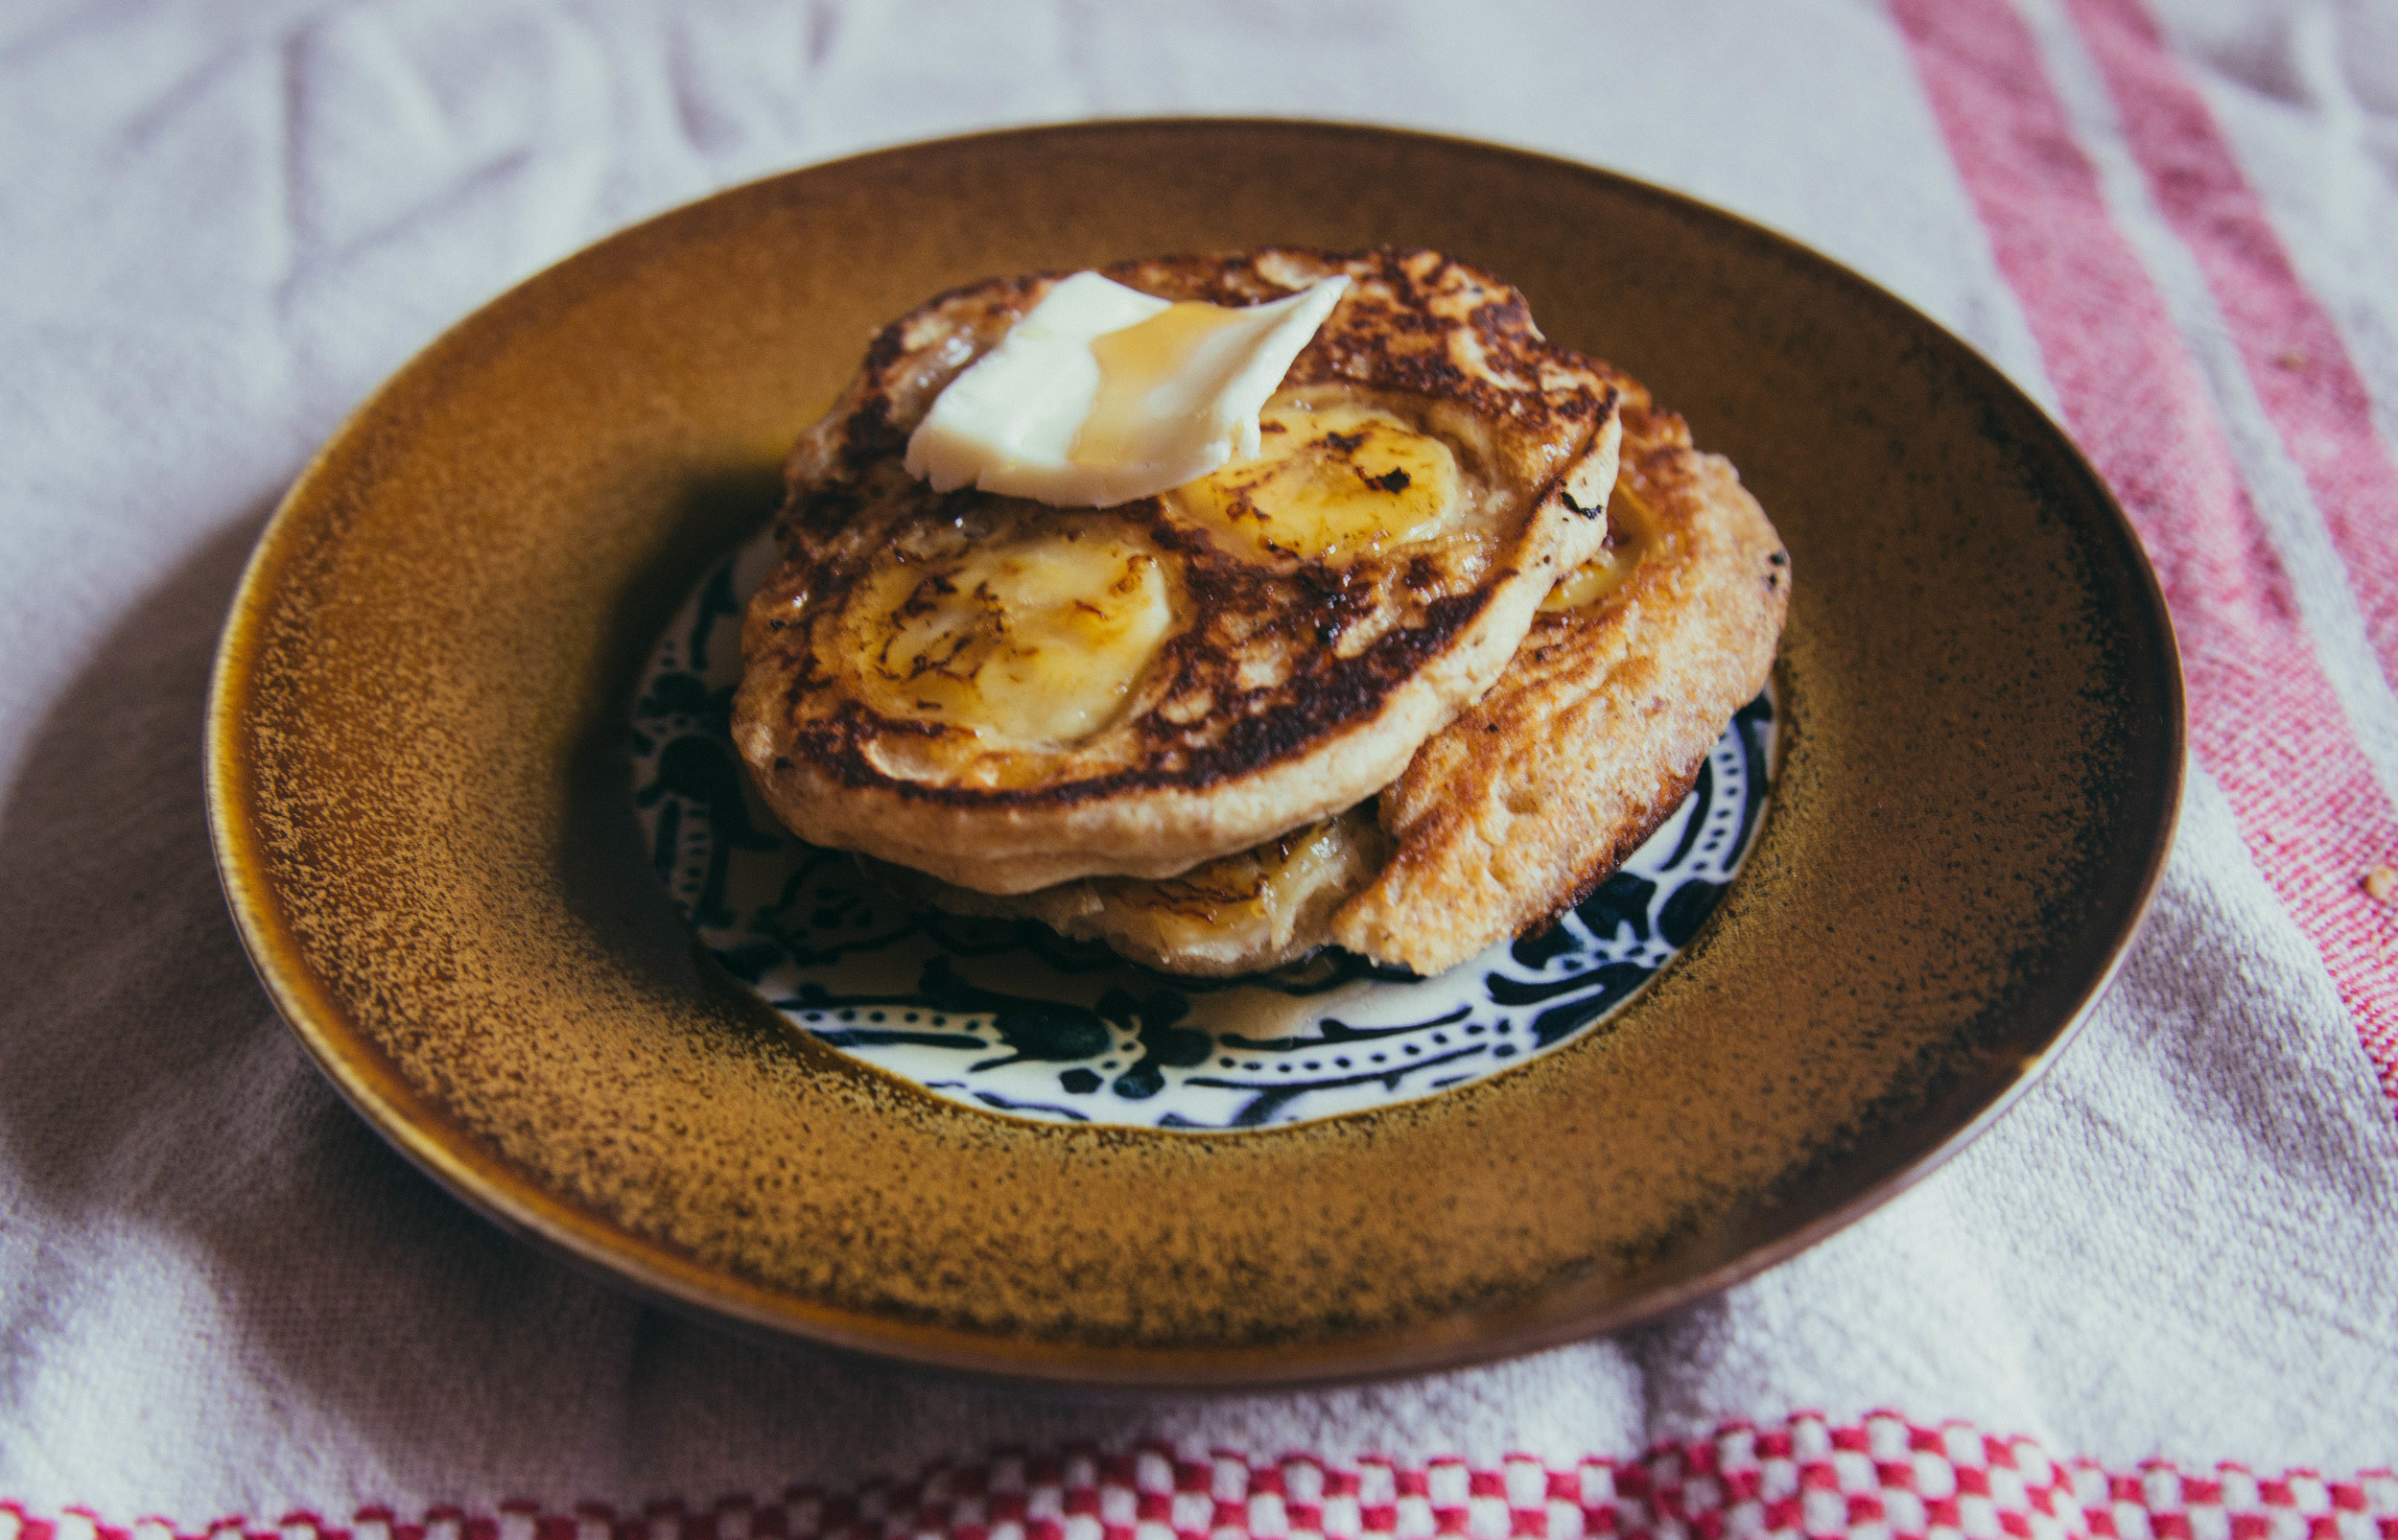
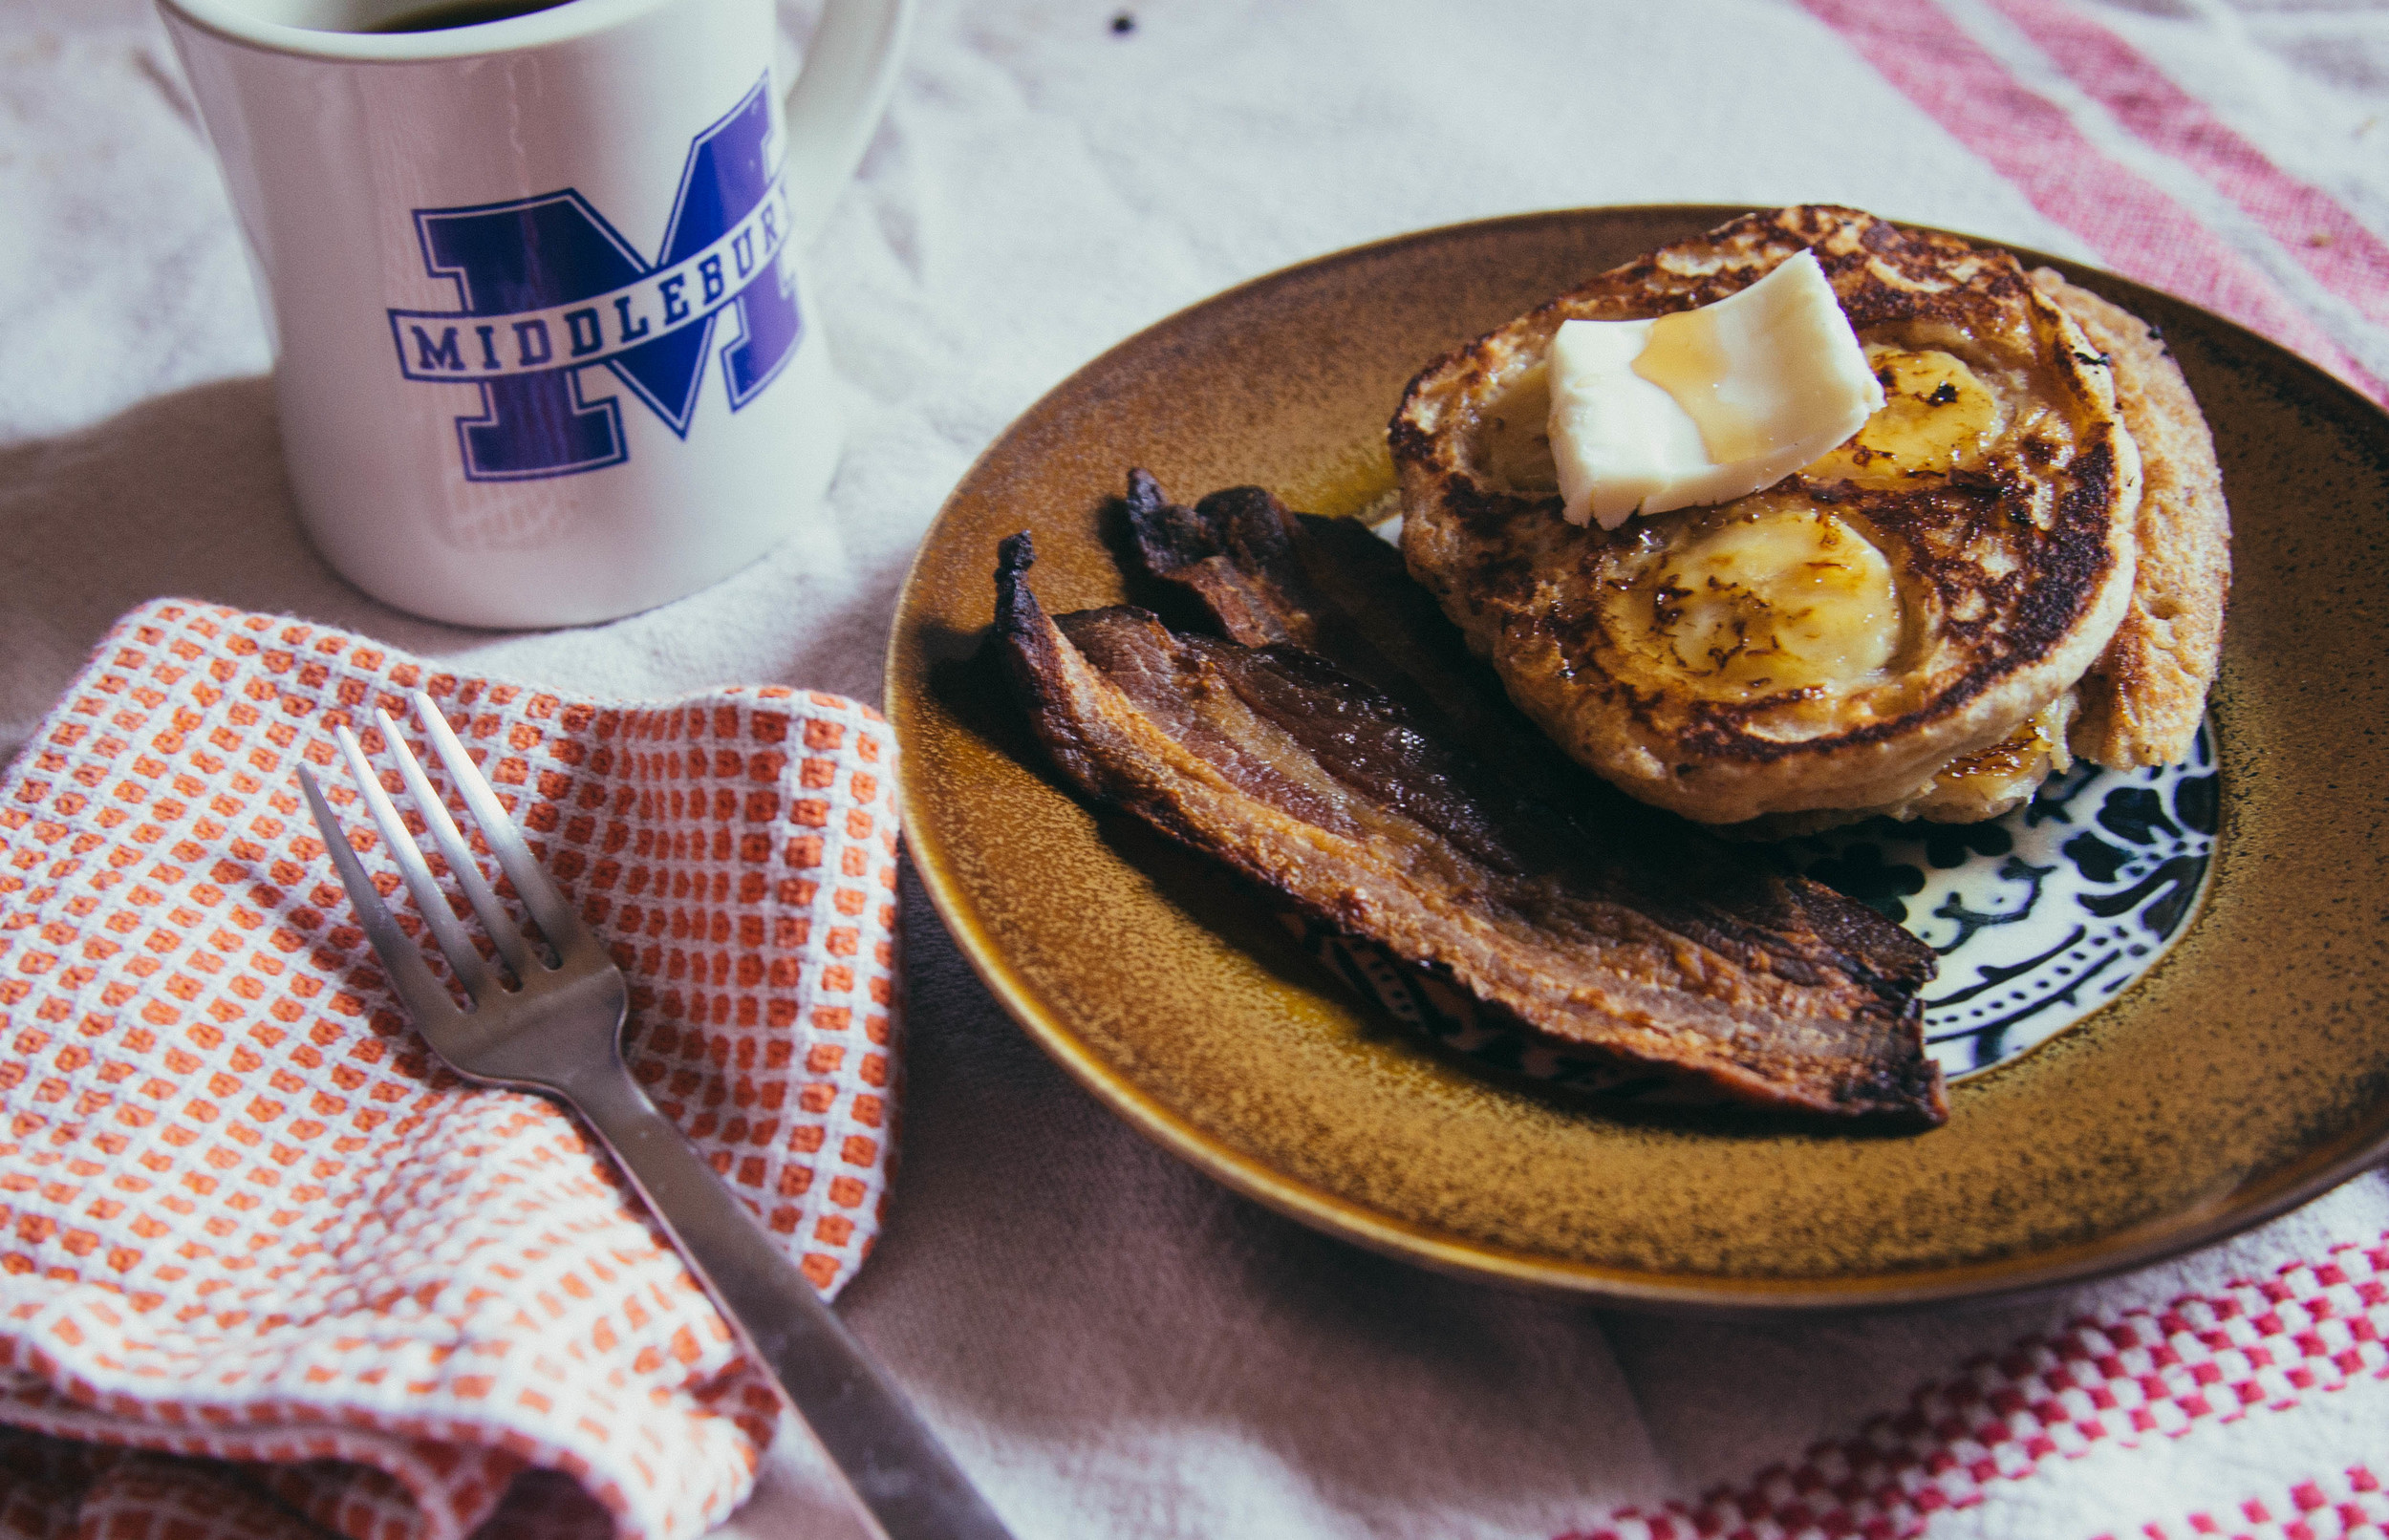
You know when you wake up and you really want pancakes... These are the pancakes I want. A couple years ago I lived with a phenomenal cook (she's the kinda cook who gets high then makes the best banana bread you've ever tasted). So on Saturday mornings when I really wanted pancakes, she was my hero. We found a smitten kitchen recipe (of course) for blueberry yogurt pancakes and adapted it to our own liking/fridge. I would read out the ingredients and instructions lazily from the couch and my magic roommate would make the breakfast of my dreams.
The nice thing about using different types of flour for pancakes is that they absorb maple syrup in different ways (and I really view pancakes as vessels for getting as much maple syrup into my body as possible). Using almond meal or buckwheat or whole wheat flour tends to make the pancakes more absorbent so they're just oozing with syrup and it is ah-mah-zing.
Steps
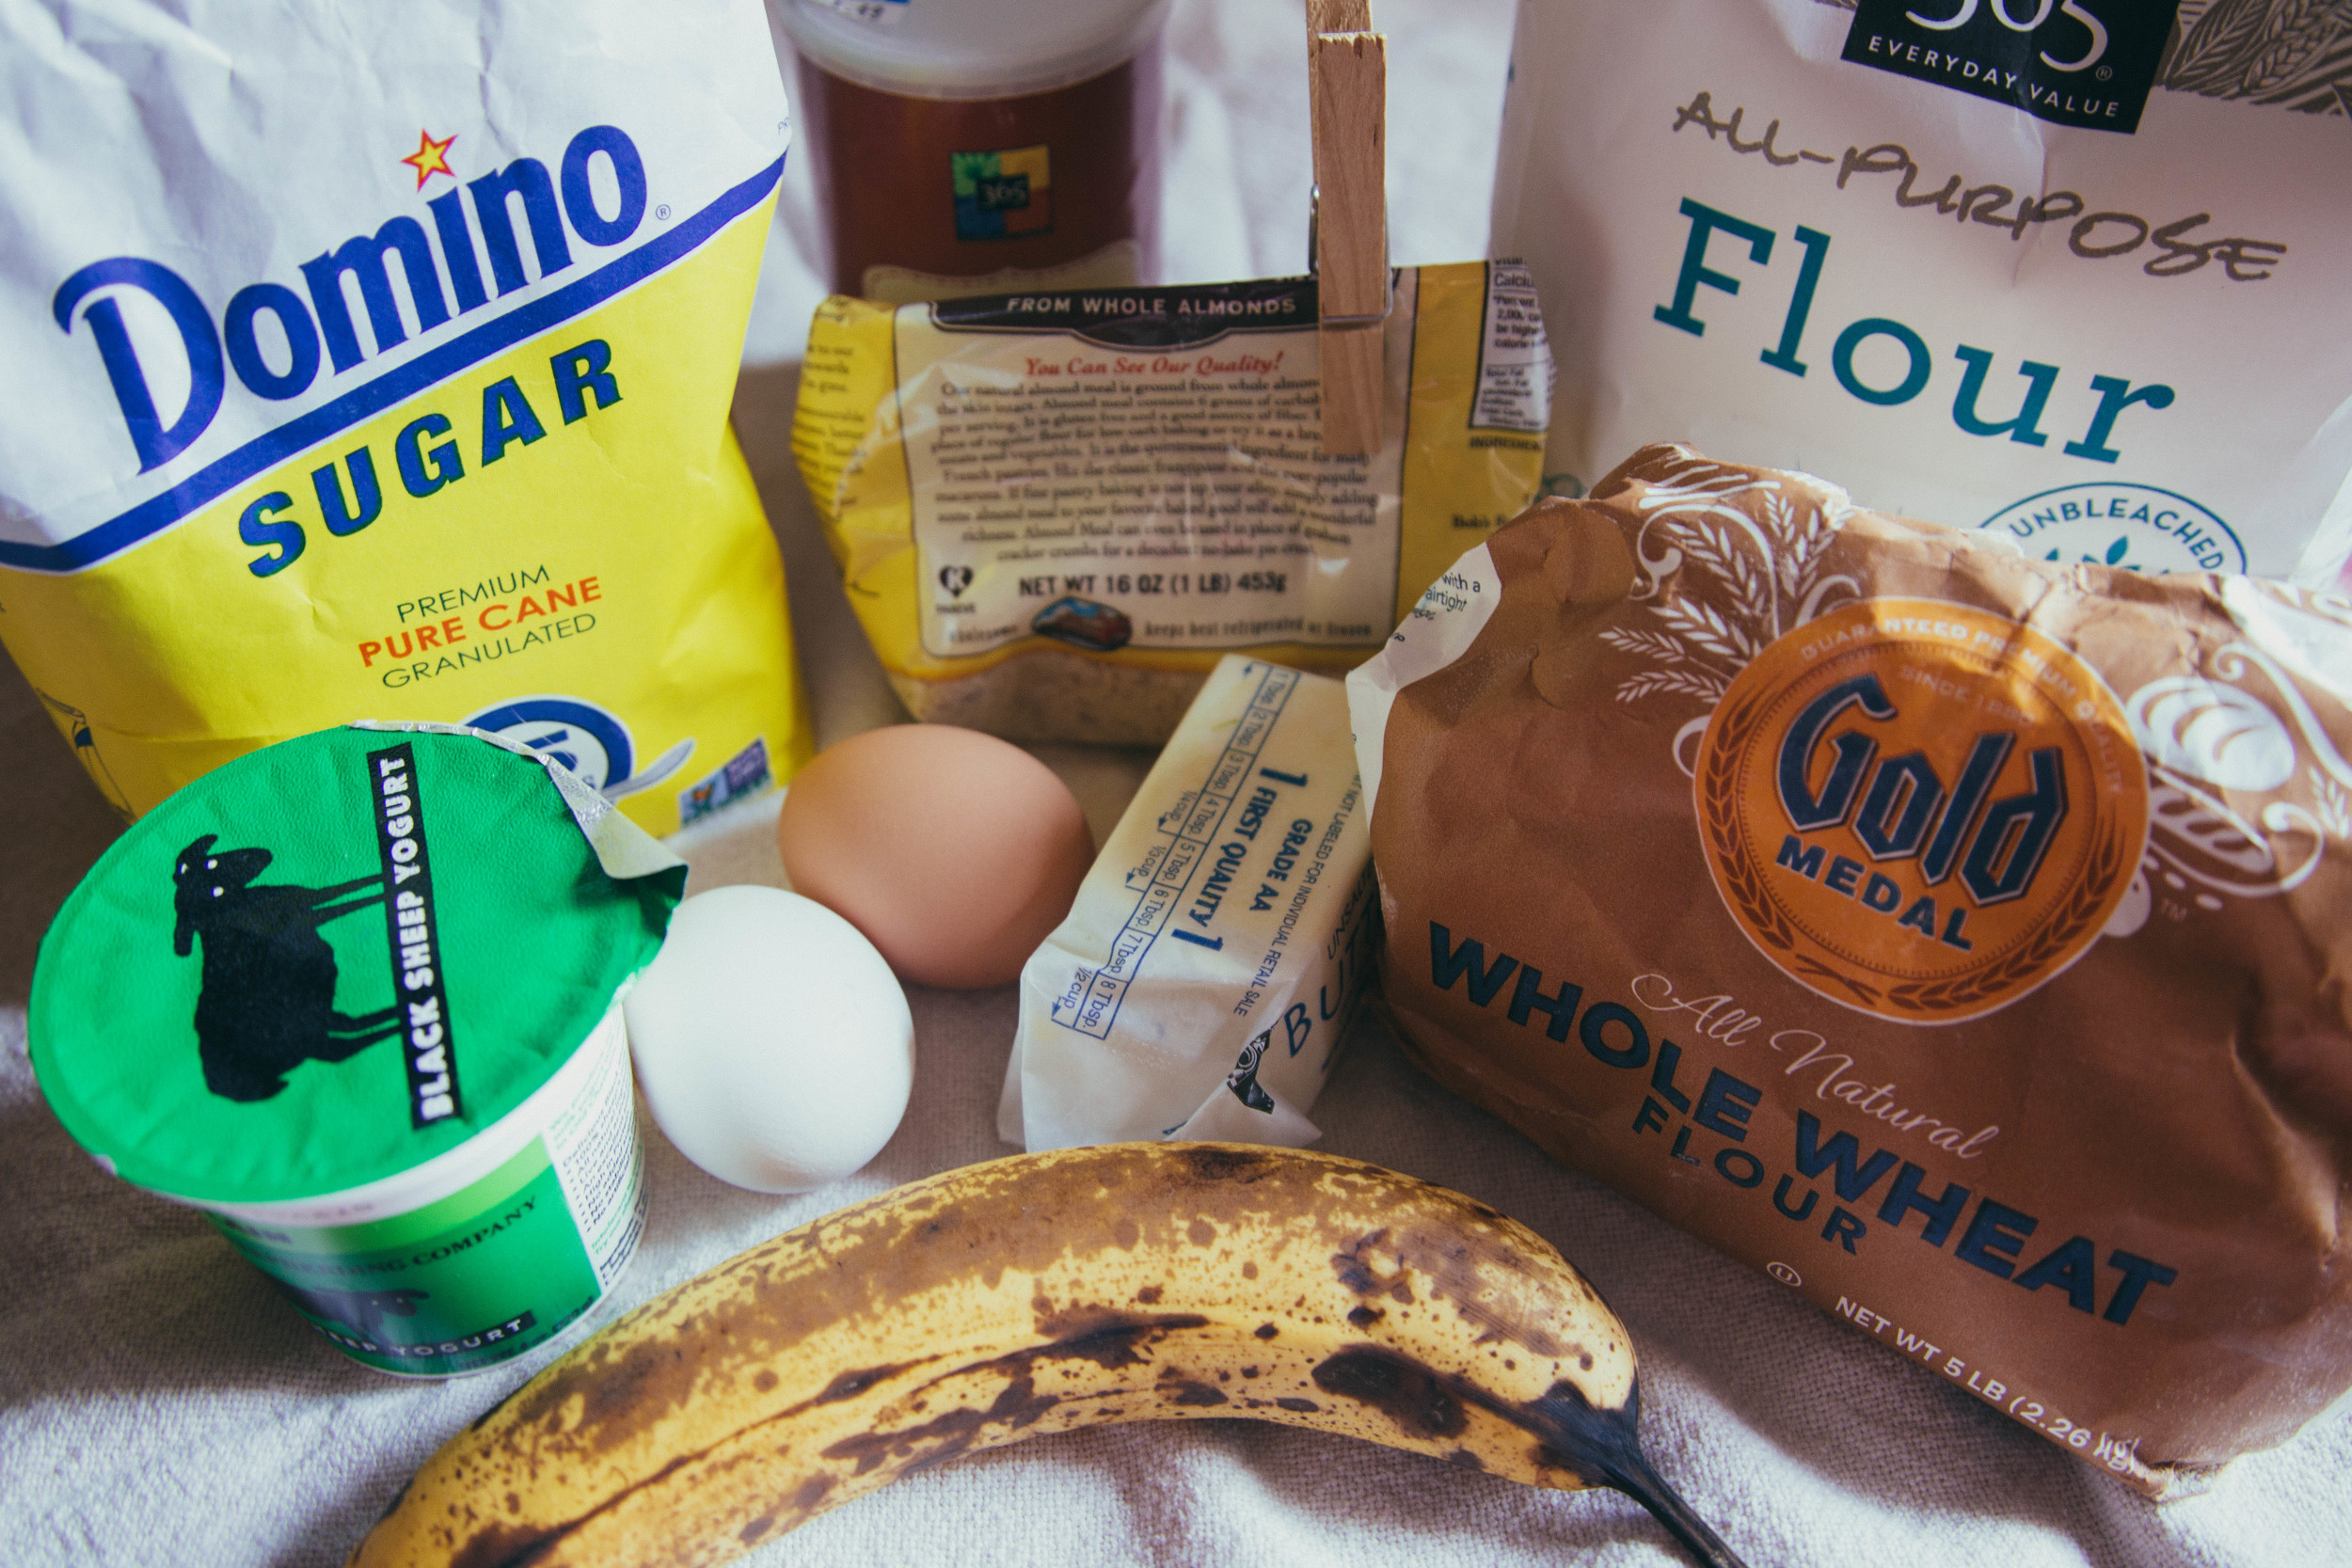
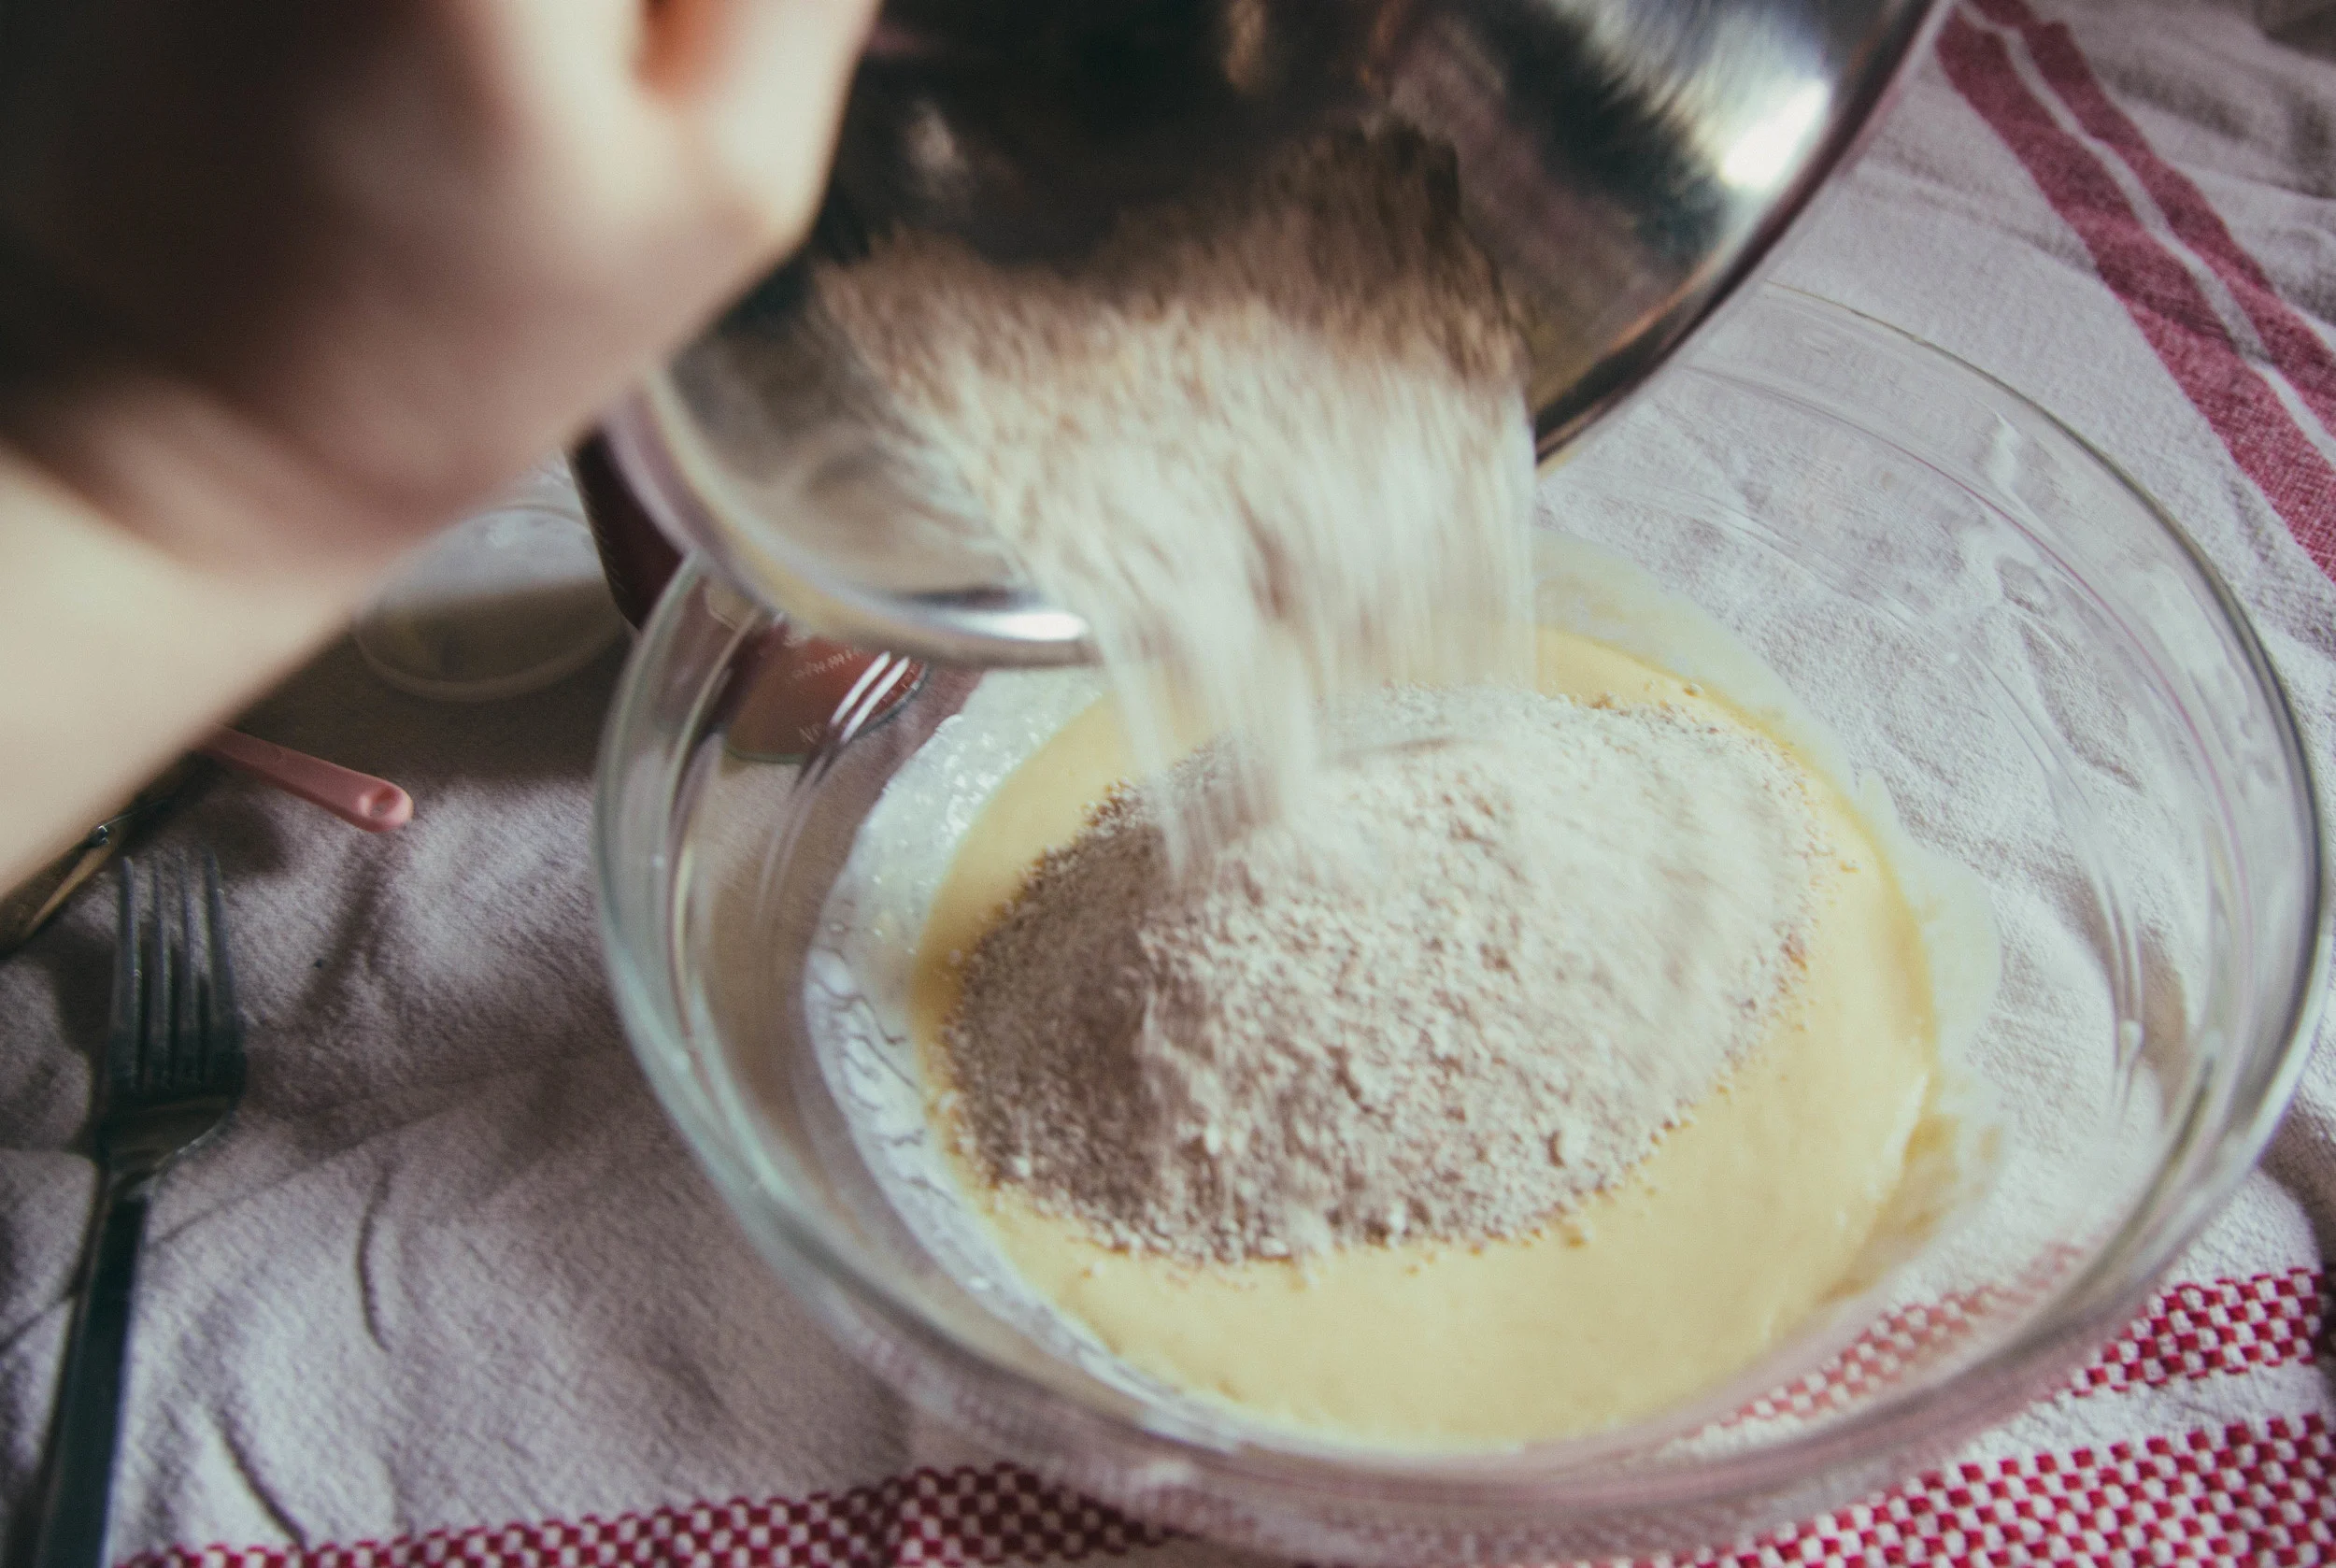
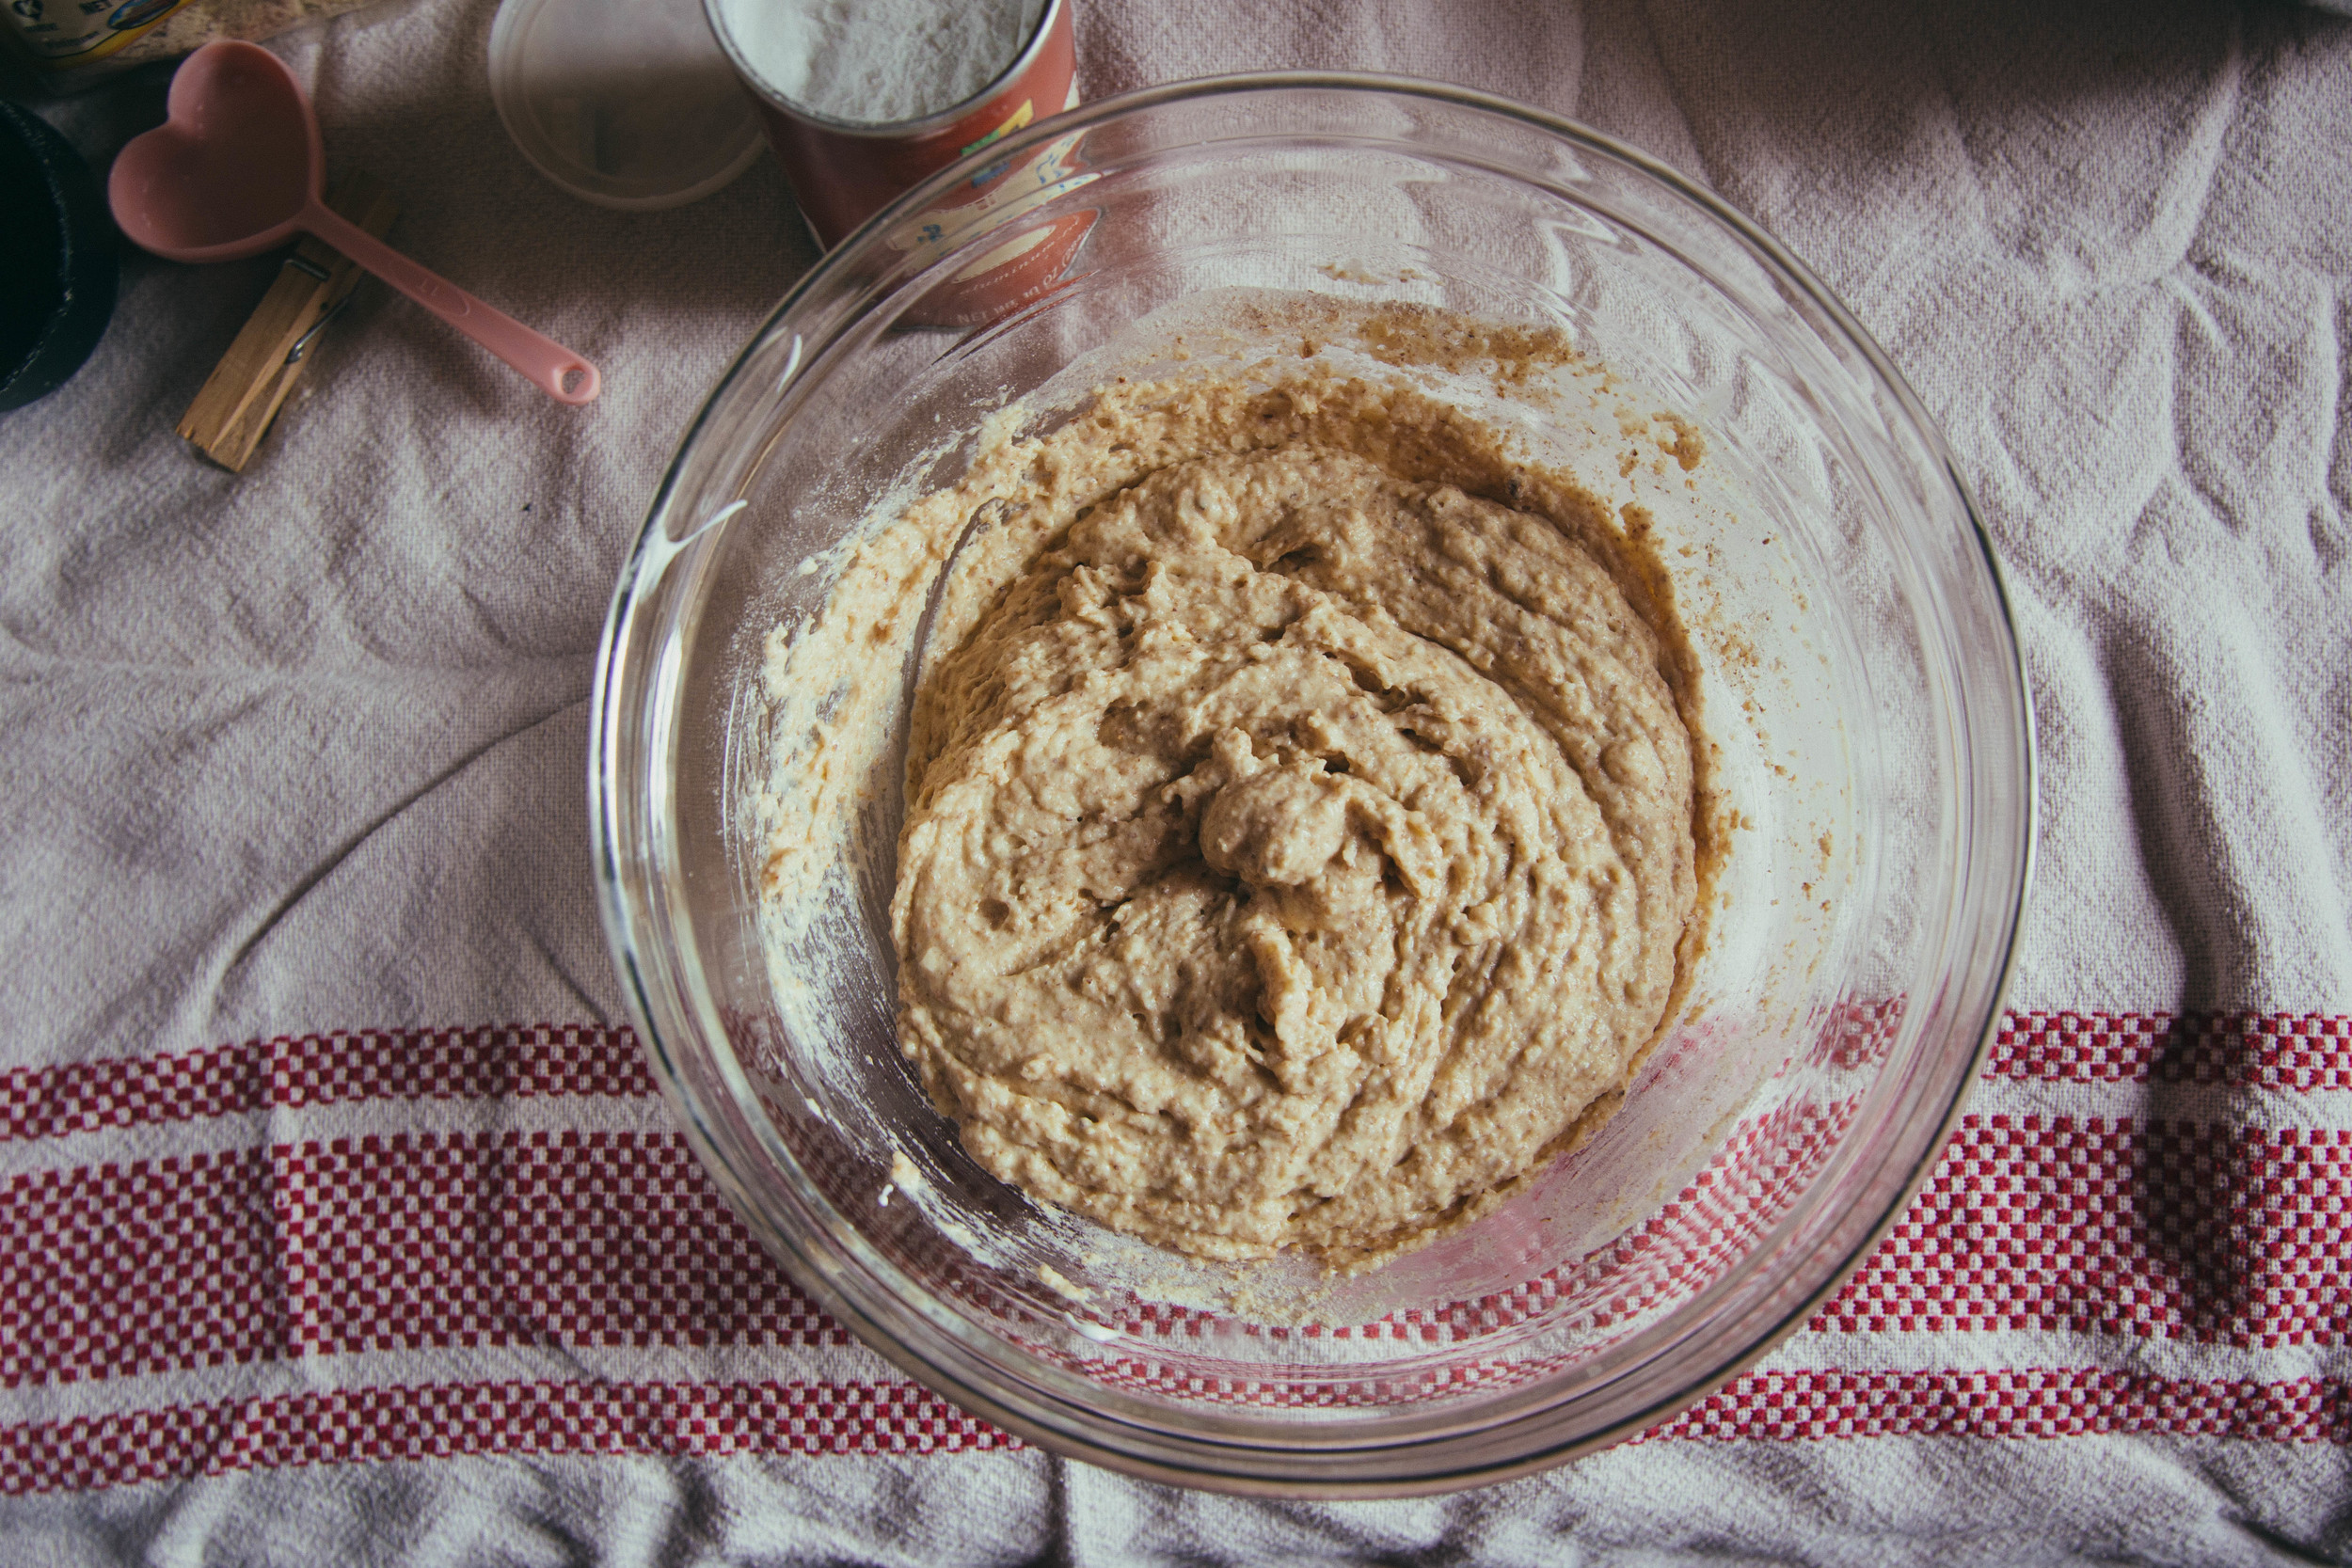
Mix the dry ingredients together in a bowl. Mix the wet ingredients together in a different bowl. Add the dry ingredients to the wet ingredients and mix everything together (the mixture is light but a little thick and a few lumps are fine).
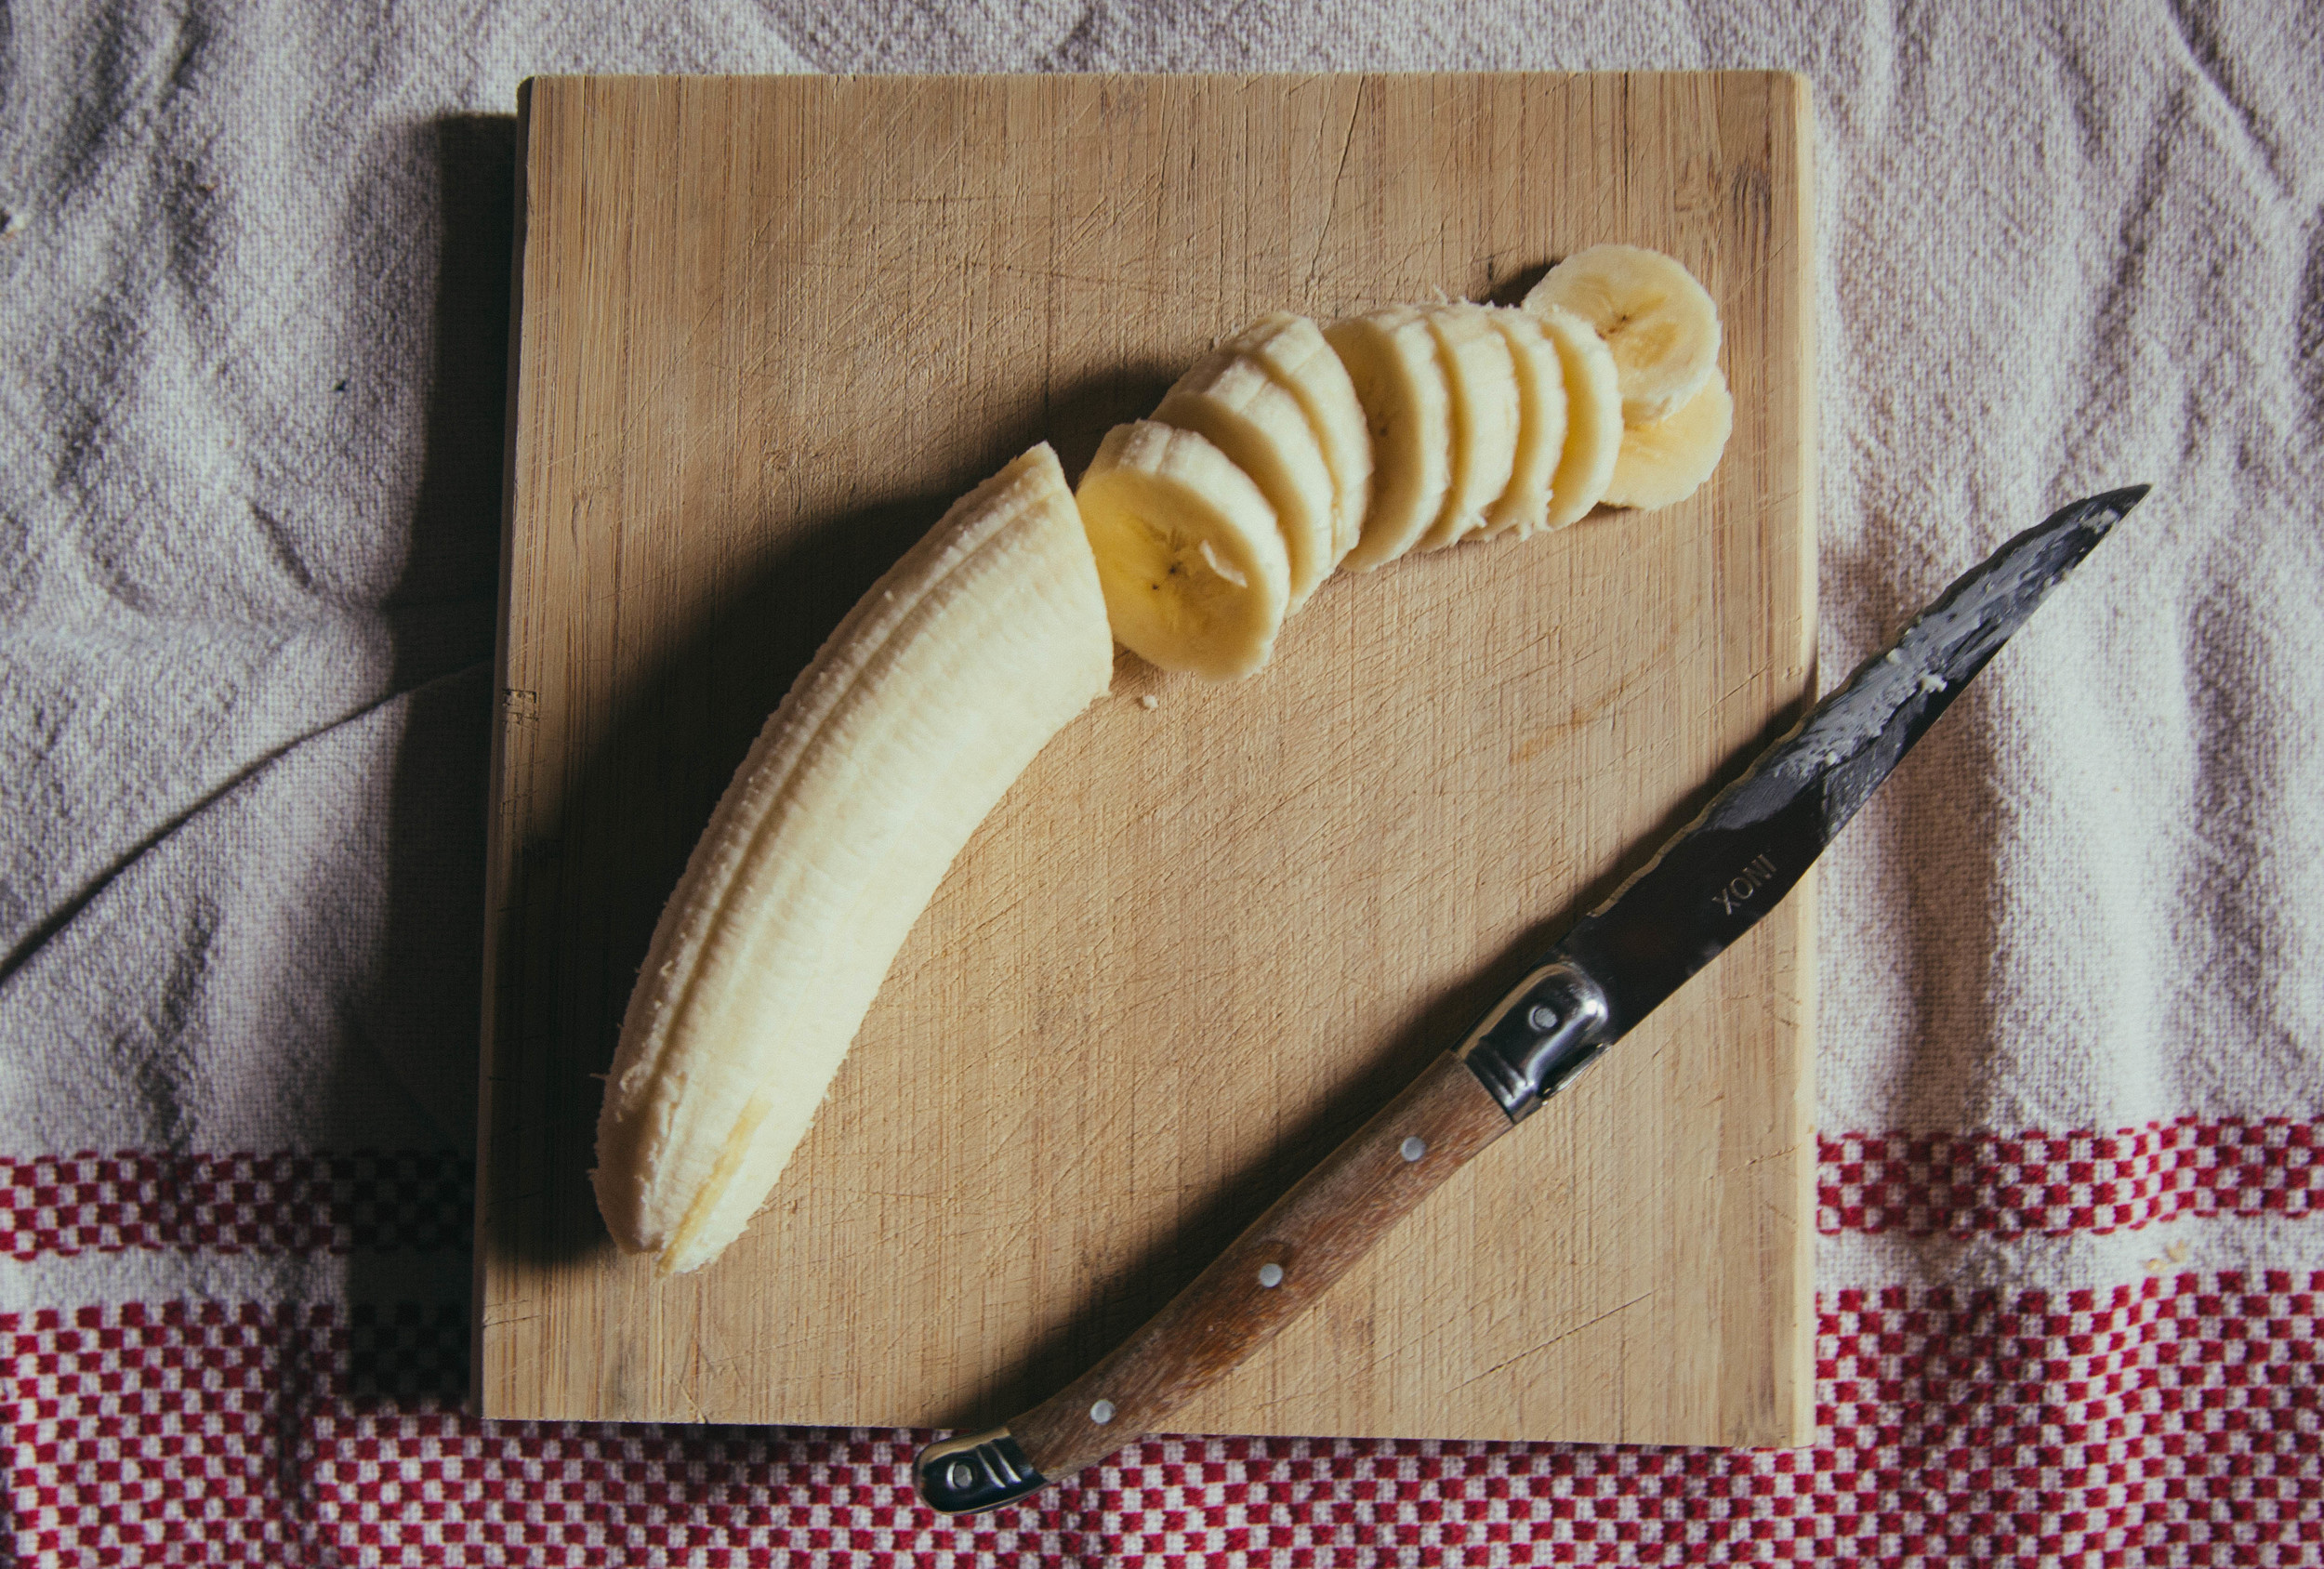
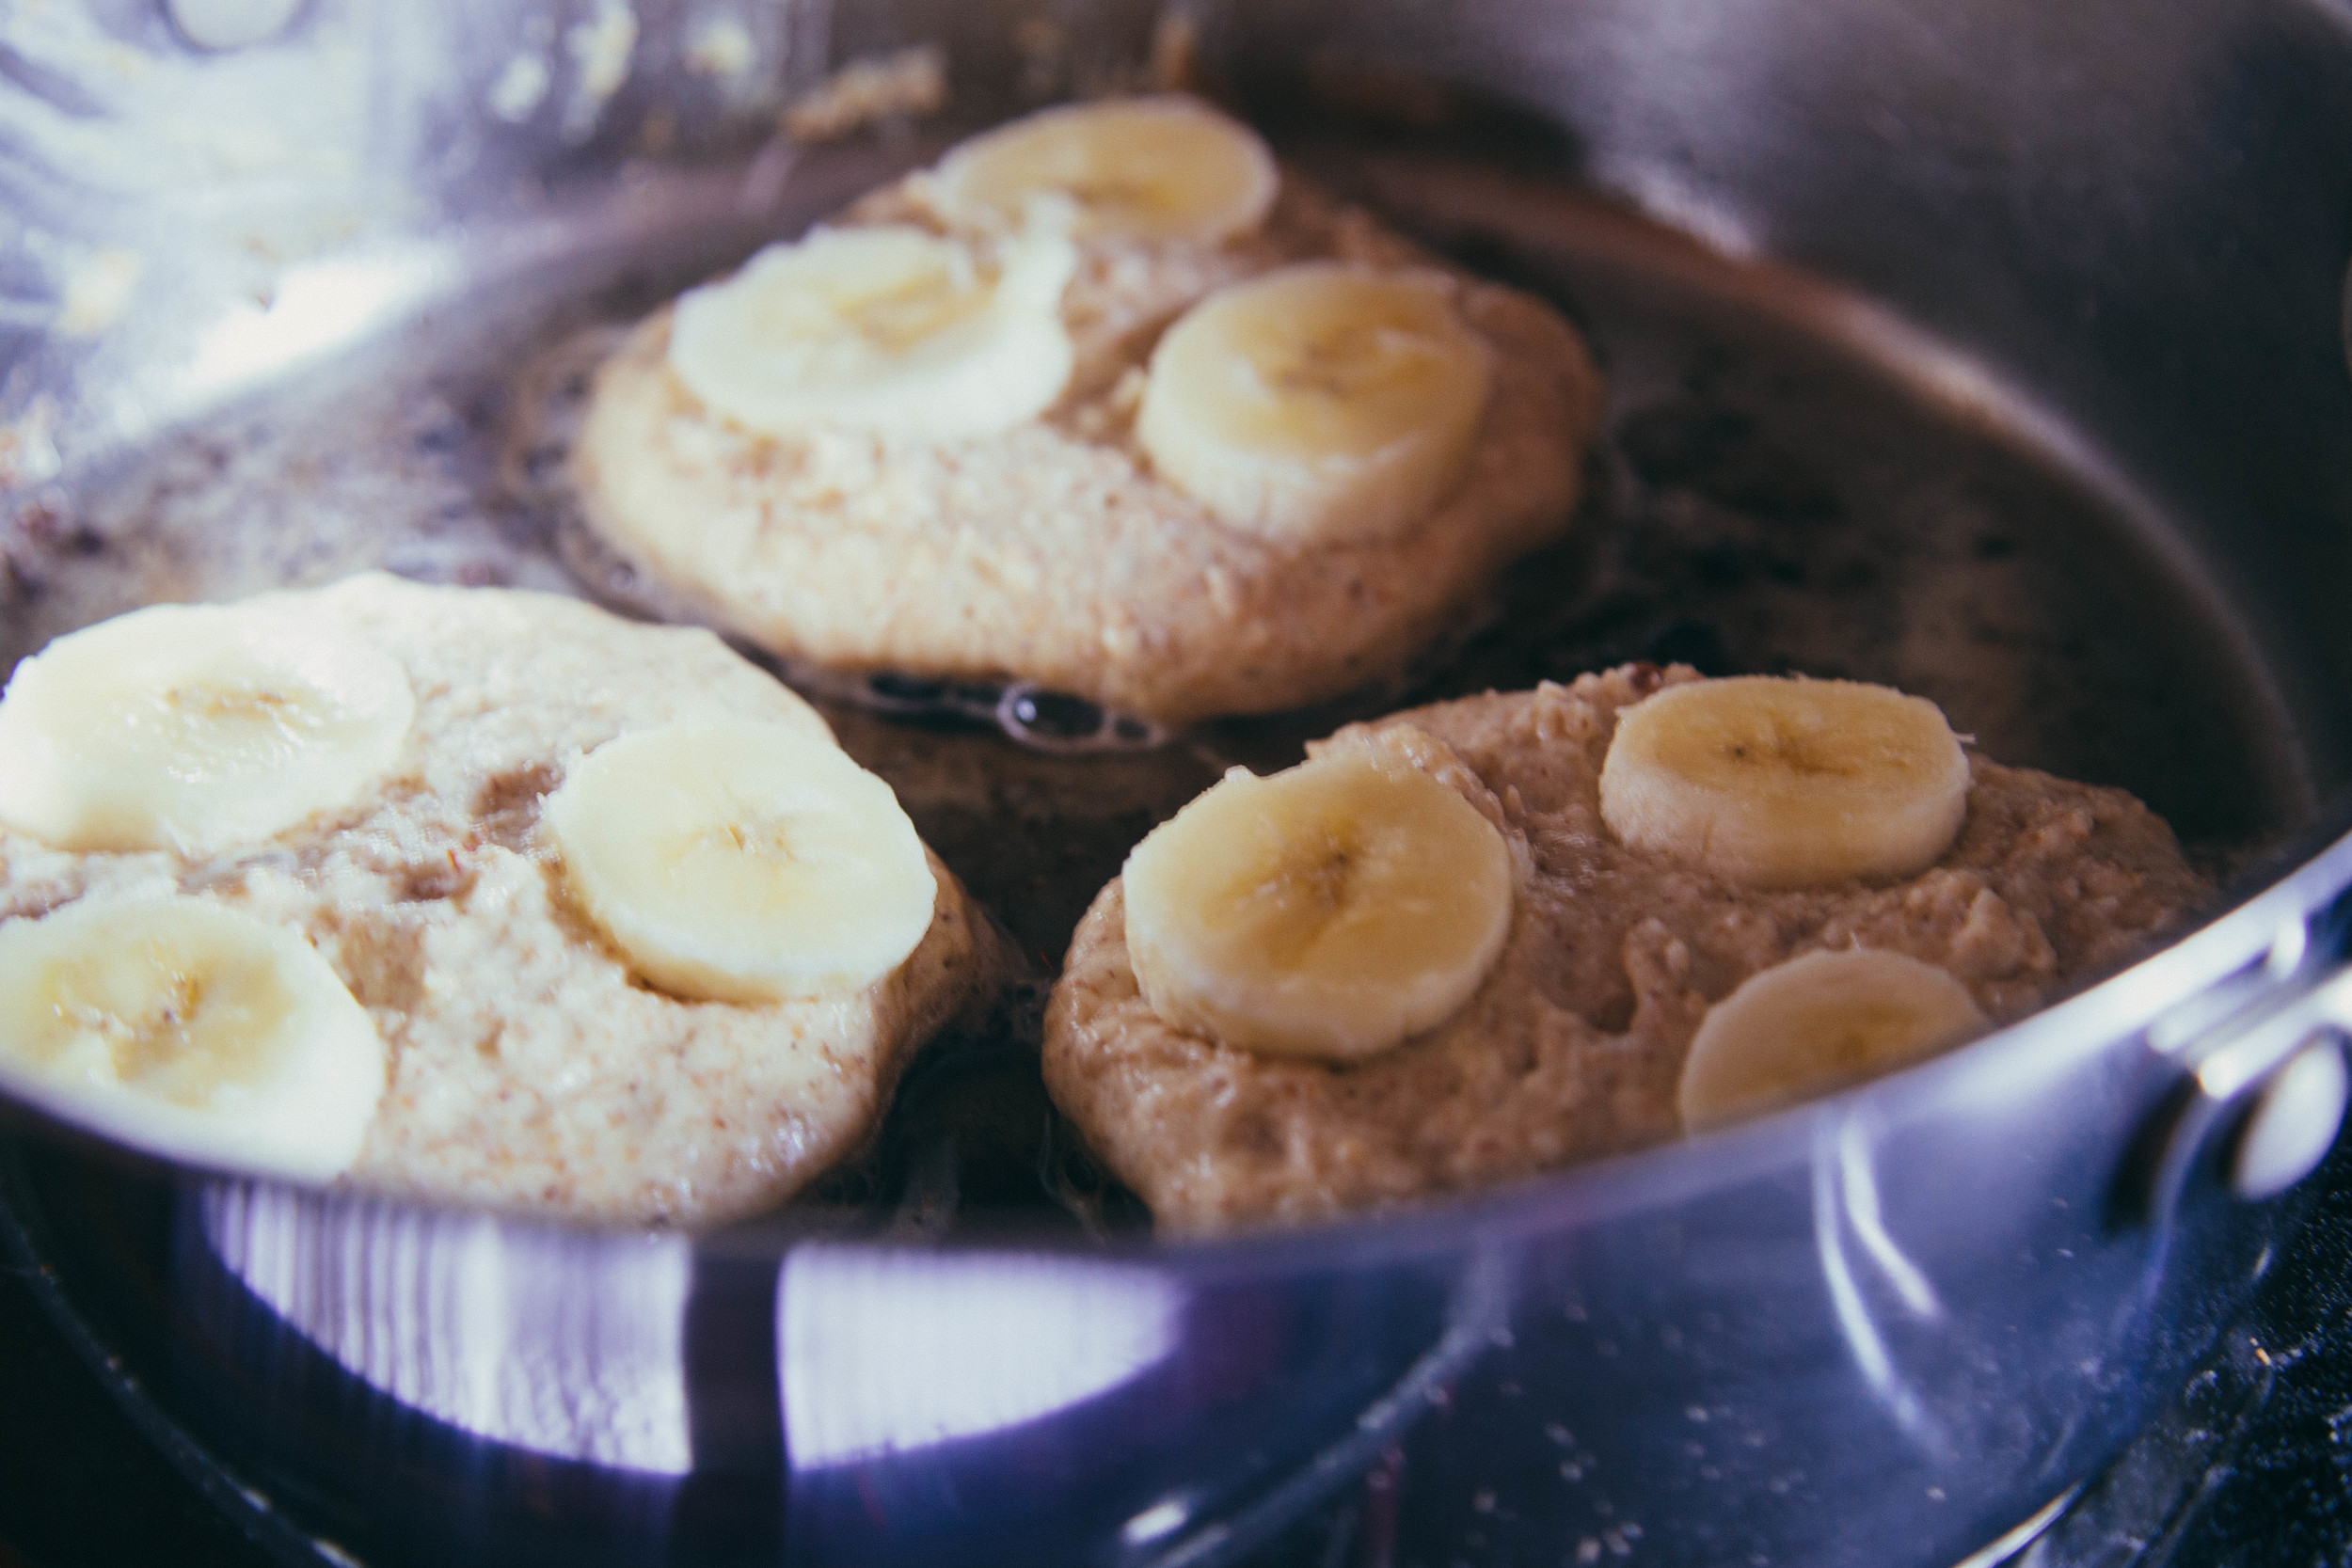
Slice the bananas. Heat butter in a skillet over a medium heat. Drop a small dollop of batter in the pan and place banana slices on top of the pancake. Cook for about 3 minutes or until the edges begin to bubble and crisp. Flip and cook for another 3 - 4 minutes or until the pancake is cooked and the banana has caramelized. Repeat until all the batter and banana slices have been used up--the mixture should make about 10 small pancakes.
Tupiniquim is a Brazilian Food Stand in Edinburgh. They make gluten free crepes and delicious pressed juices. Last year, I supported their Kickstarter campaign and my reward was a collection of delightful recipe cards. I received the cards at Christmas and finally got round to recipe testing this past weekend. I made their Chicken Curry Piri-Piri and.... It. Was. So. Good.
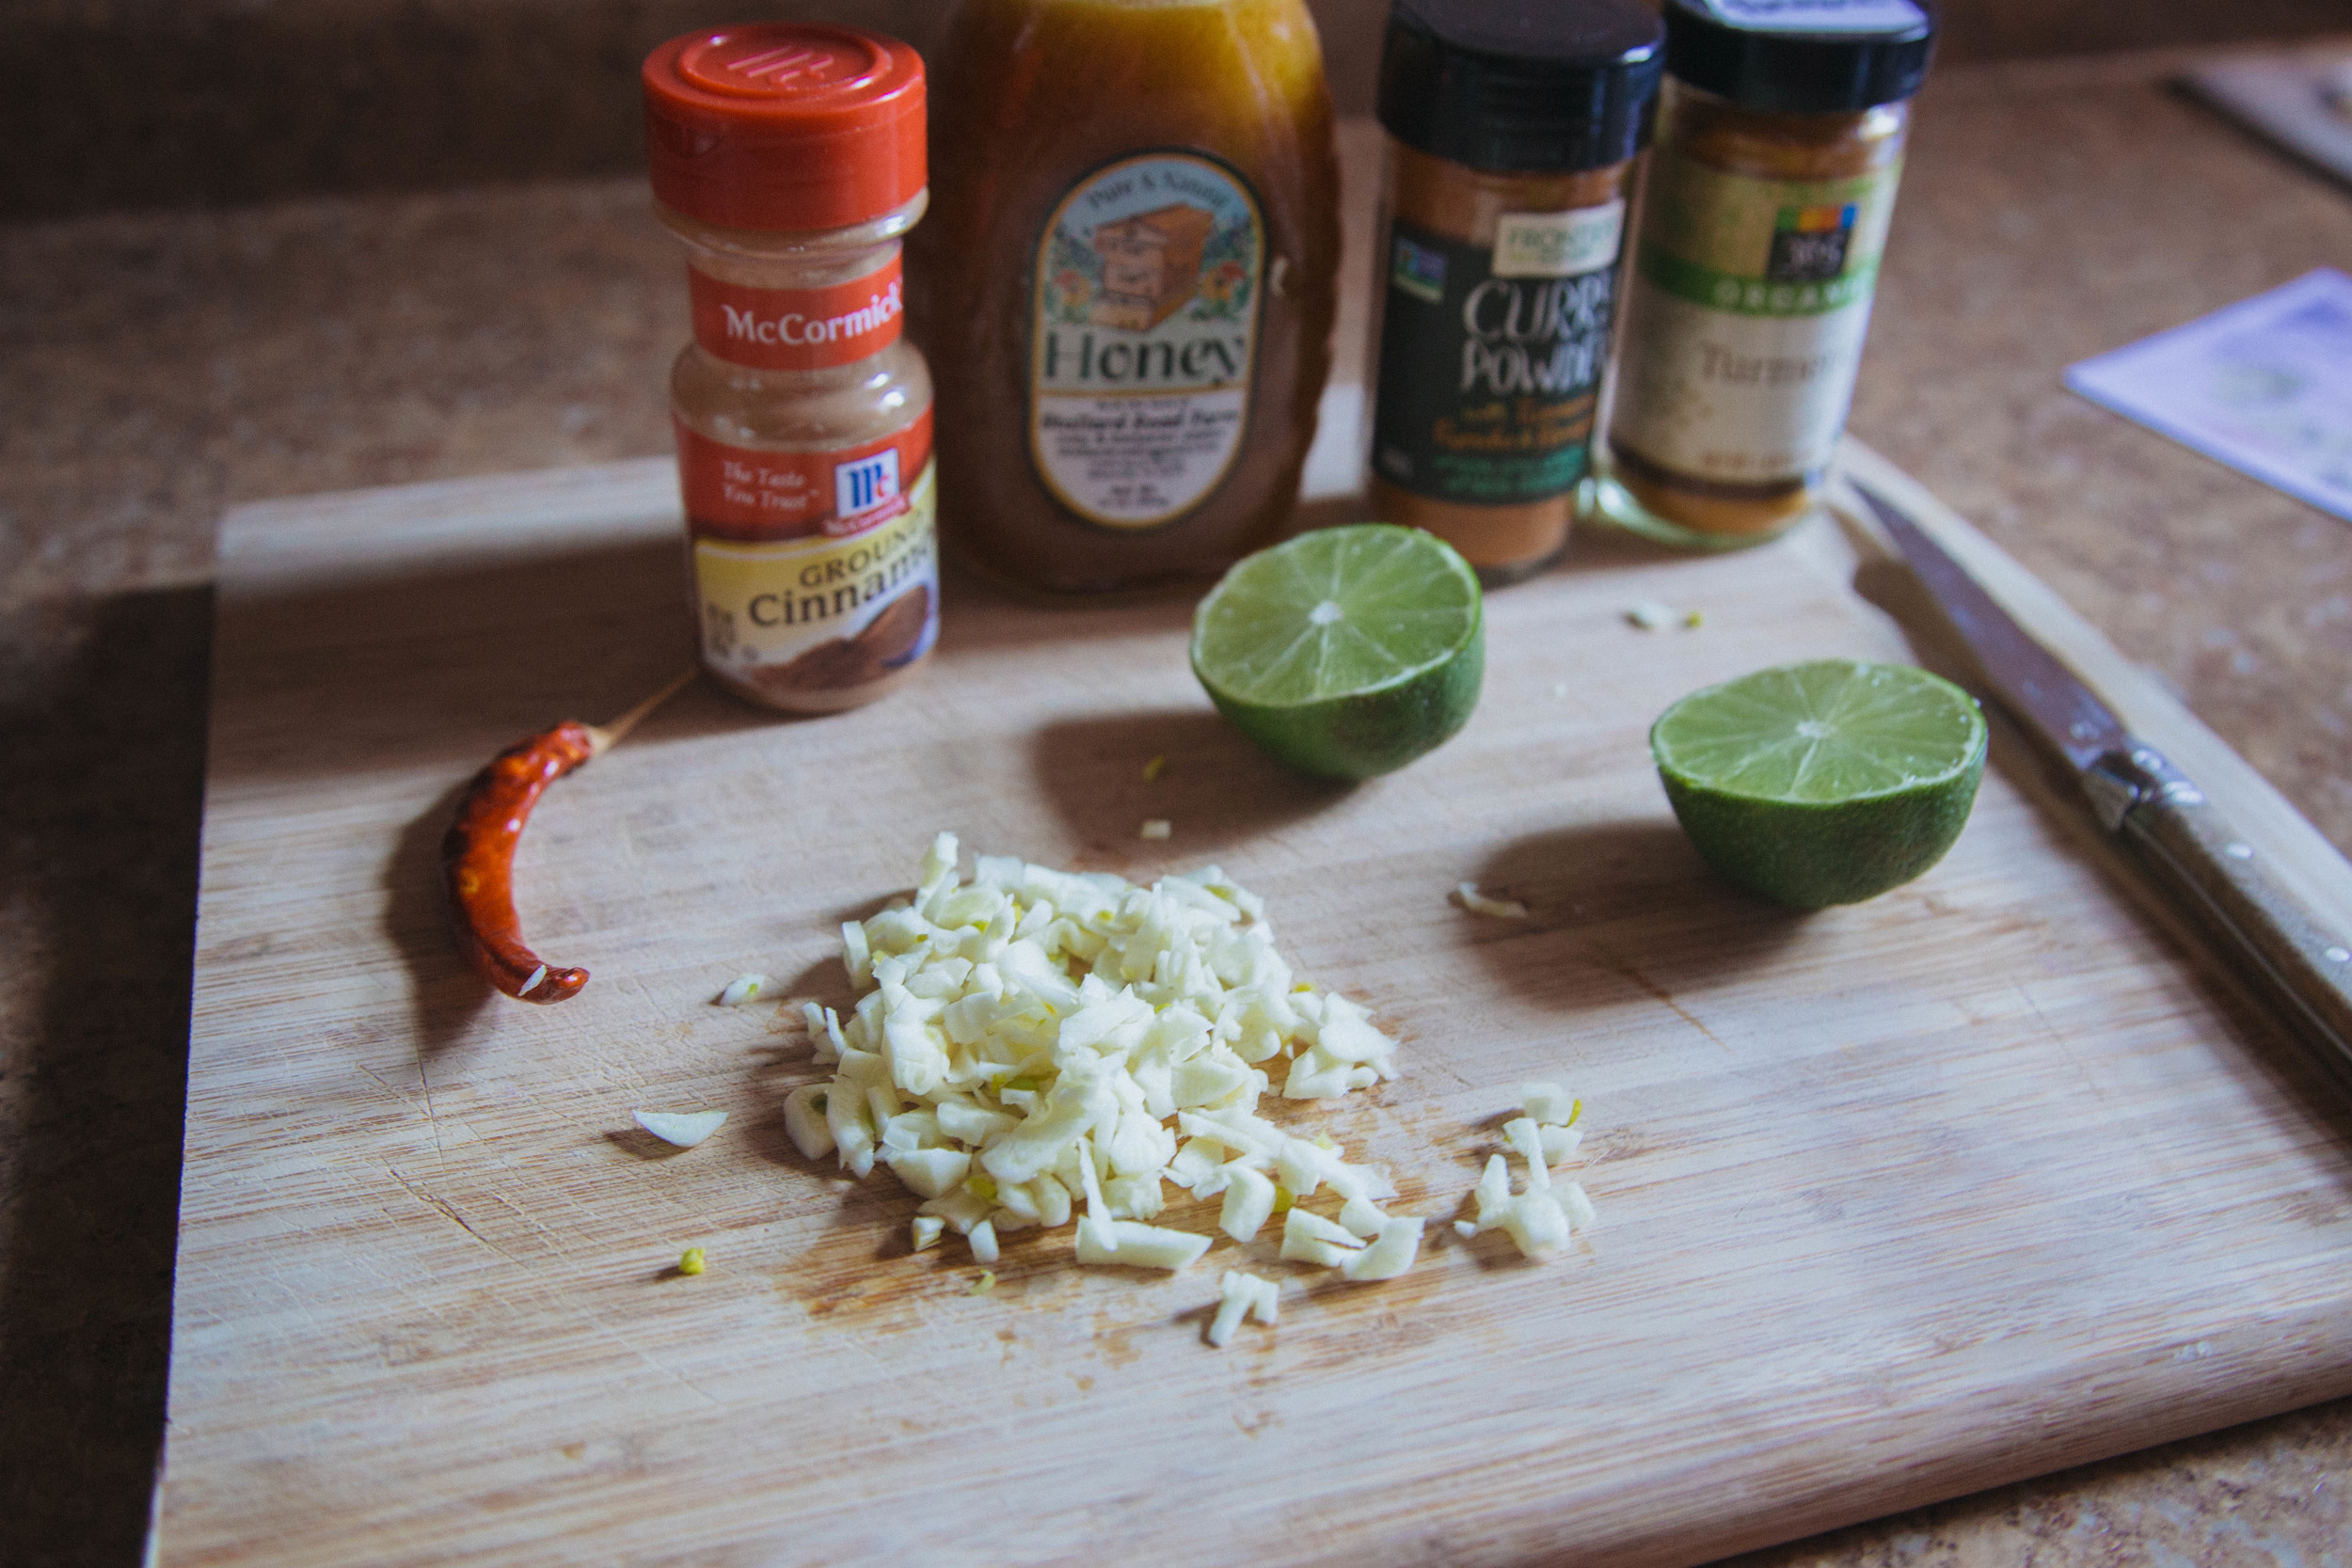
The recipe was pretty simple but involves some planning because you need to marinade the chicken for three hours. I also made a couple substitutions because the original recipe had curry leaves (which are almost impossible to find at the grocery store) and cloves (which I discovered I was out of after I began cooking...). I also added lime juice because I love citrus and used canola oil instead of sunflower oil because that's what I had in the cupboard.
Tupiniquim suggests eating this curry in a tortilla with cheese, spinach, and avocado (which sounds pretty good) but I ate mine with yogurt, cucumber, and pita bread.
Steps
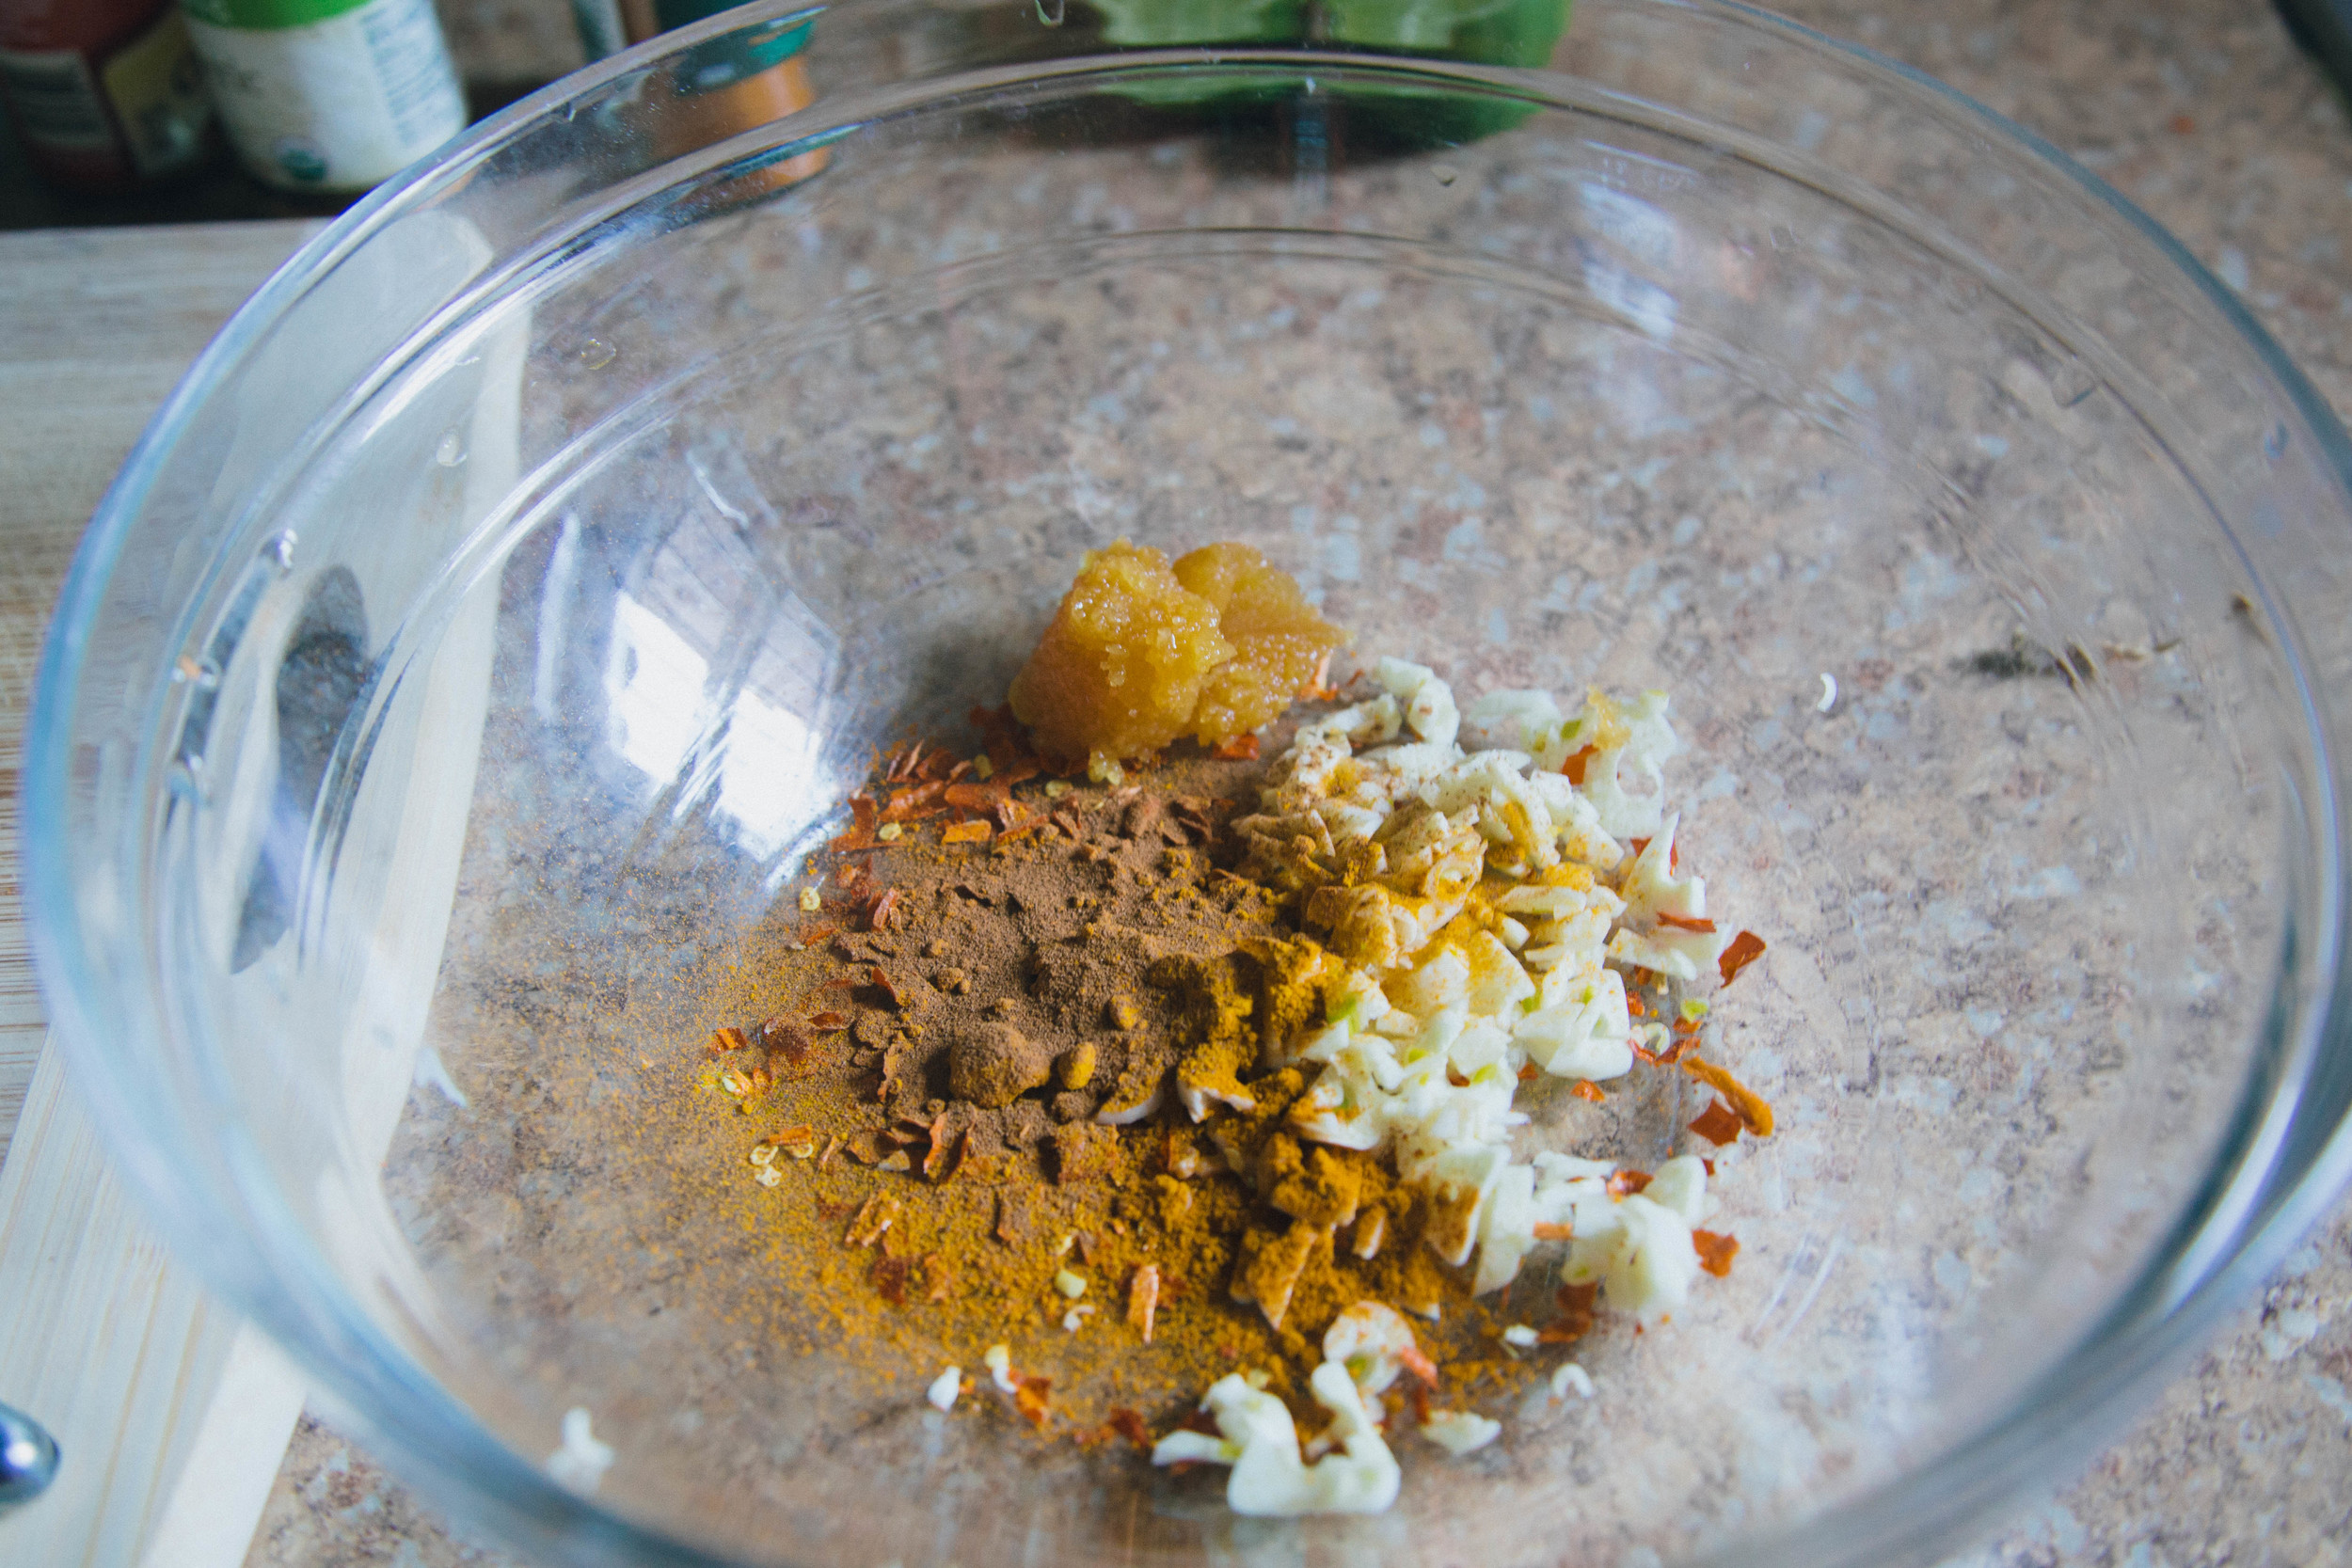
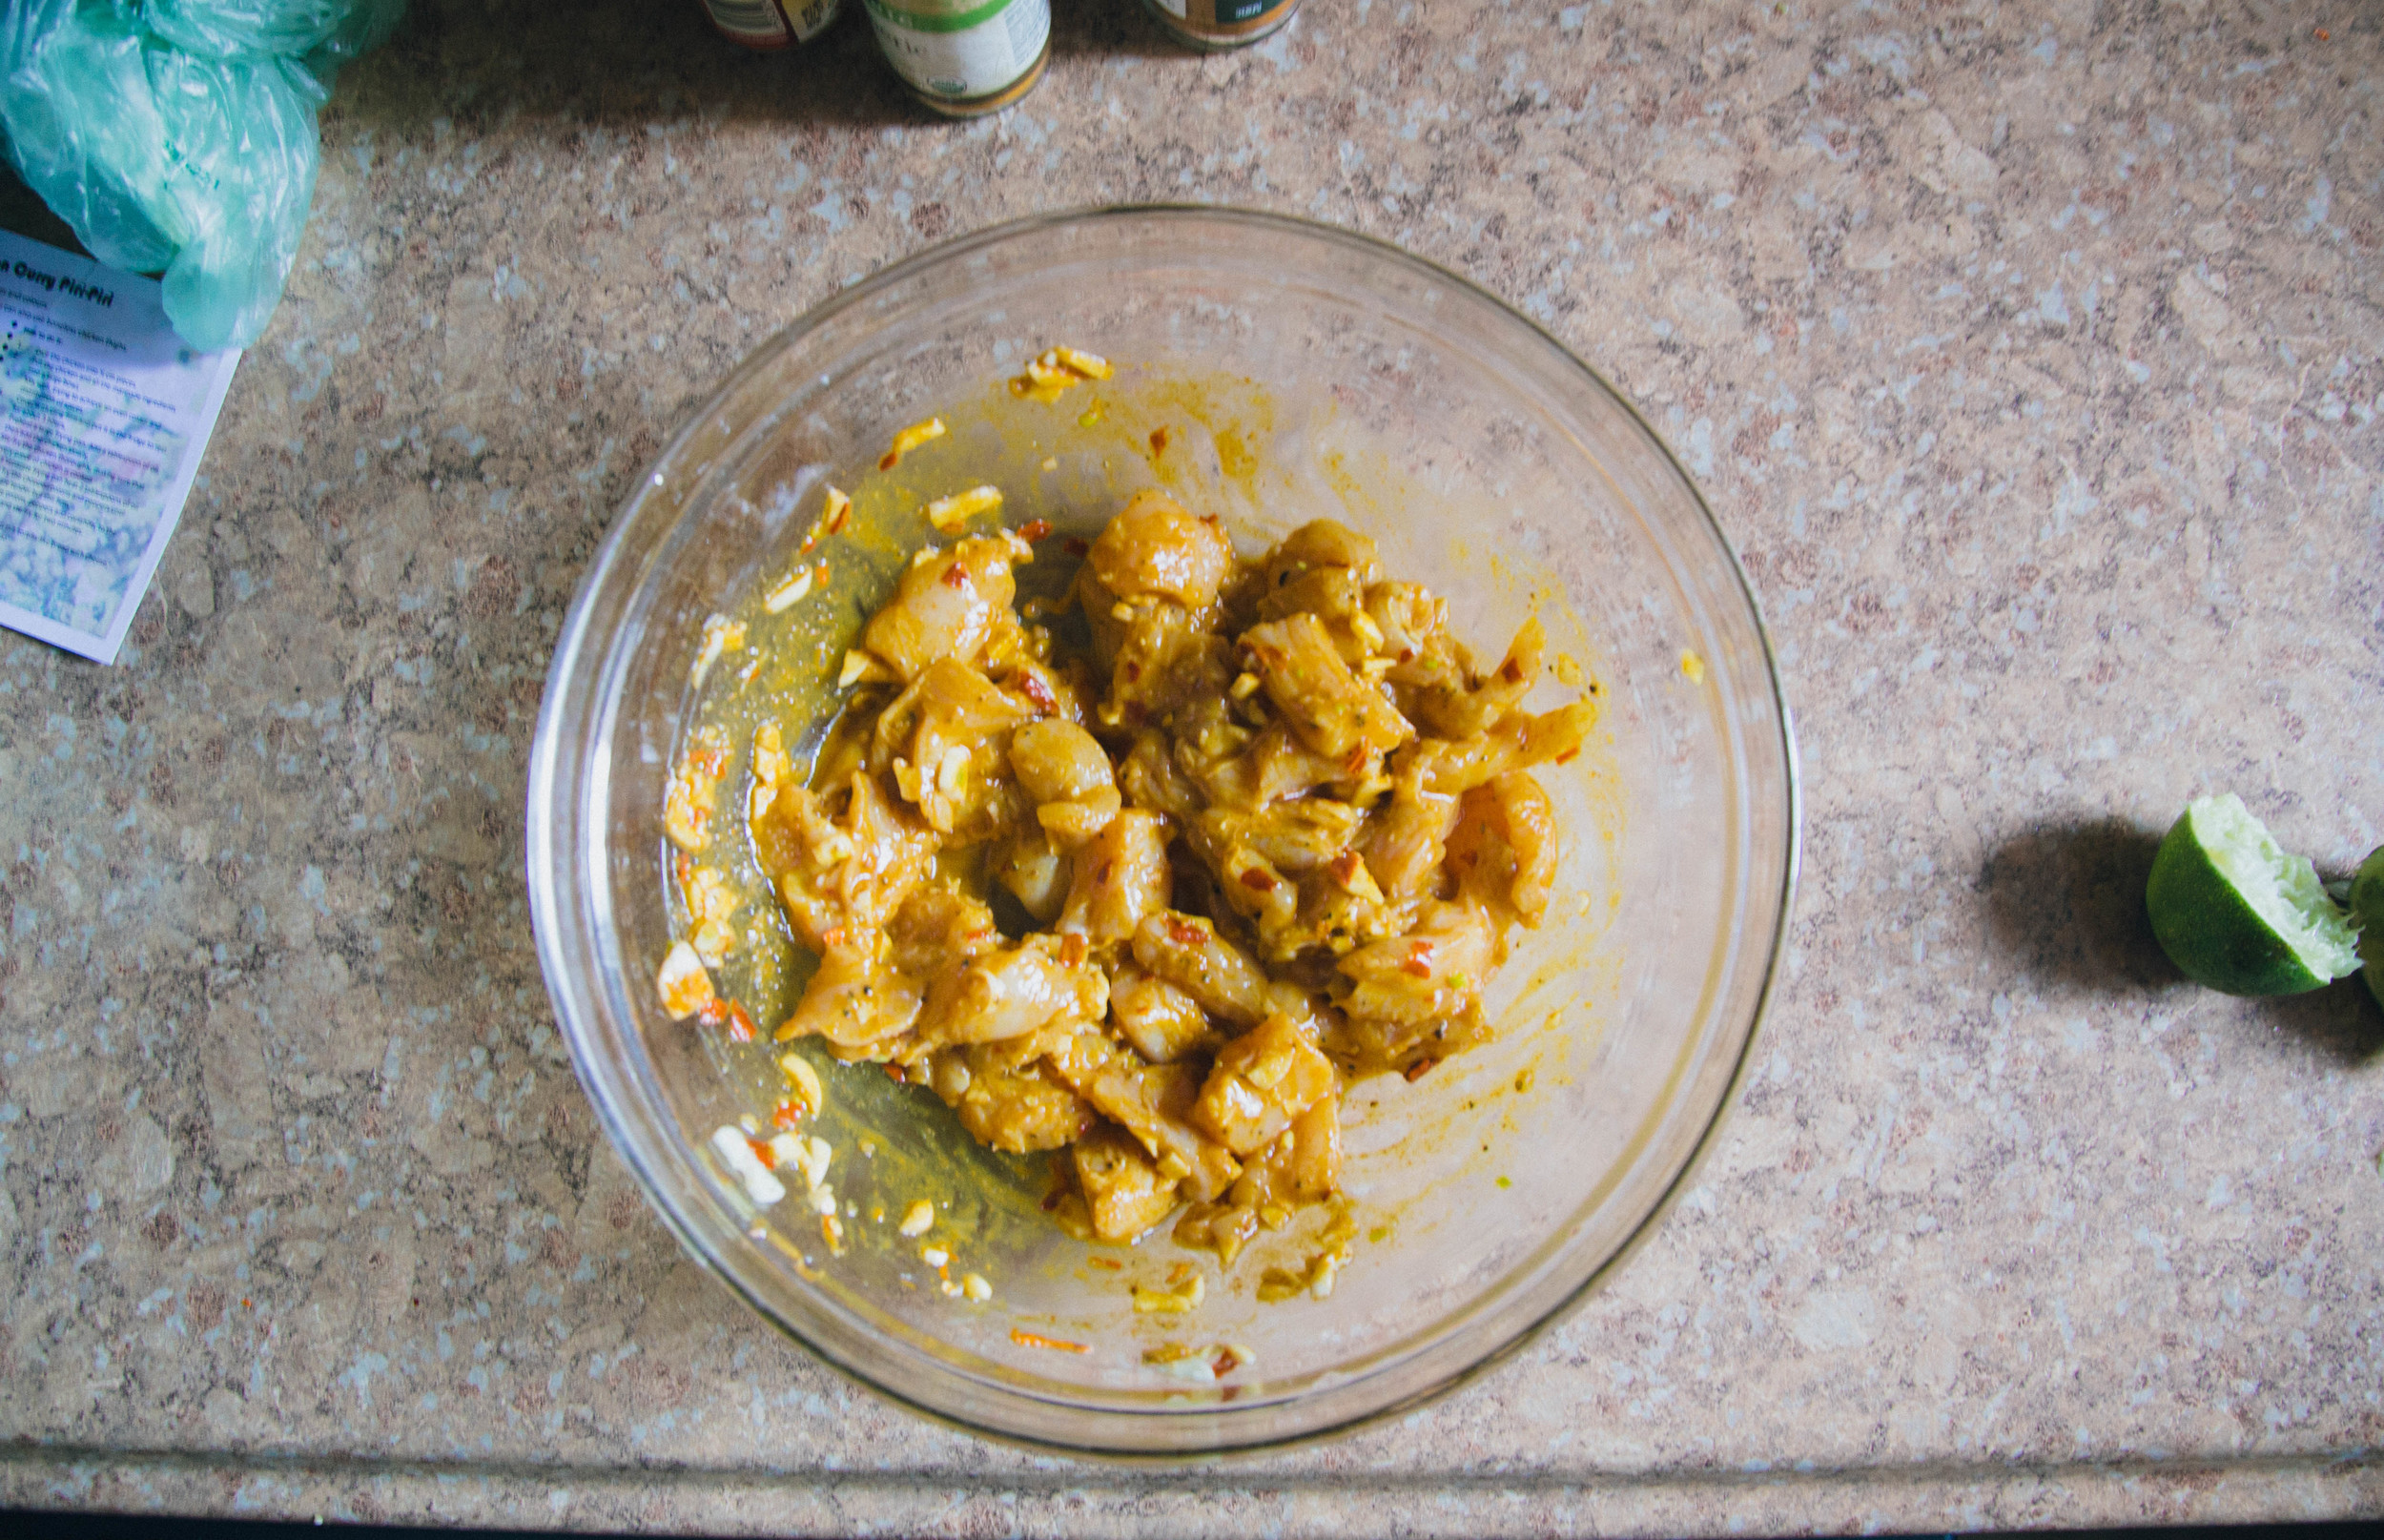
Chop the chicken into bitesize chunks and mix in a bowl with the curry powder, turmeric, cinnamon, chillies, honey, garlic, lime juice, 1/2 of the oil, salt & pepper. Cover and refrigerate for 3 hours.
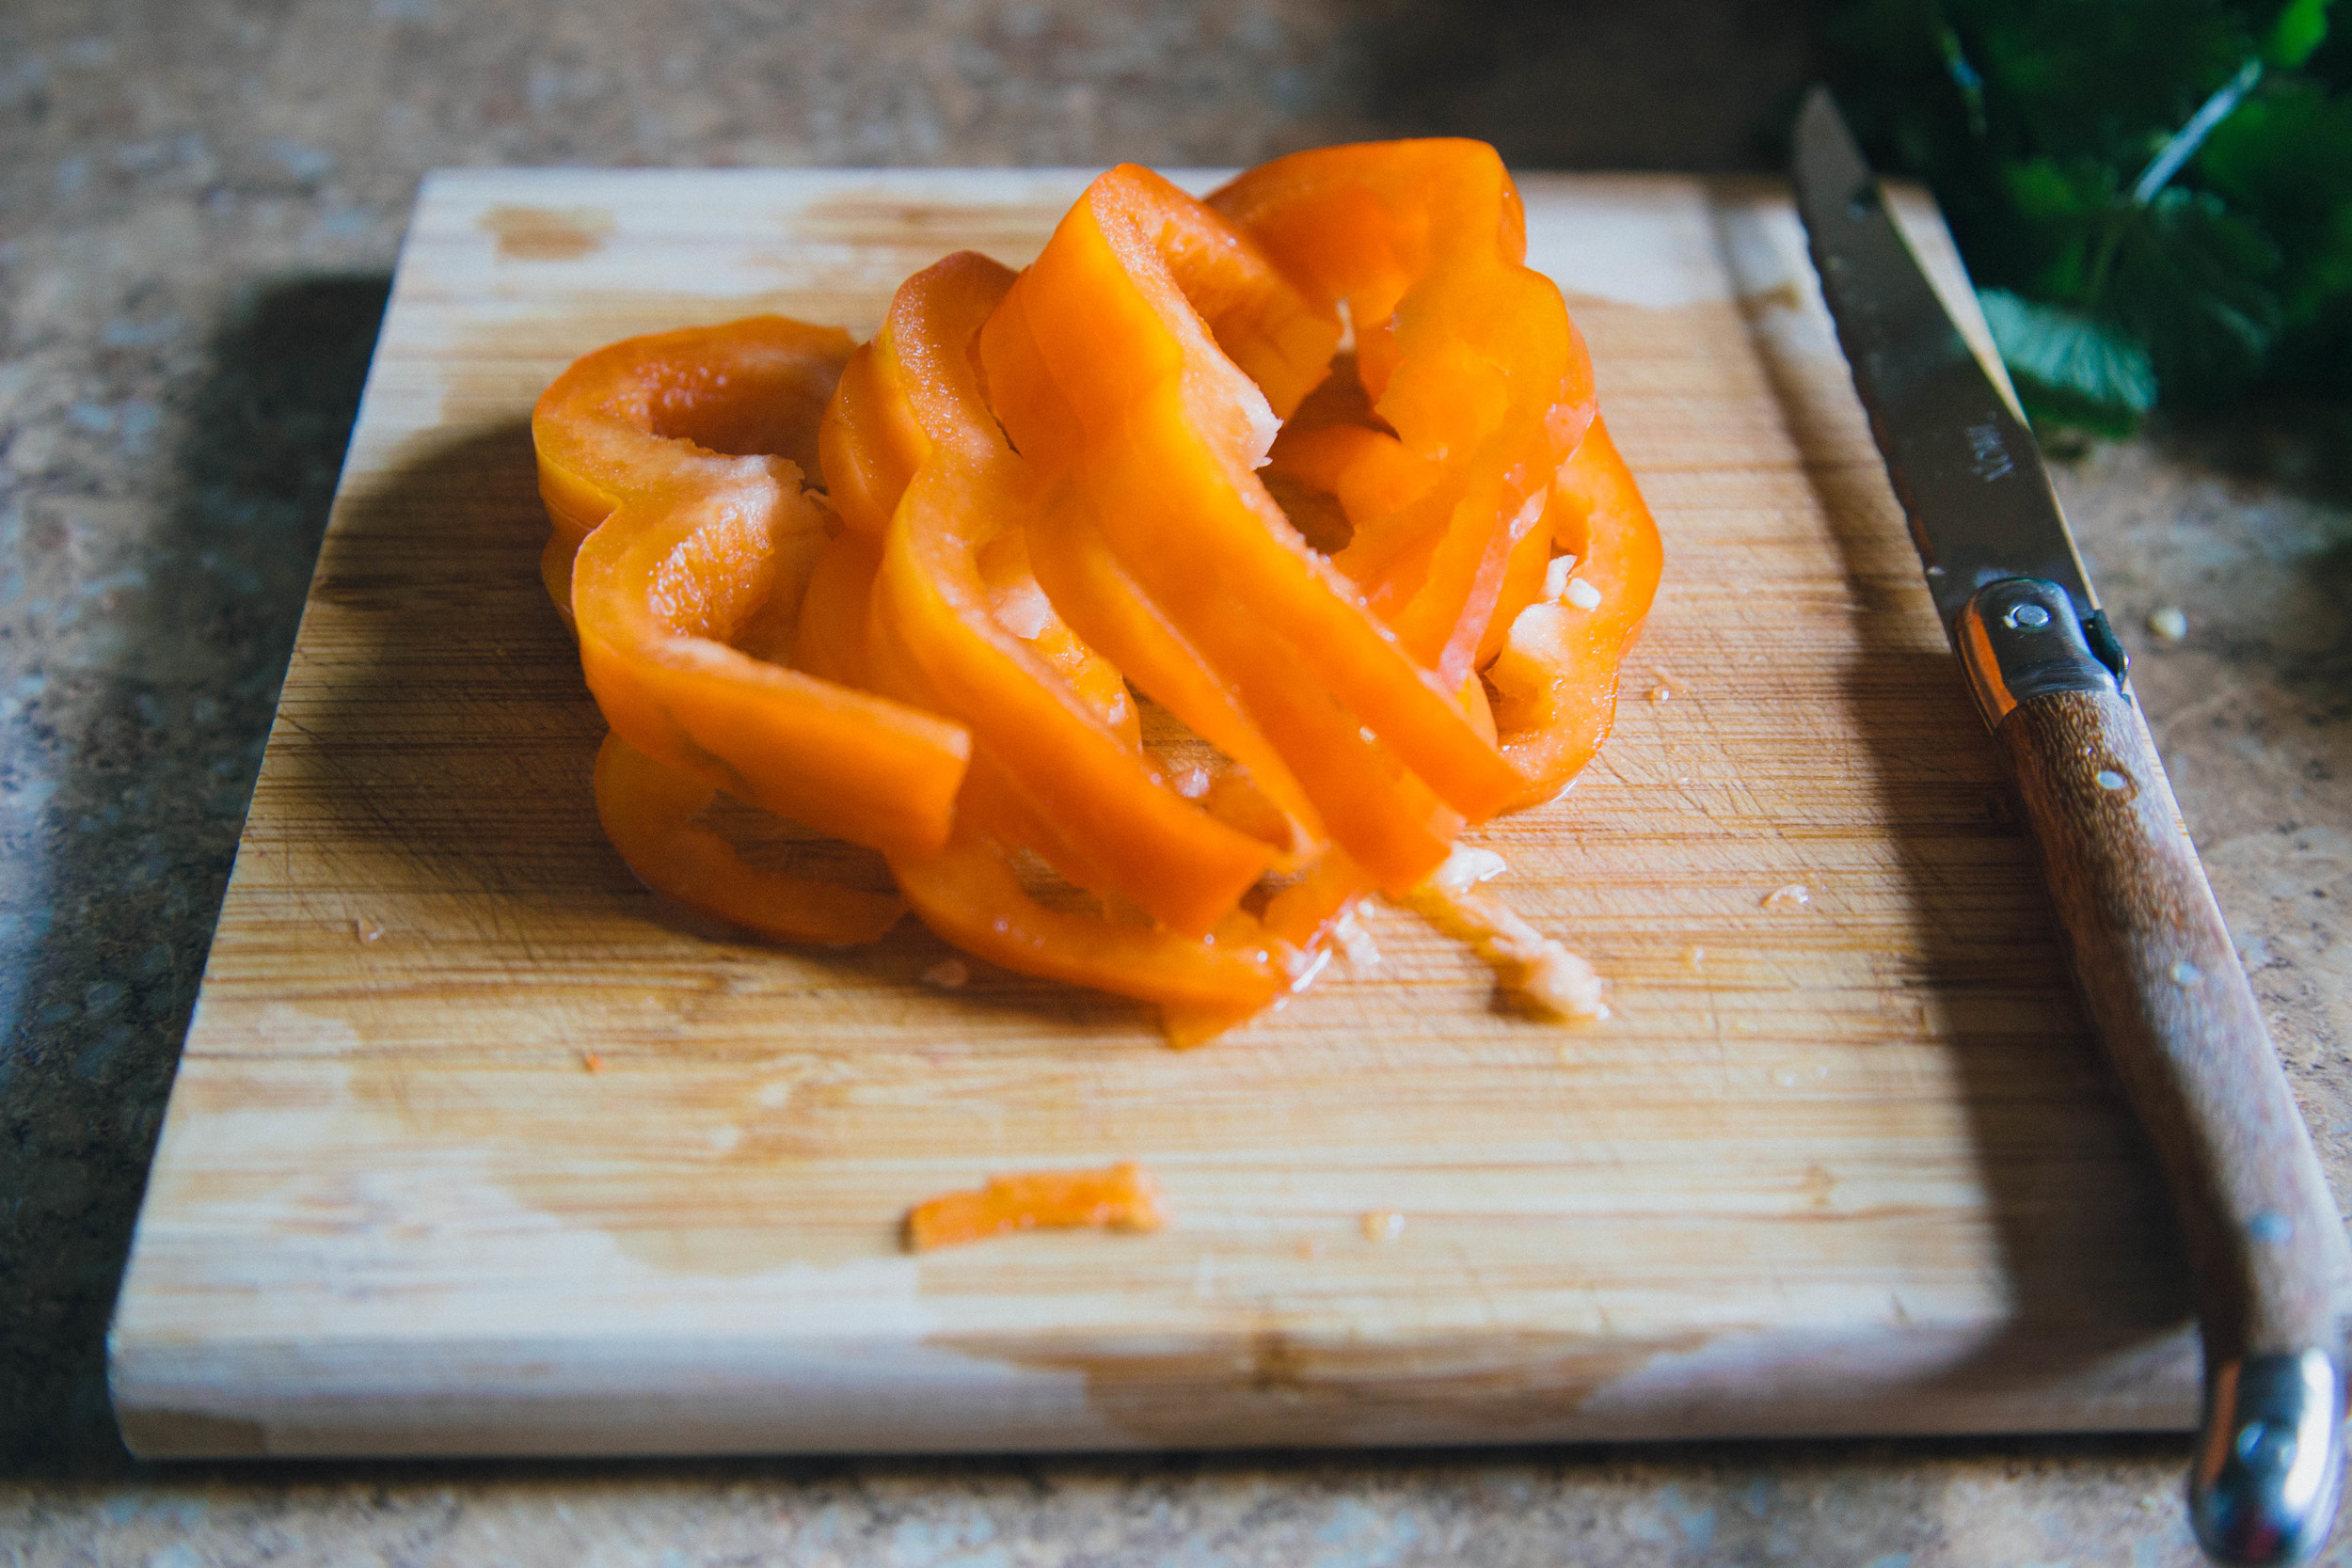
Dice the onion and sauté on a medium-high heat until brown. Slice the peppers and add them to the pan, cooking until soft. Remove the onion and peppers from the pan and cook the chicken.
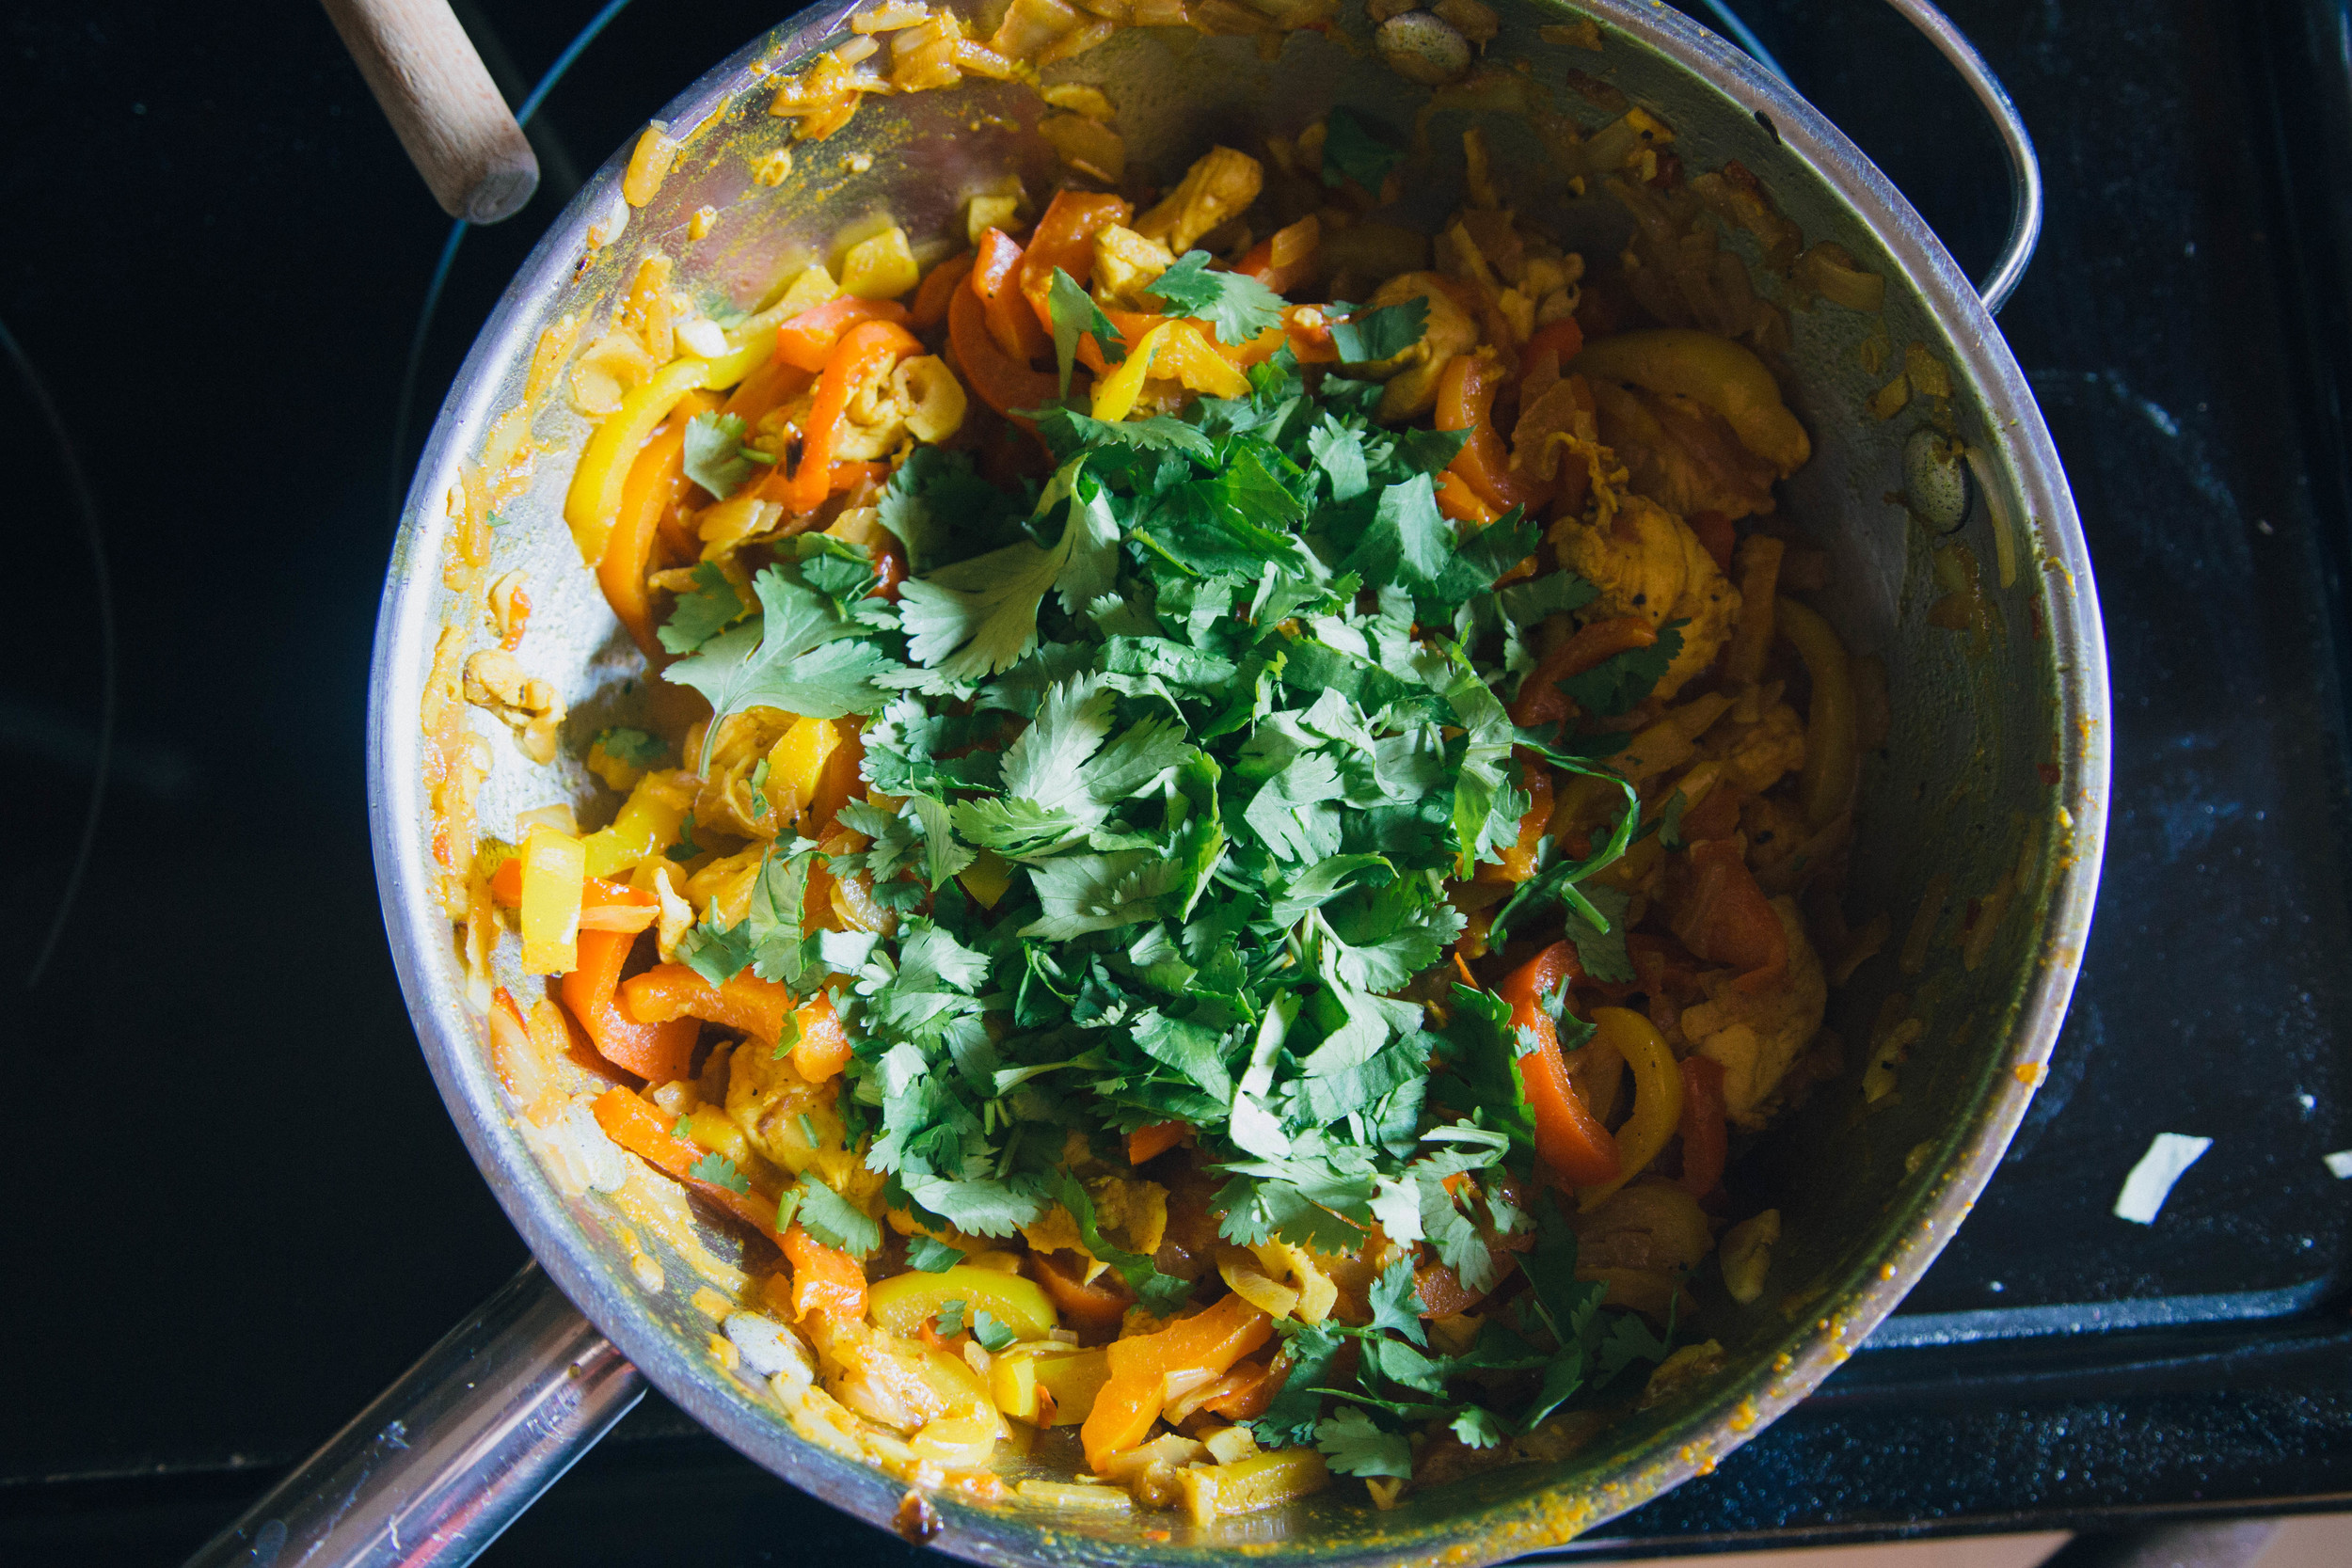
Once cooked, add the onions and peppers back in and stir to combine. Roughly chop the cilantro, remove the pan from the heat, and stir cilantro into the curry. Top with your choice of toppings!
Stuff
8oz chicken
1 tbsp curry powder
1 tsp turmeric
1 tsp ground cinnamon
1 tbsp crushed dry chillies (I removed most of the seeds)
1 tbsp honey
3 garlic cloves (diced)
juice from 1 lime
4 oz canola oil (2oz for the marinade, 2oz for cooking)
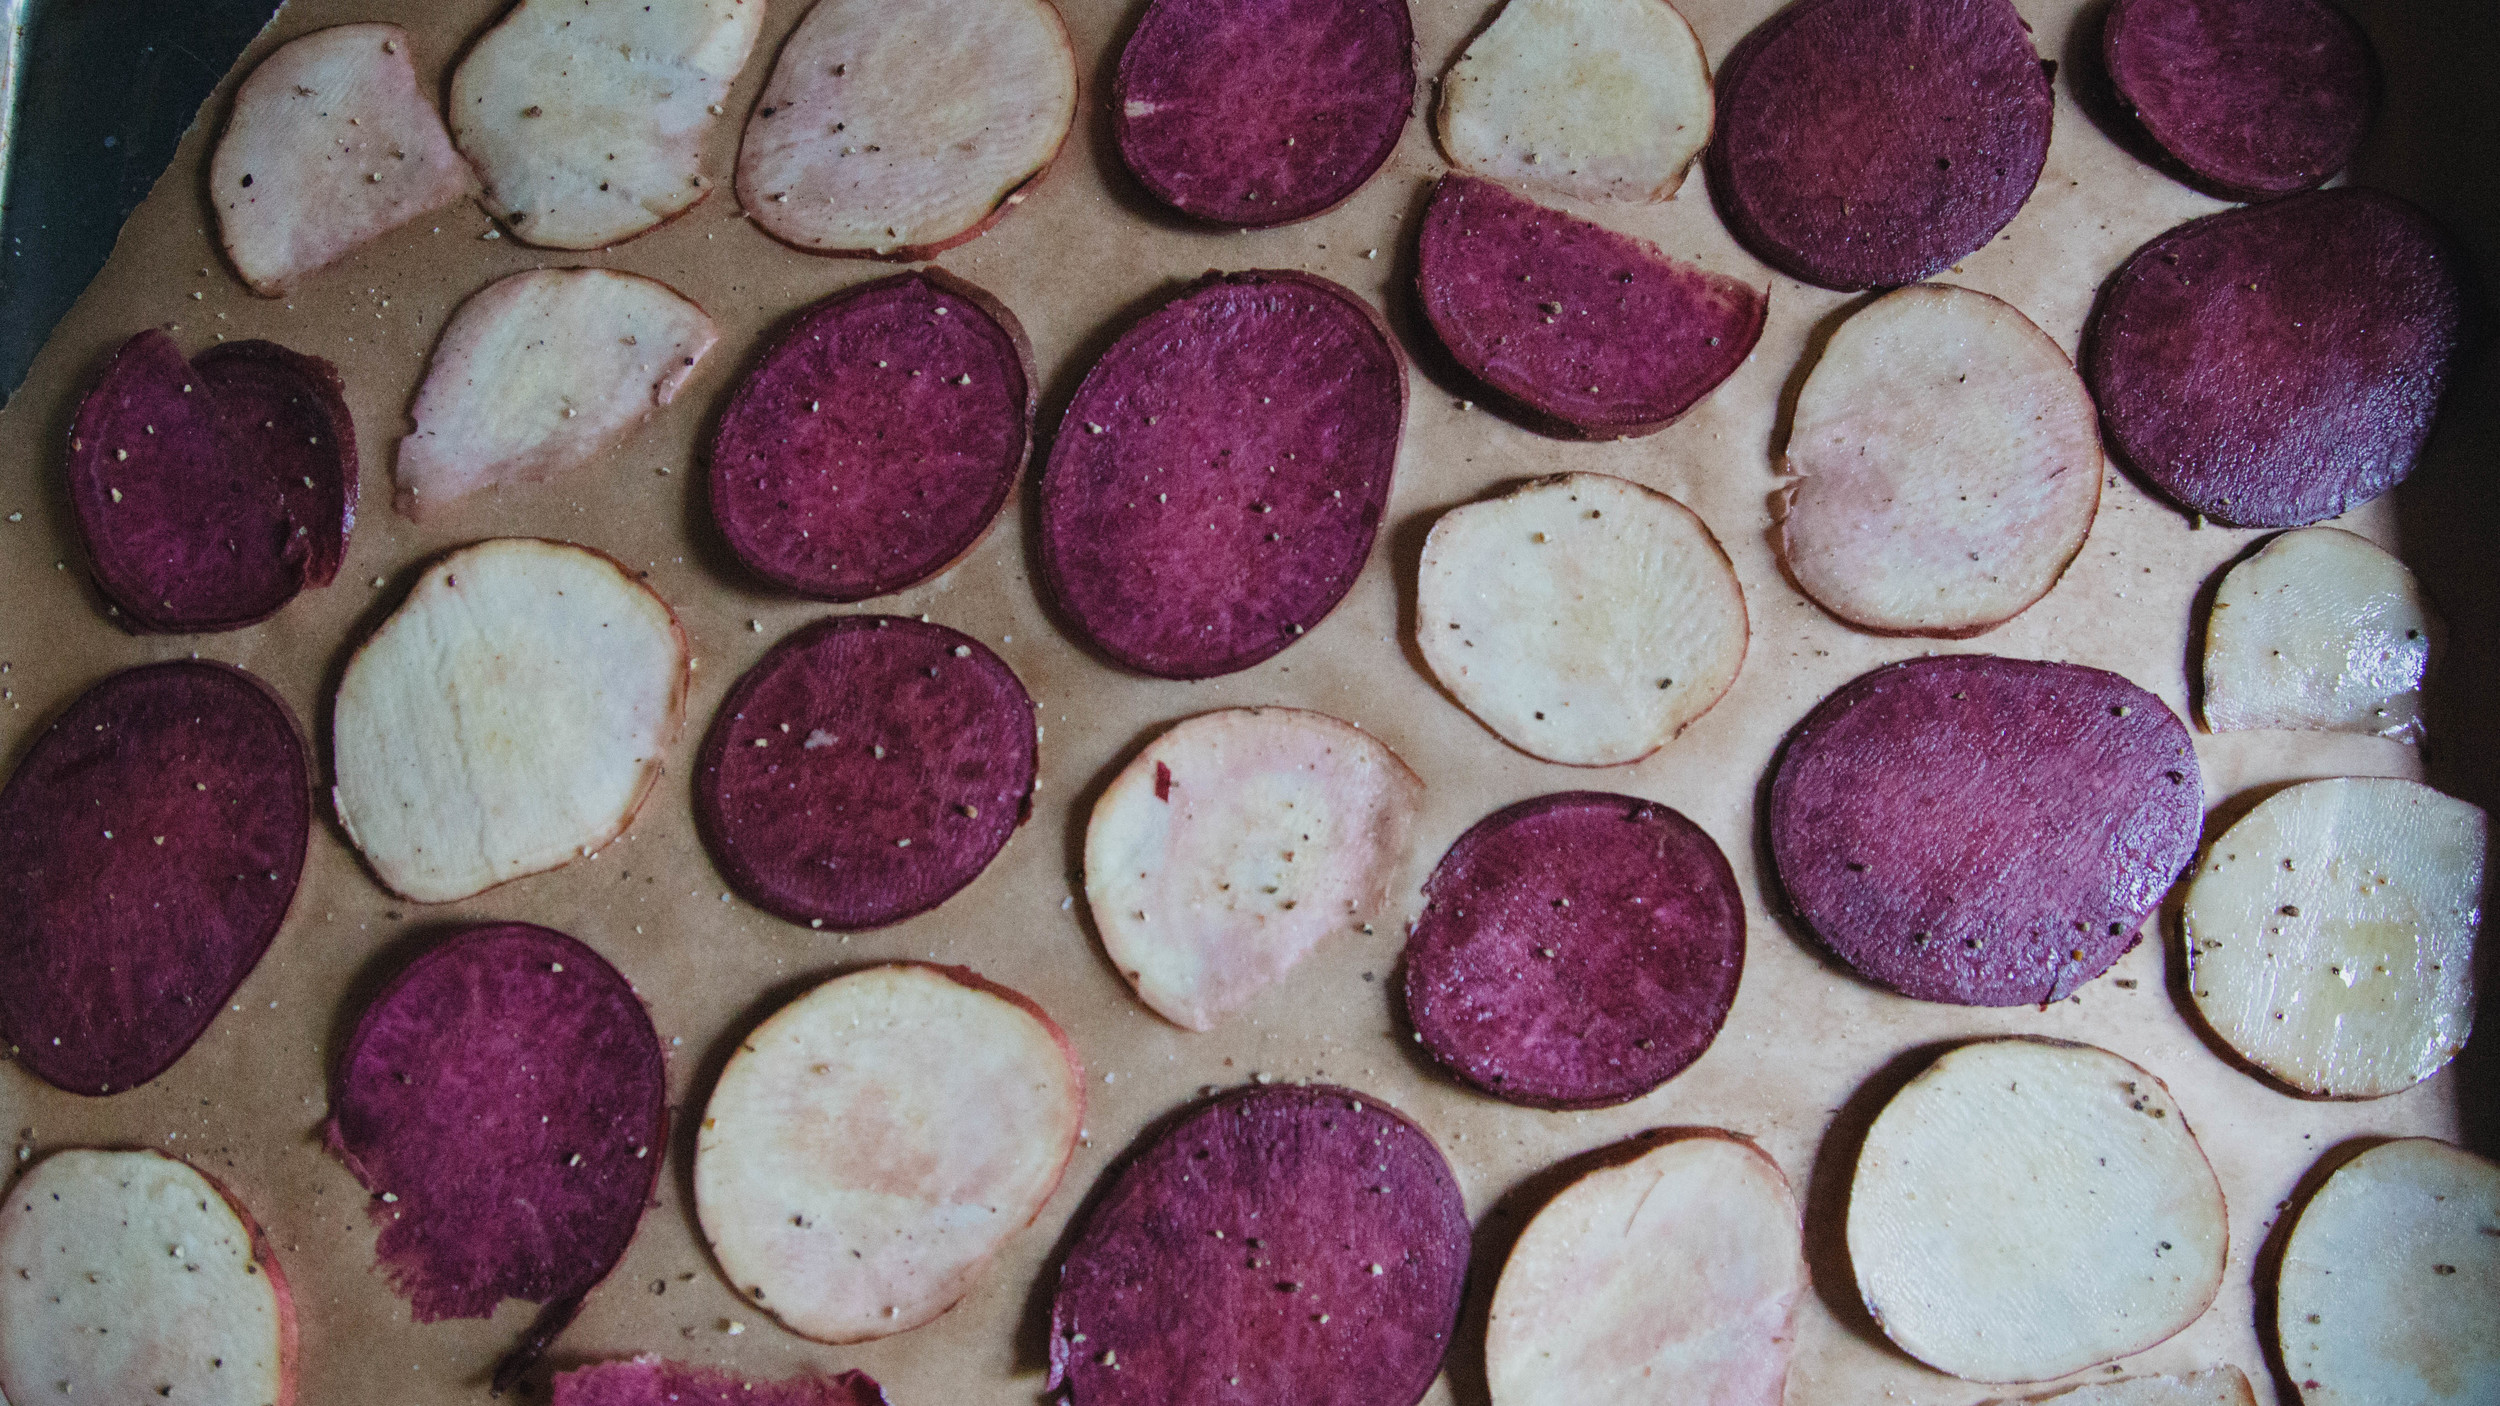
You know what they say, when life hands you weird sweet potatoes, make weird sweet potato chips. Sure, it might not be the best known saying but it's solid advice. For the last few weeks, my CSA has included both murasaki and okinawan sweet potatoes. Our veggie box would arrive, my roommate and I would unpack the box, put the sweet potatoes on a shelf, then stare at them, pondering how on earth to cook them.
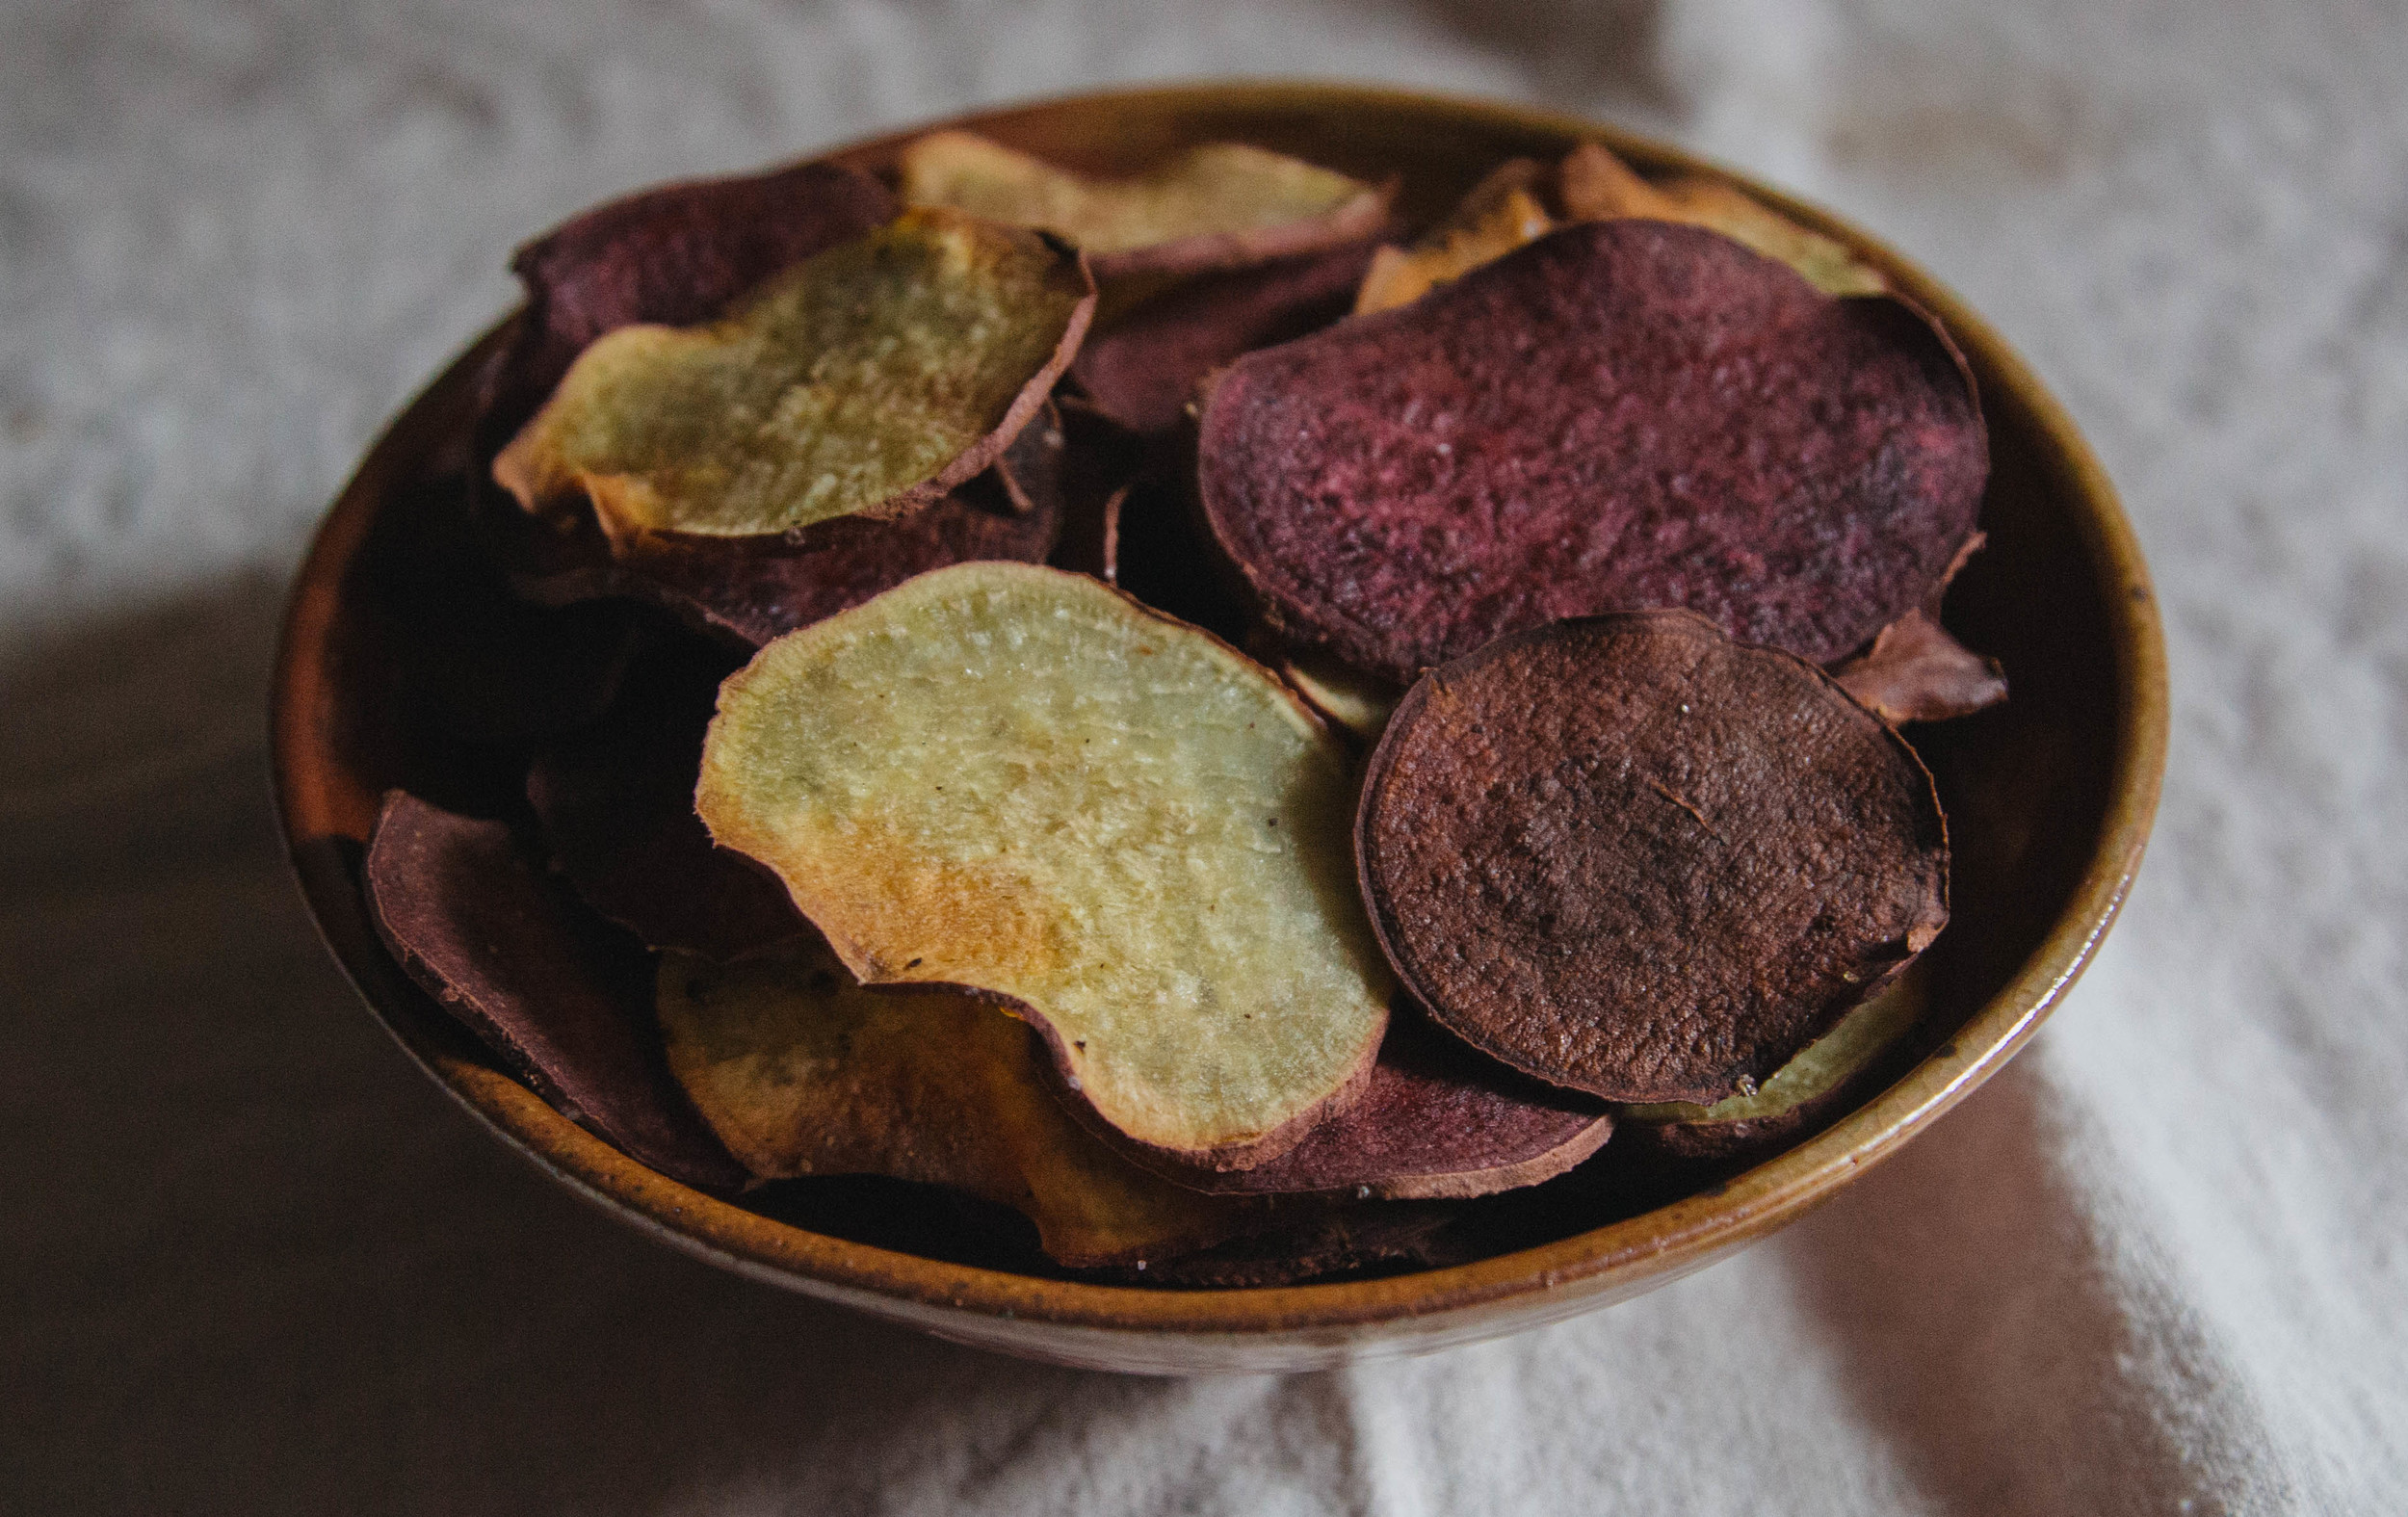
We had no idea what to do with them... you can mash them, but I wasn't convinced I wanted to eat a mound of purple sweet potato mash? But then I remembered my roommate had a mandoline and I decided to make ALL OF THE CHIPS. So Sunday afternoon I got slicing and baked five sheets of sweet potato chips, which my roommate and I proceeded to eat all of. We also had pizza for dinner that night. It was a pretty good Sunday.
I hadn't made these before, so I just used salt, pepper, and olive oil but I think paprika or maybe some chopped rosemary could also work (that's what I'm going to try next). I thought the purple chips (okinawan) crisped a little better but my roommate preferred the potato flavor of the white chips (murasaki). I'll definitely make both again, but next time I might cook them separately so the white chips bake a little longer.
Steps
Preheat the oven to 400F. Wash and thinly slice the potatoes using a mandoline. In a bowl, mix the potato slices with olive oil, salt & pepper, making sure all slices are thinly coated with oil.
Spread the potato slices on a baking sheet and bake in the oven until crisp (approx. 25 minutes), flipping half way through. The chips can be eaten warm straight from the oven or stored in an air tight container to snack on throughout the week.
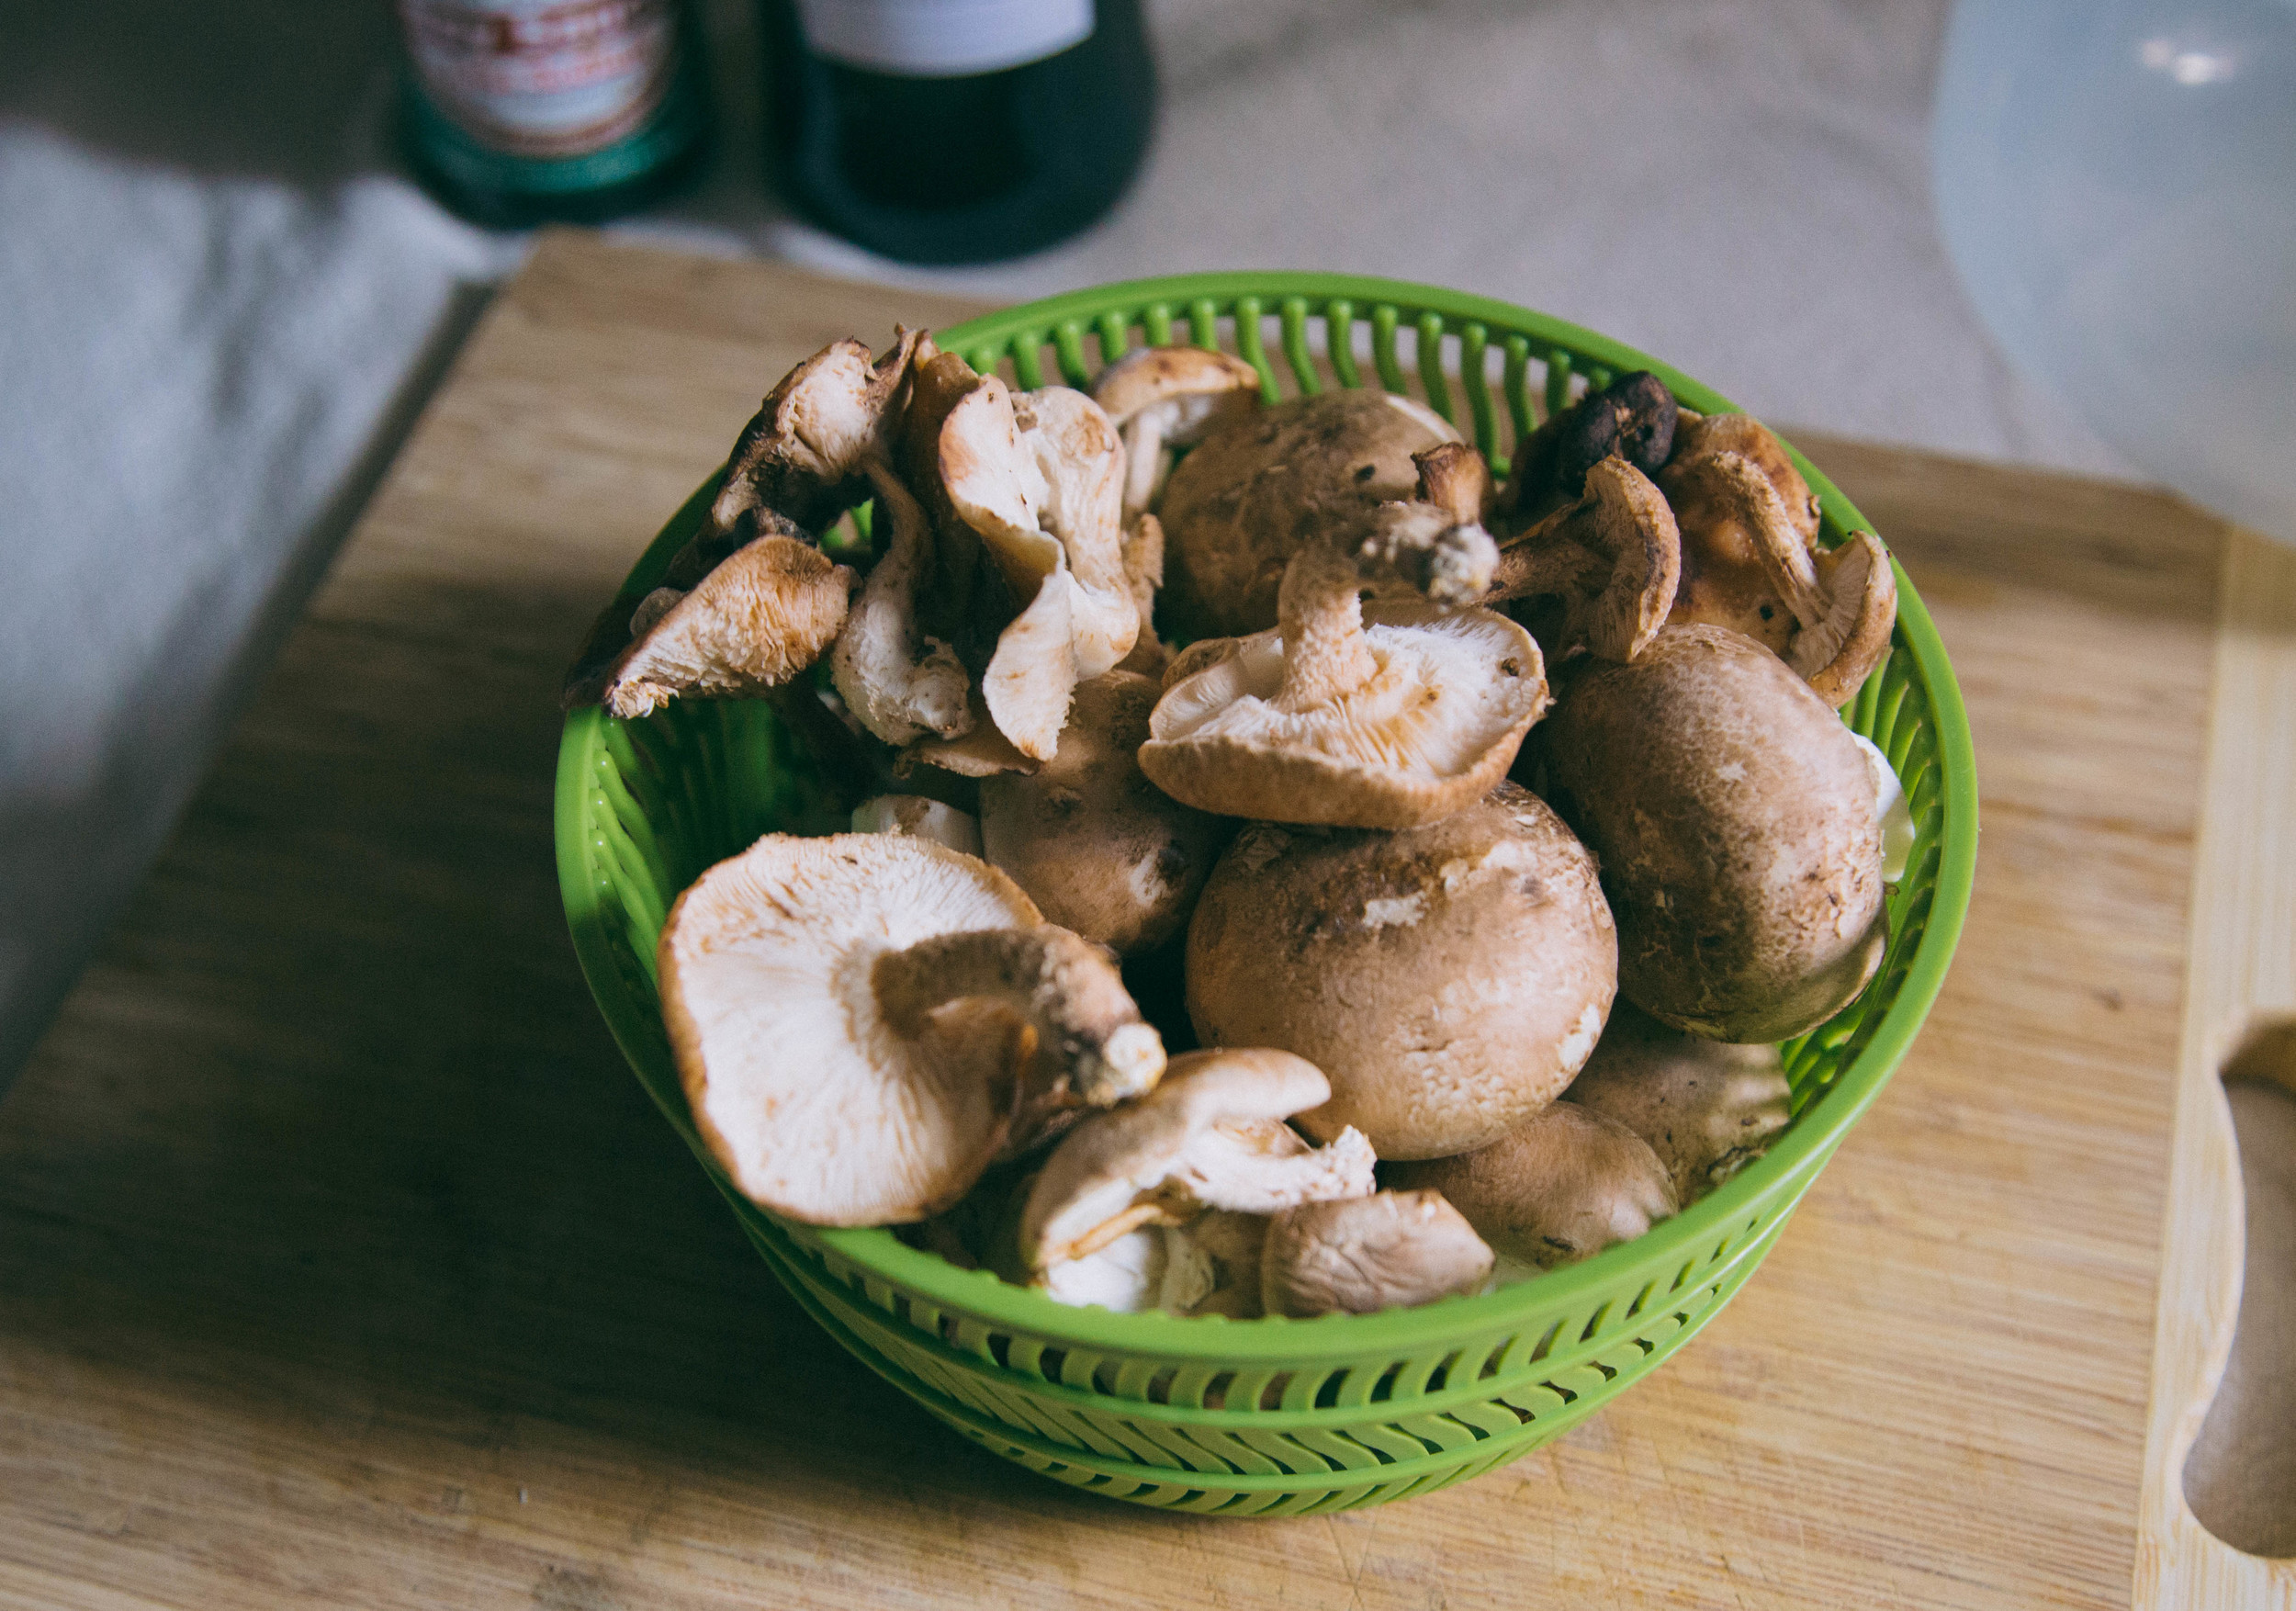
I find this time of year challenging food-wise. Every year, I impatiently wait for spring greens to arrive, dreaming of all the peas and asparagus I will gorge myself on in 6 weeks or so (to be followed by the mountains of tomatoes, cantaloupe, and corn I will inhale all summer long). But right now it's late winter and I'm feeling very uninspired by the gnarly looking produce that's some how managing to grow in the frozen ground.
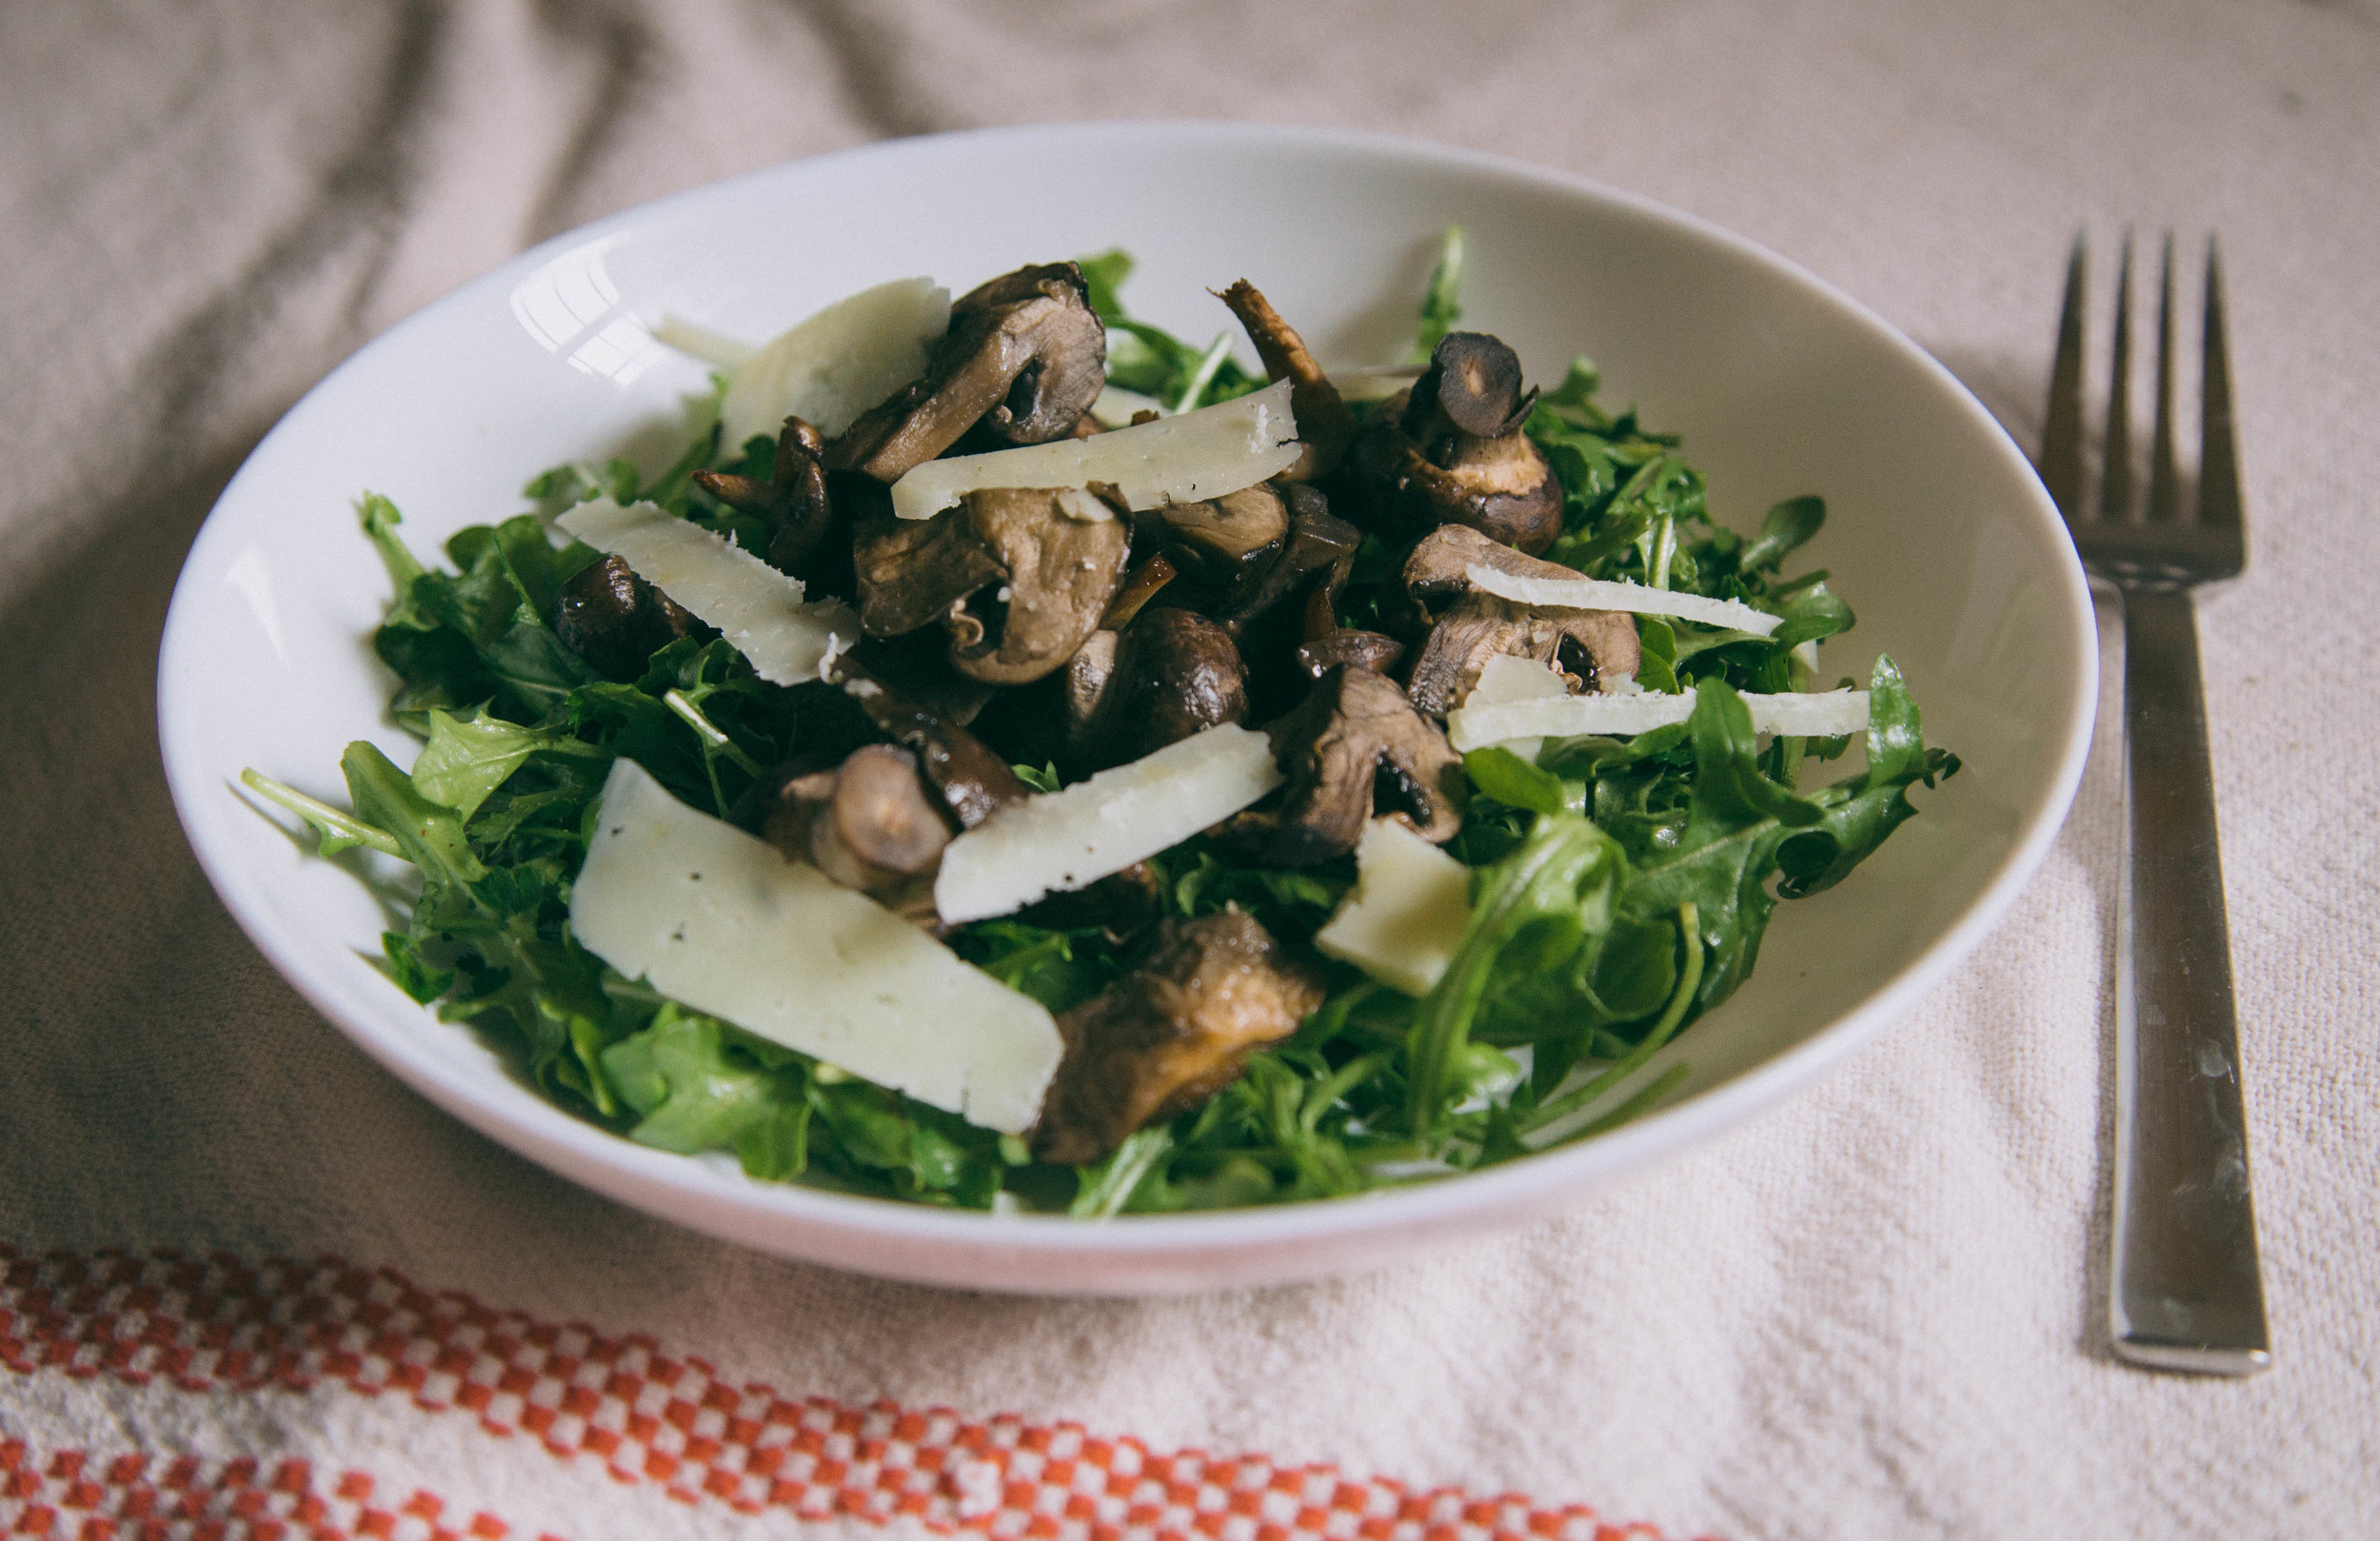
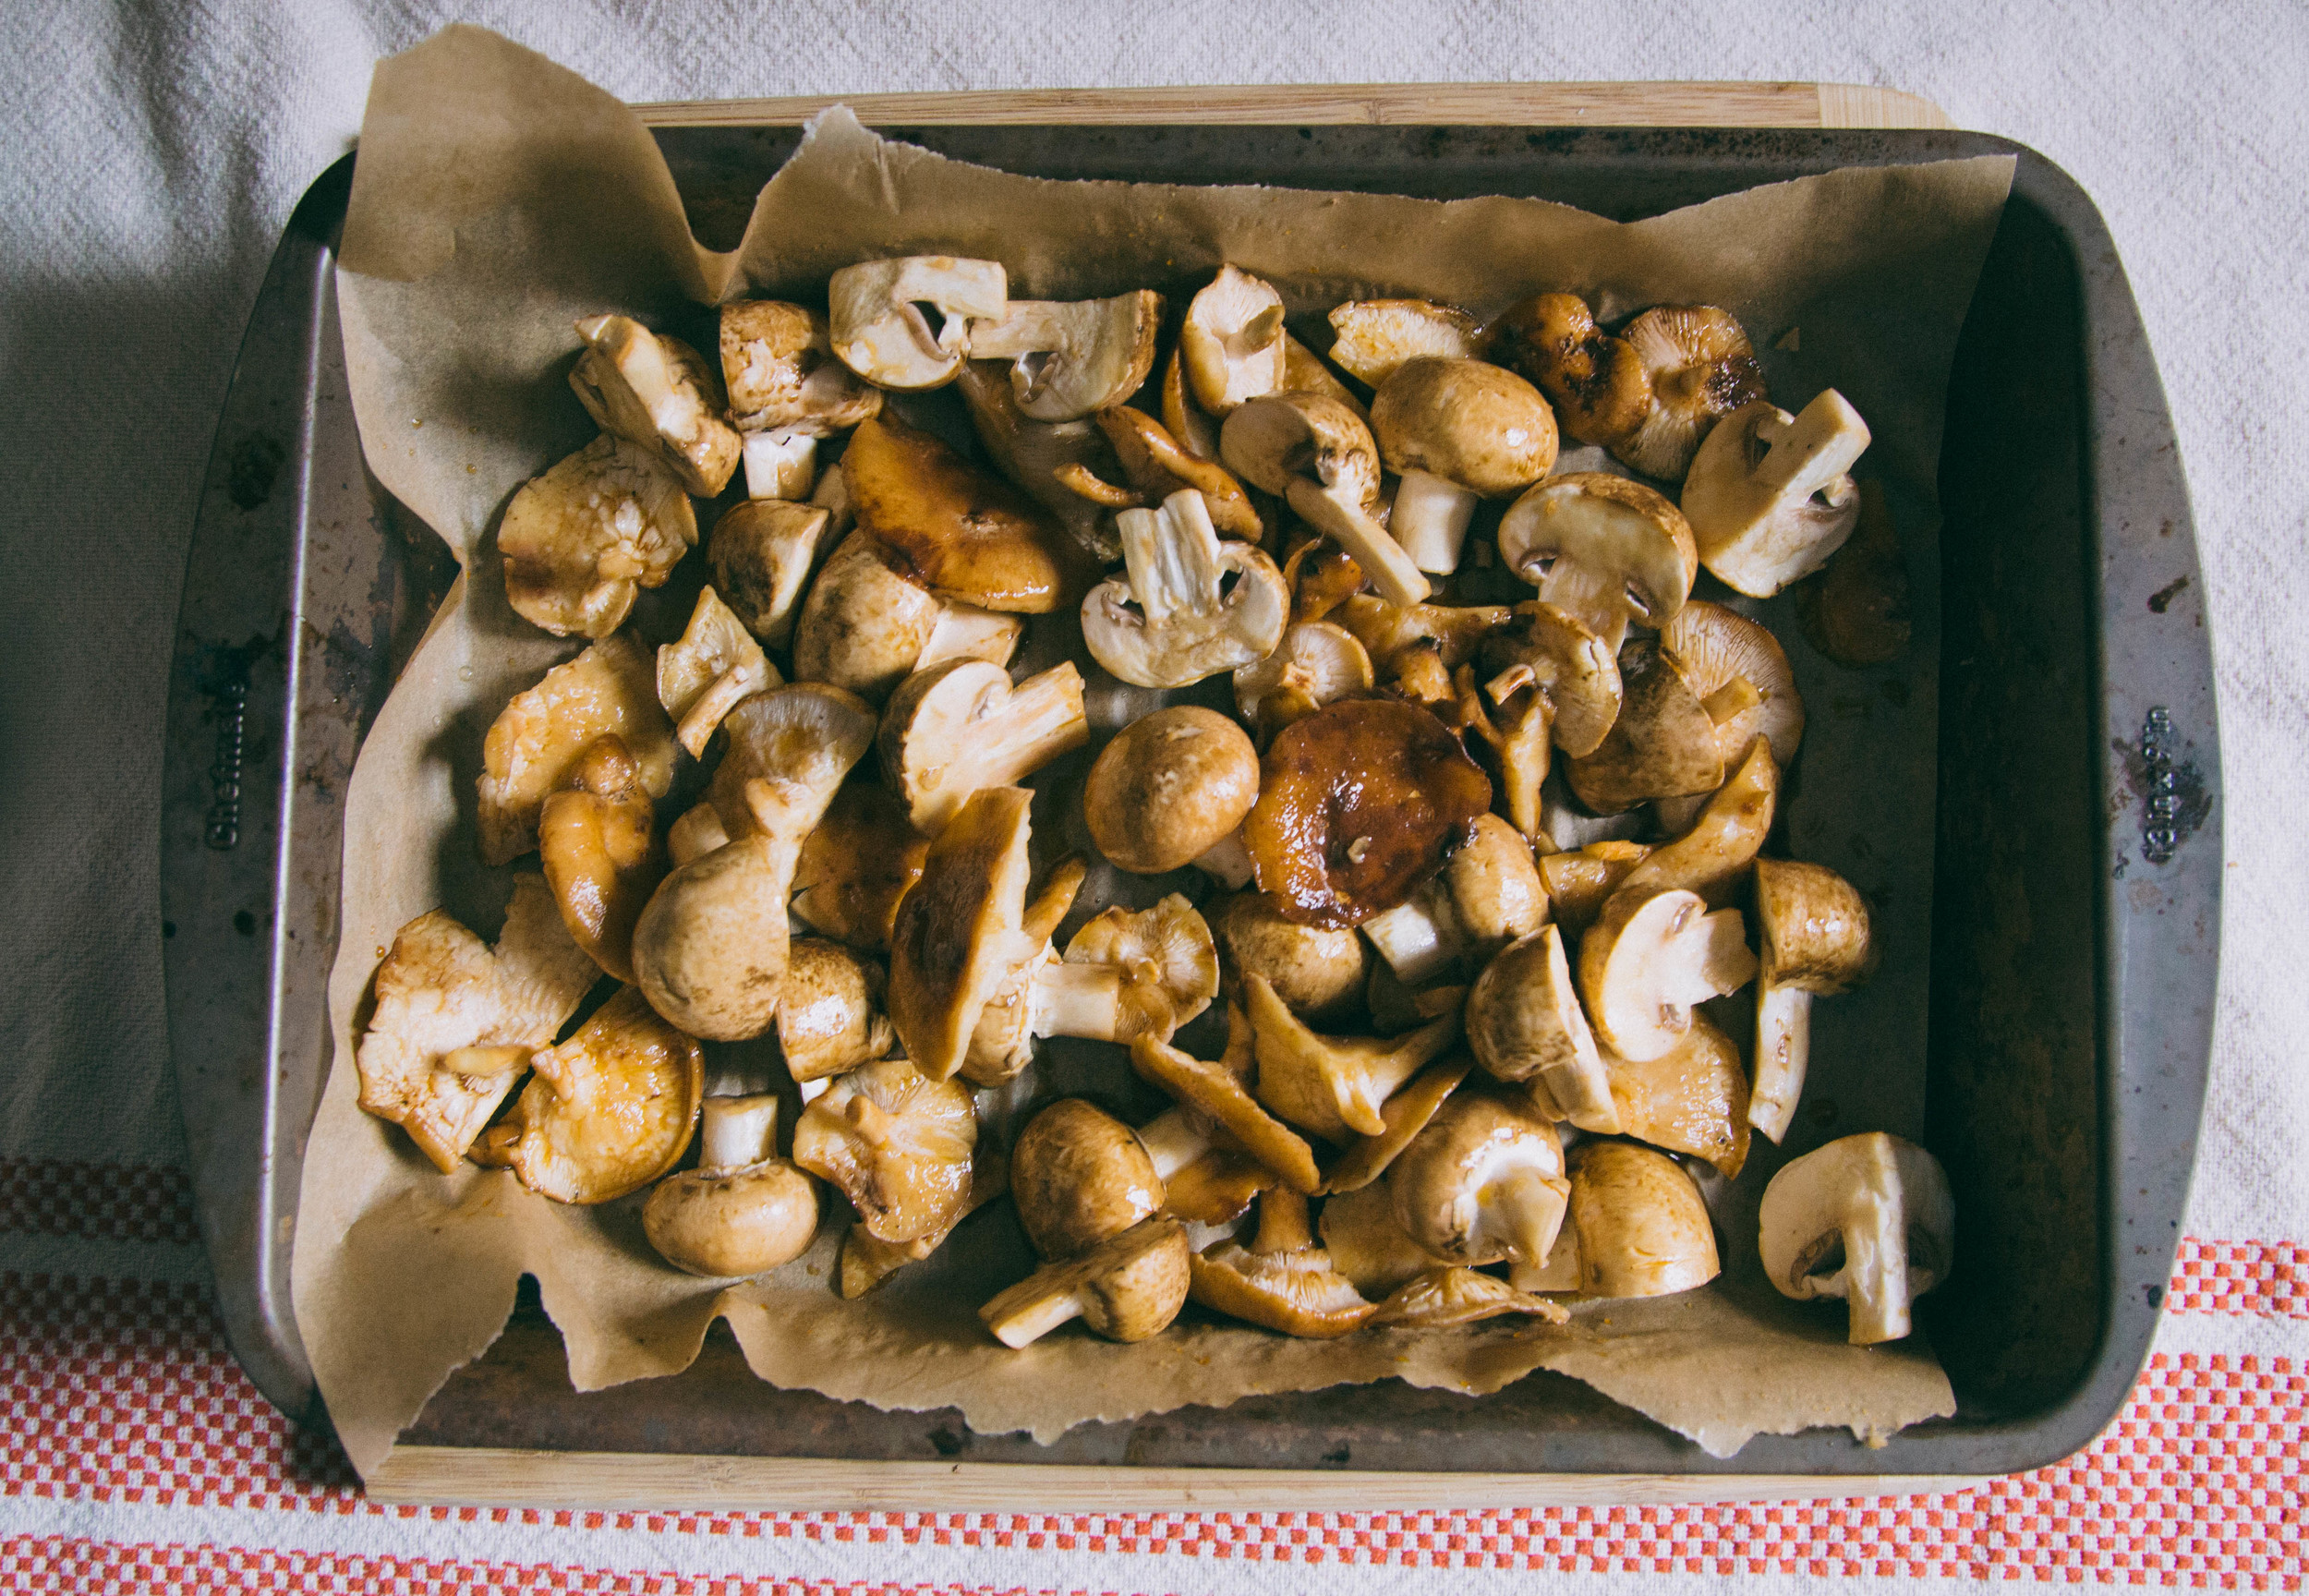
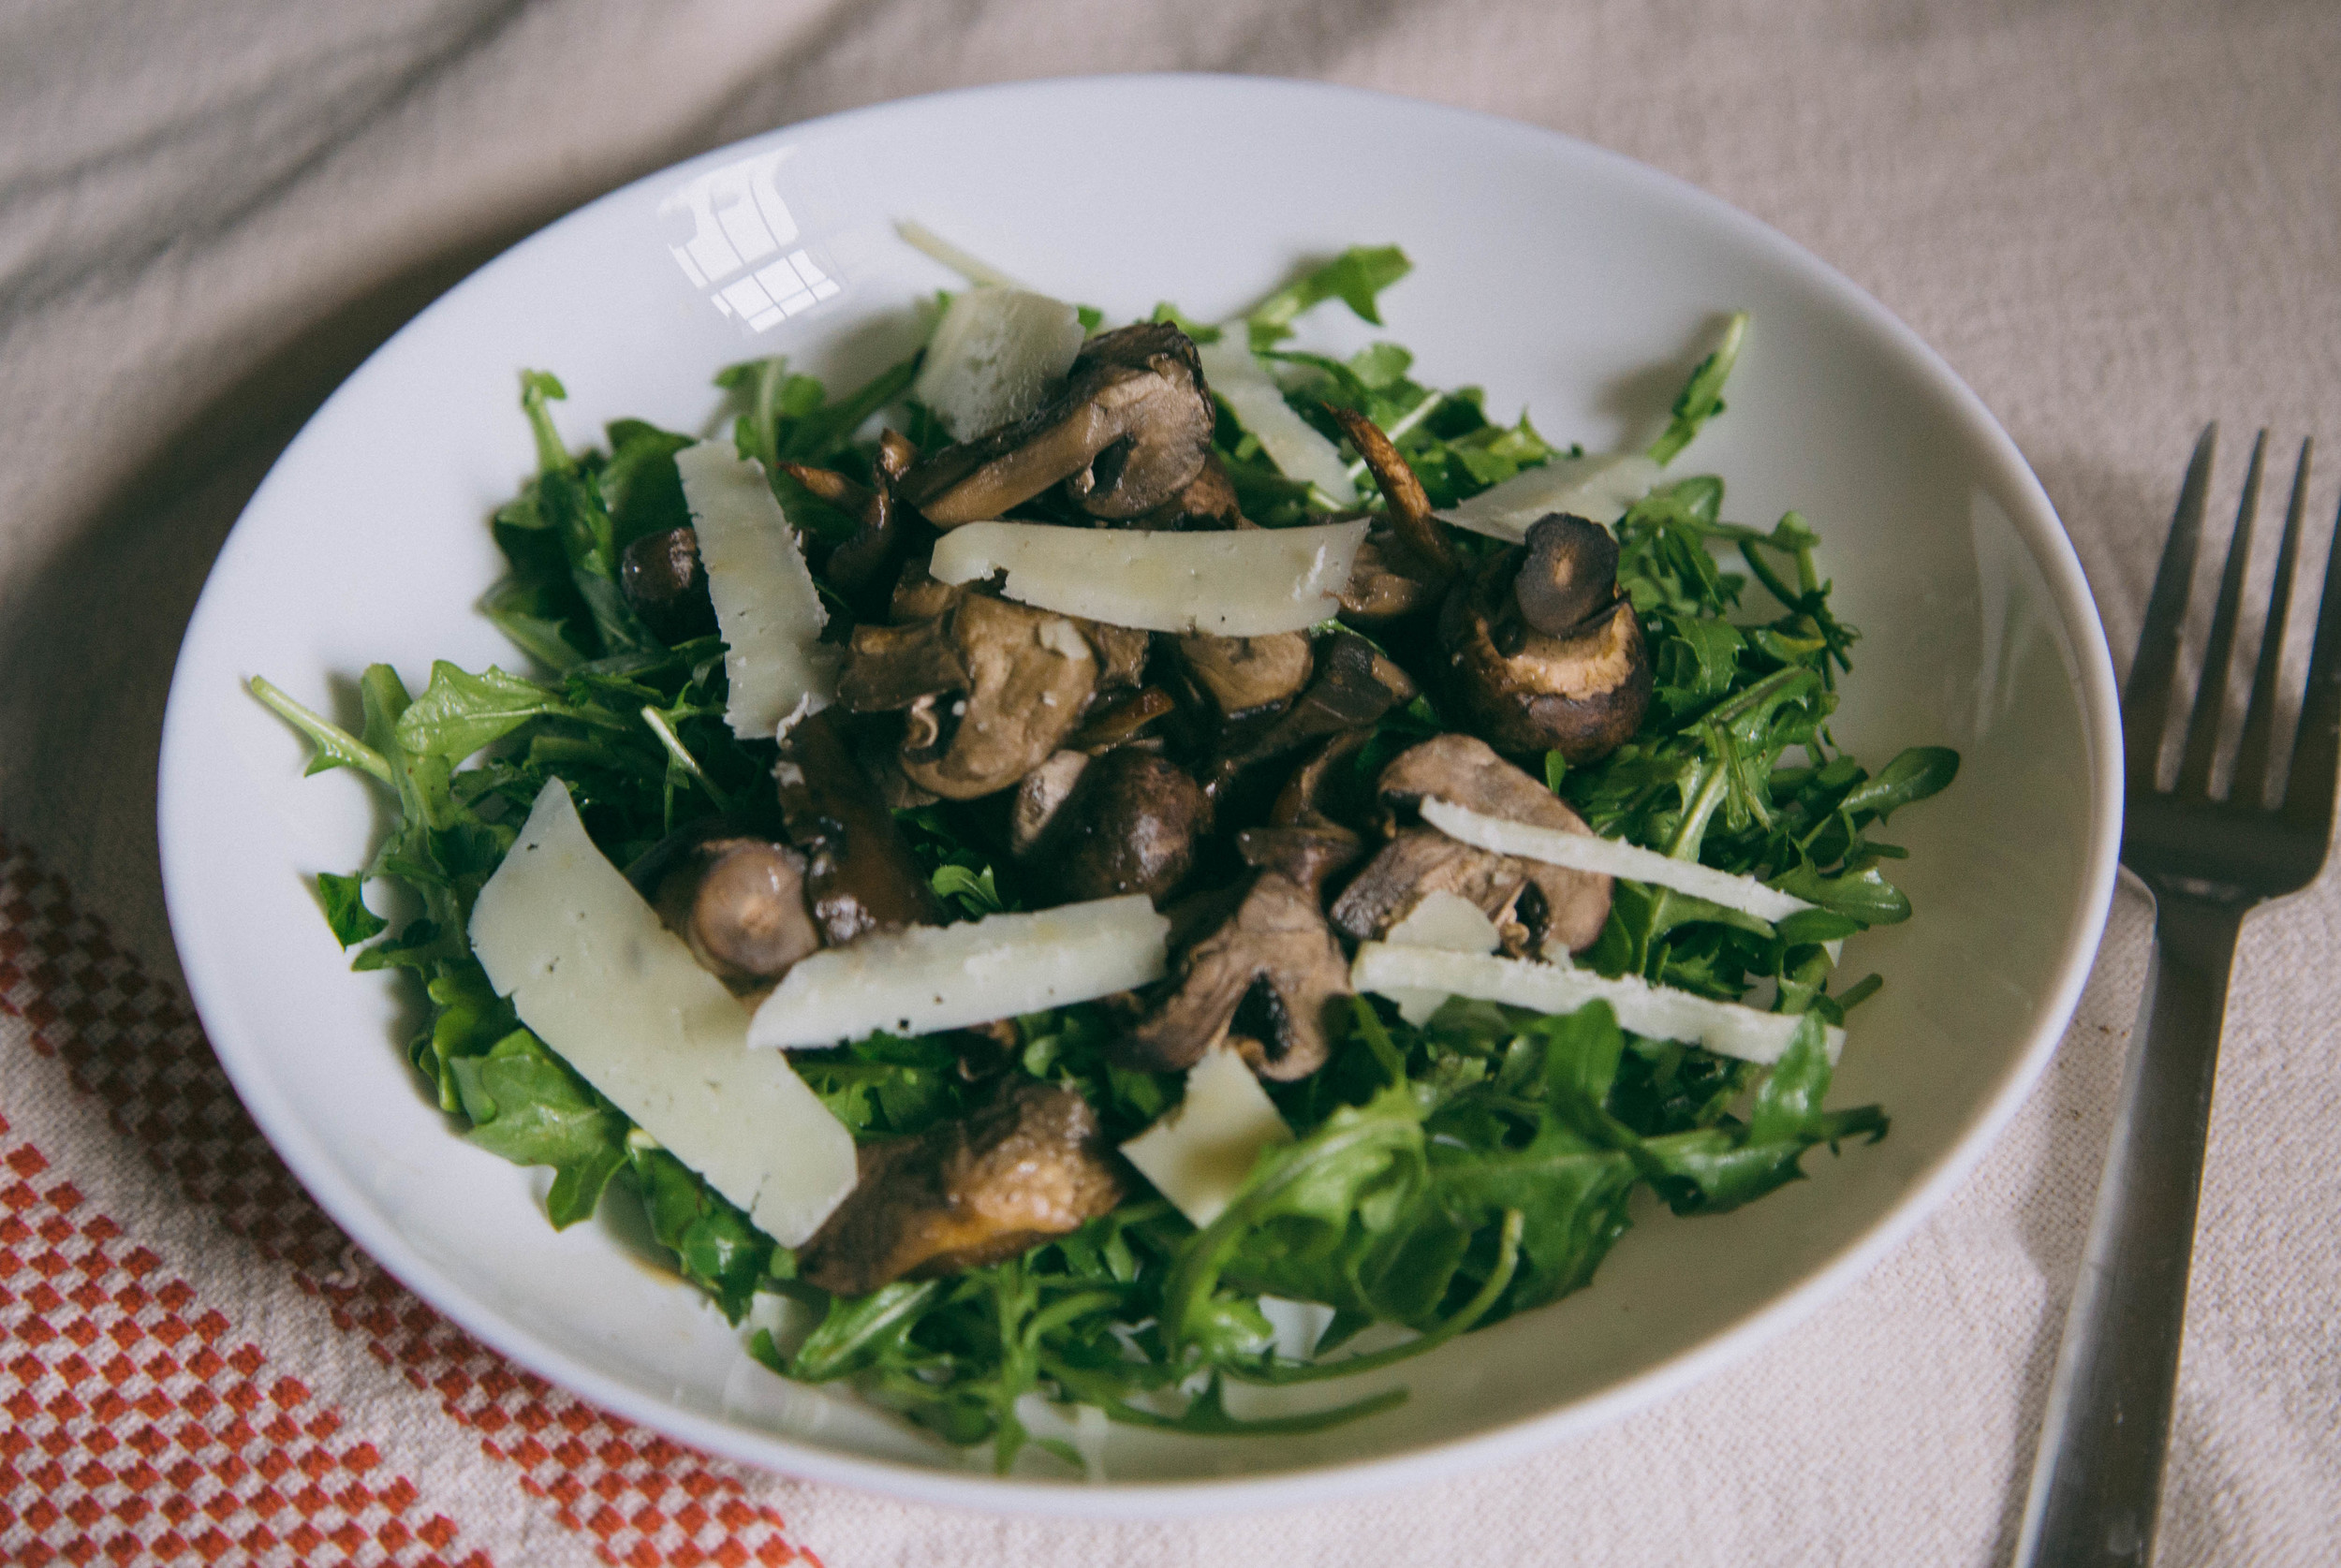
This salad seemed like a good compromise. It's got some greens to cheer me up, but the mushrooms came from my CSA, so I'm still eating locally. The mushrooms here are a mix of shiitake and cremini, but use whatever mushrooms you like. You could also add a handful of nuts or seeds for extra protein? And this salad works great with goat cheese instead of pecorino (because everything works great with goat cheese) or, if you wanted a triple umami threat, you could use parmesan.
Steps
Preheat the oven to 350F. Wash and roughly chop the mushrooms. In a baking tray, mix the mushrooms with the soy sauce and the sherry. Roast in the oven for approx. 40 mins, turning 1/2 way through.
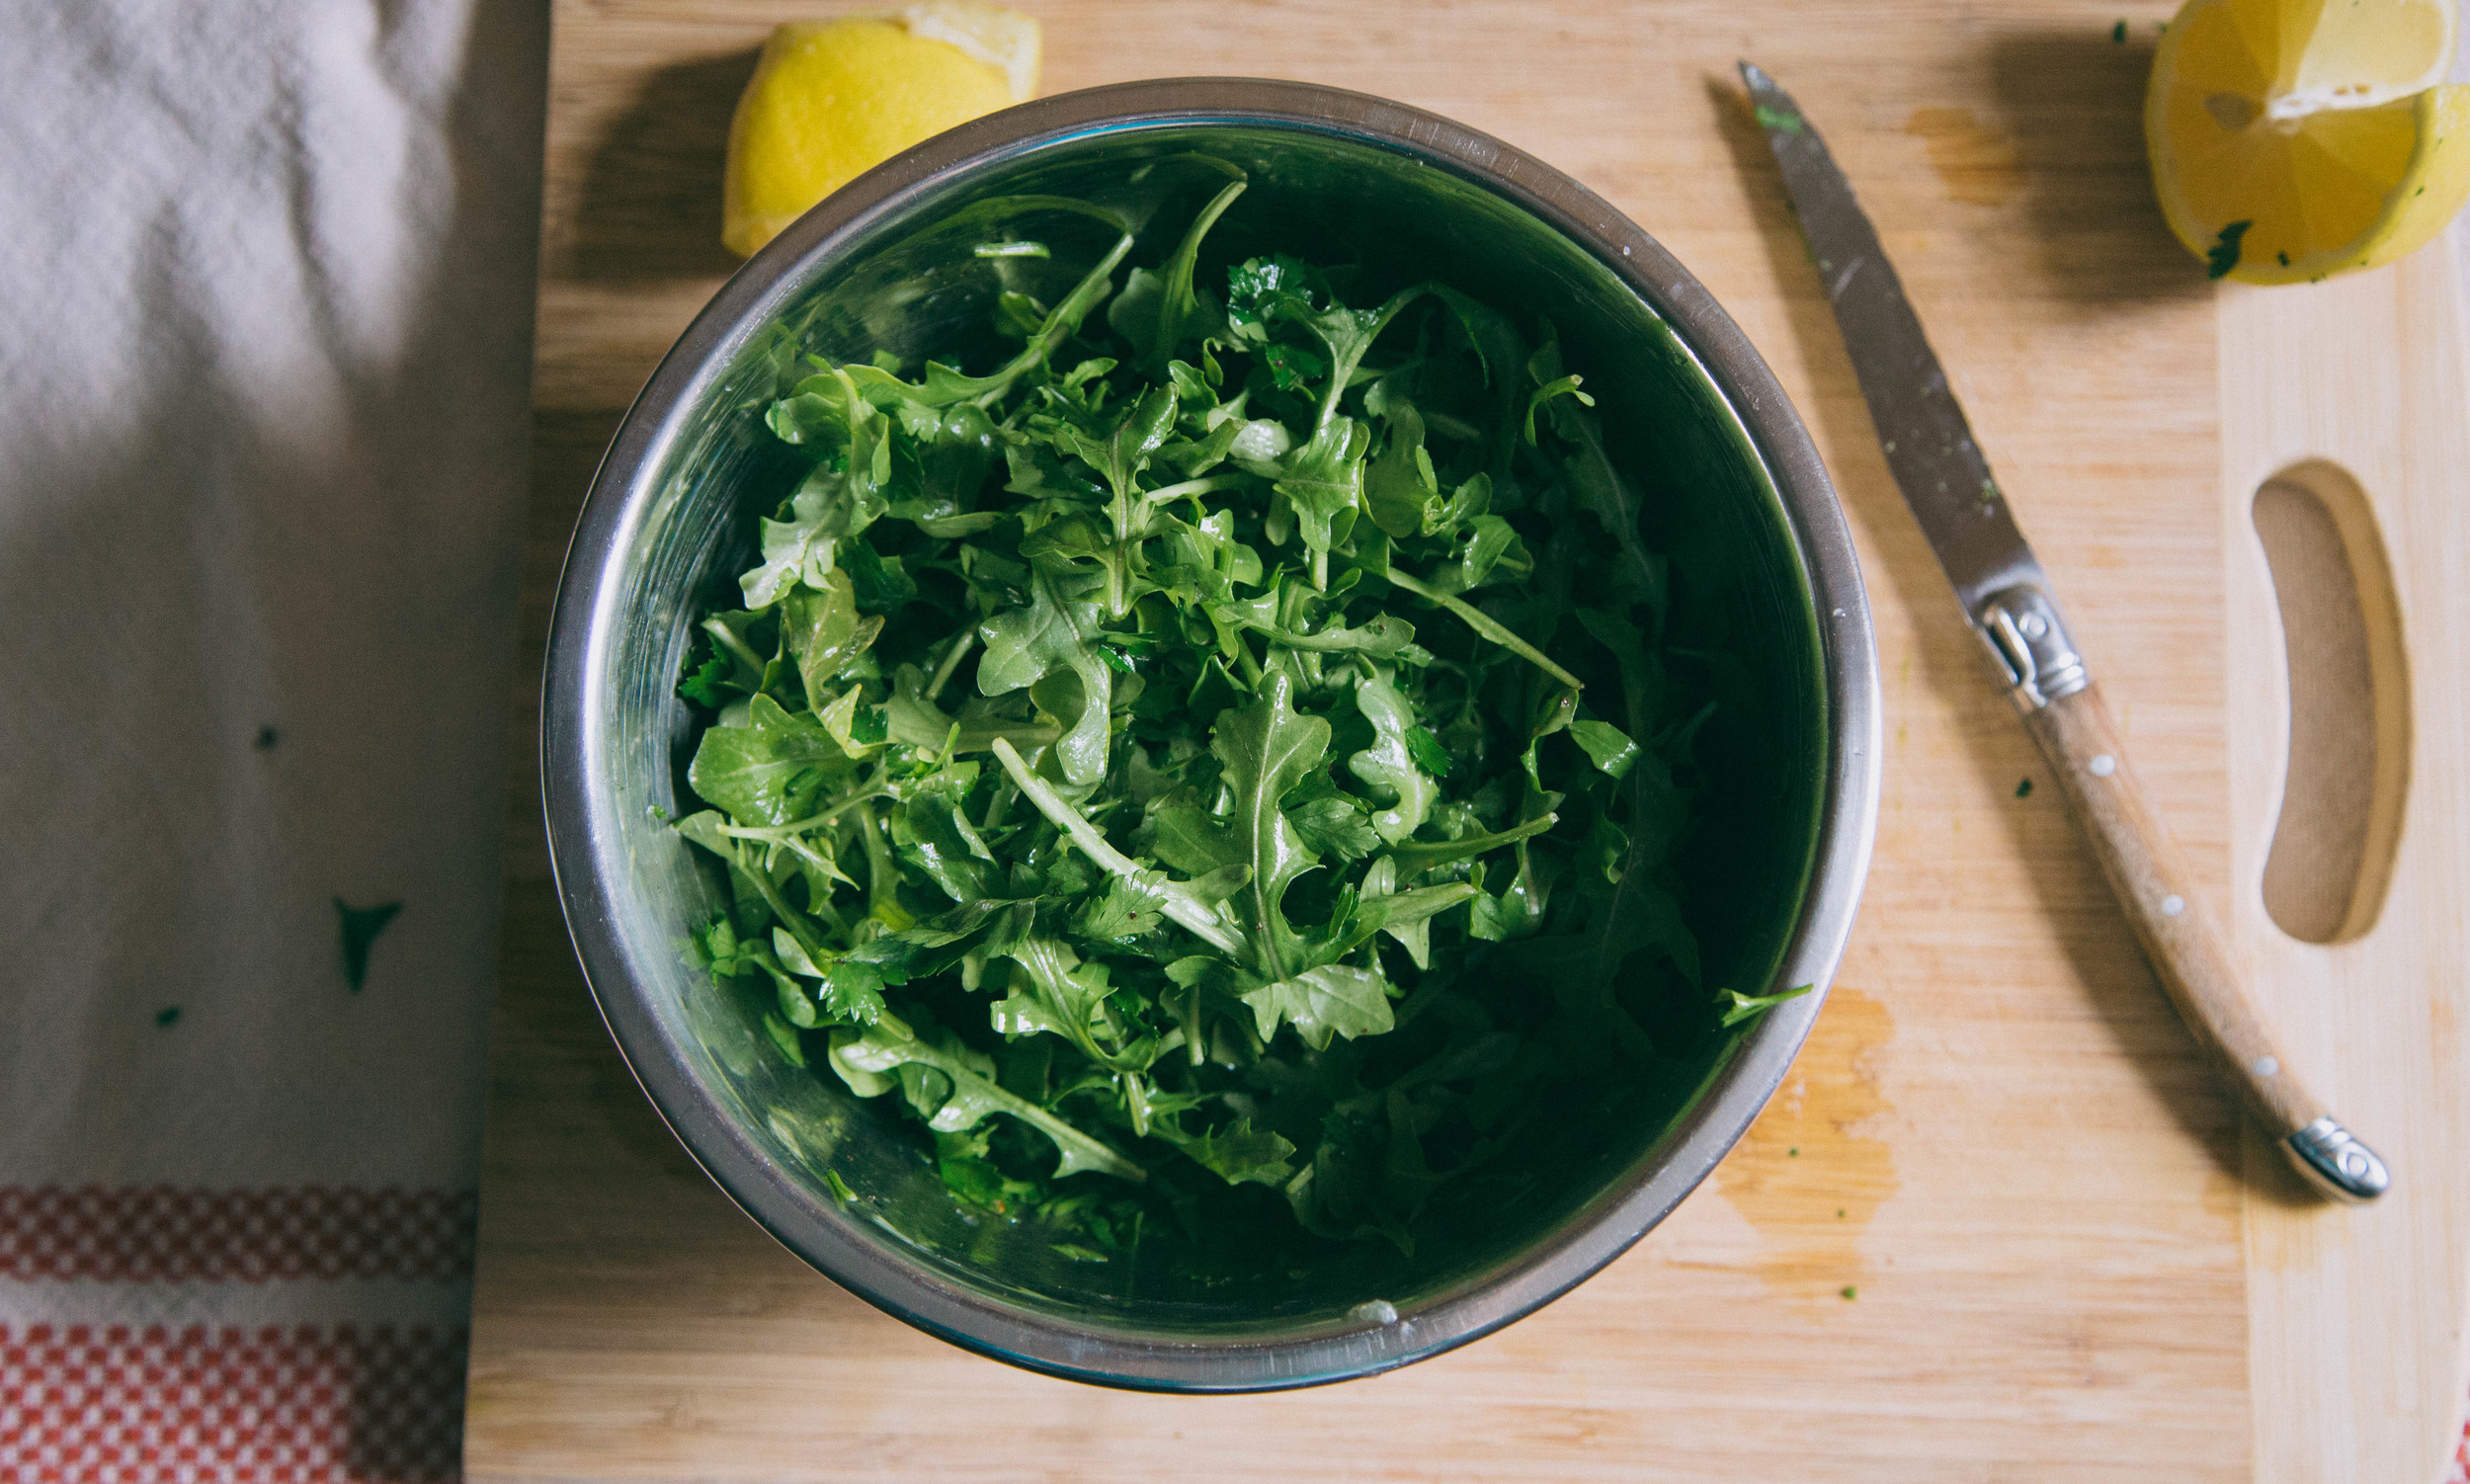
Wash the arugula and chop the parsley. In a bowl, mix the arugula, parsley, lemon juice, and olive oil. Season lightly with salt and pepper.
To serve, arrange greens on a plate, top with the roasted mushrooms, and shave on a few slivers of pecorino.
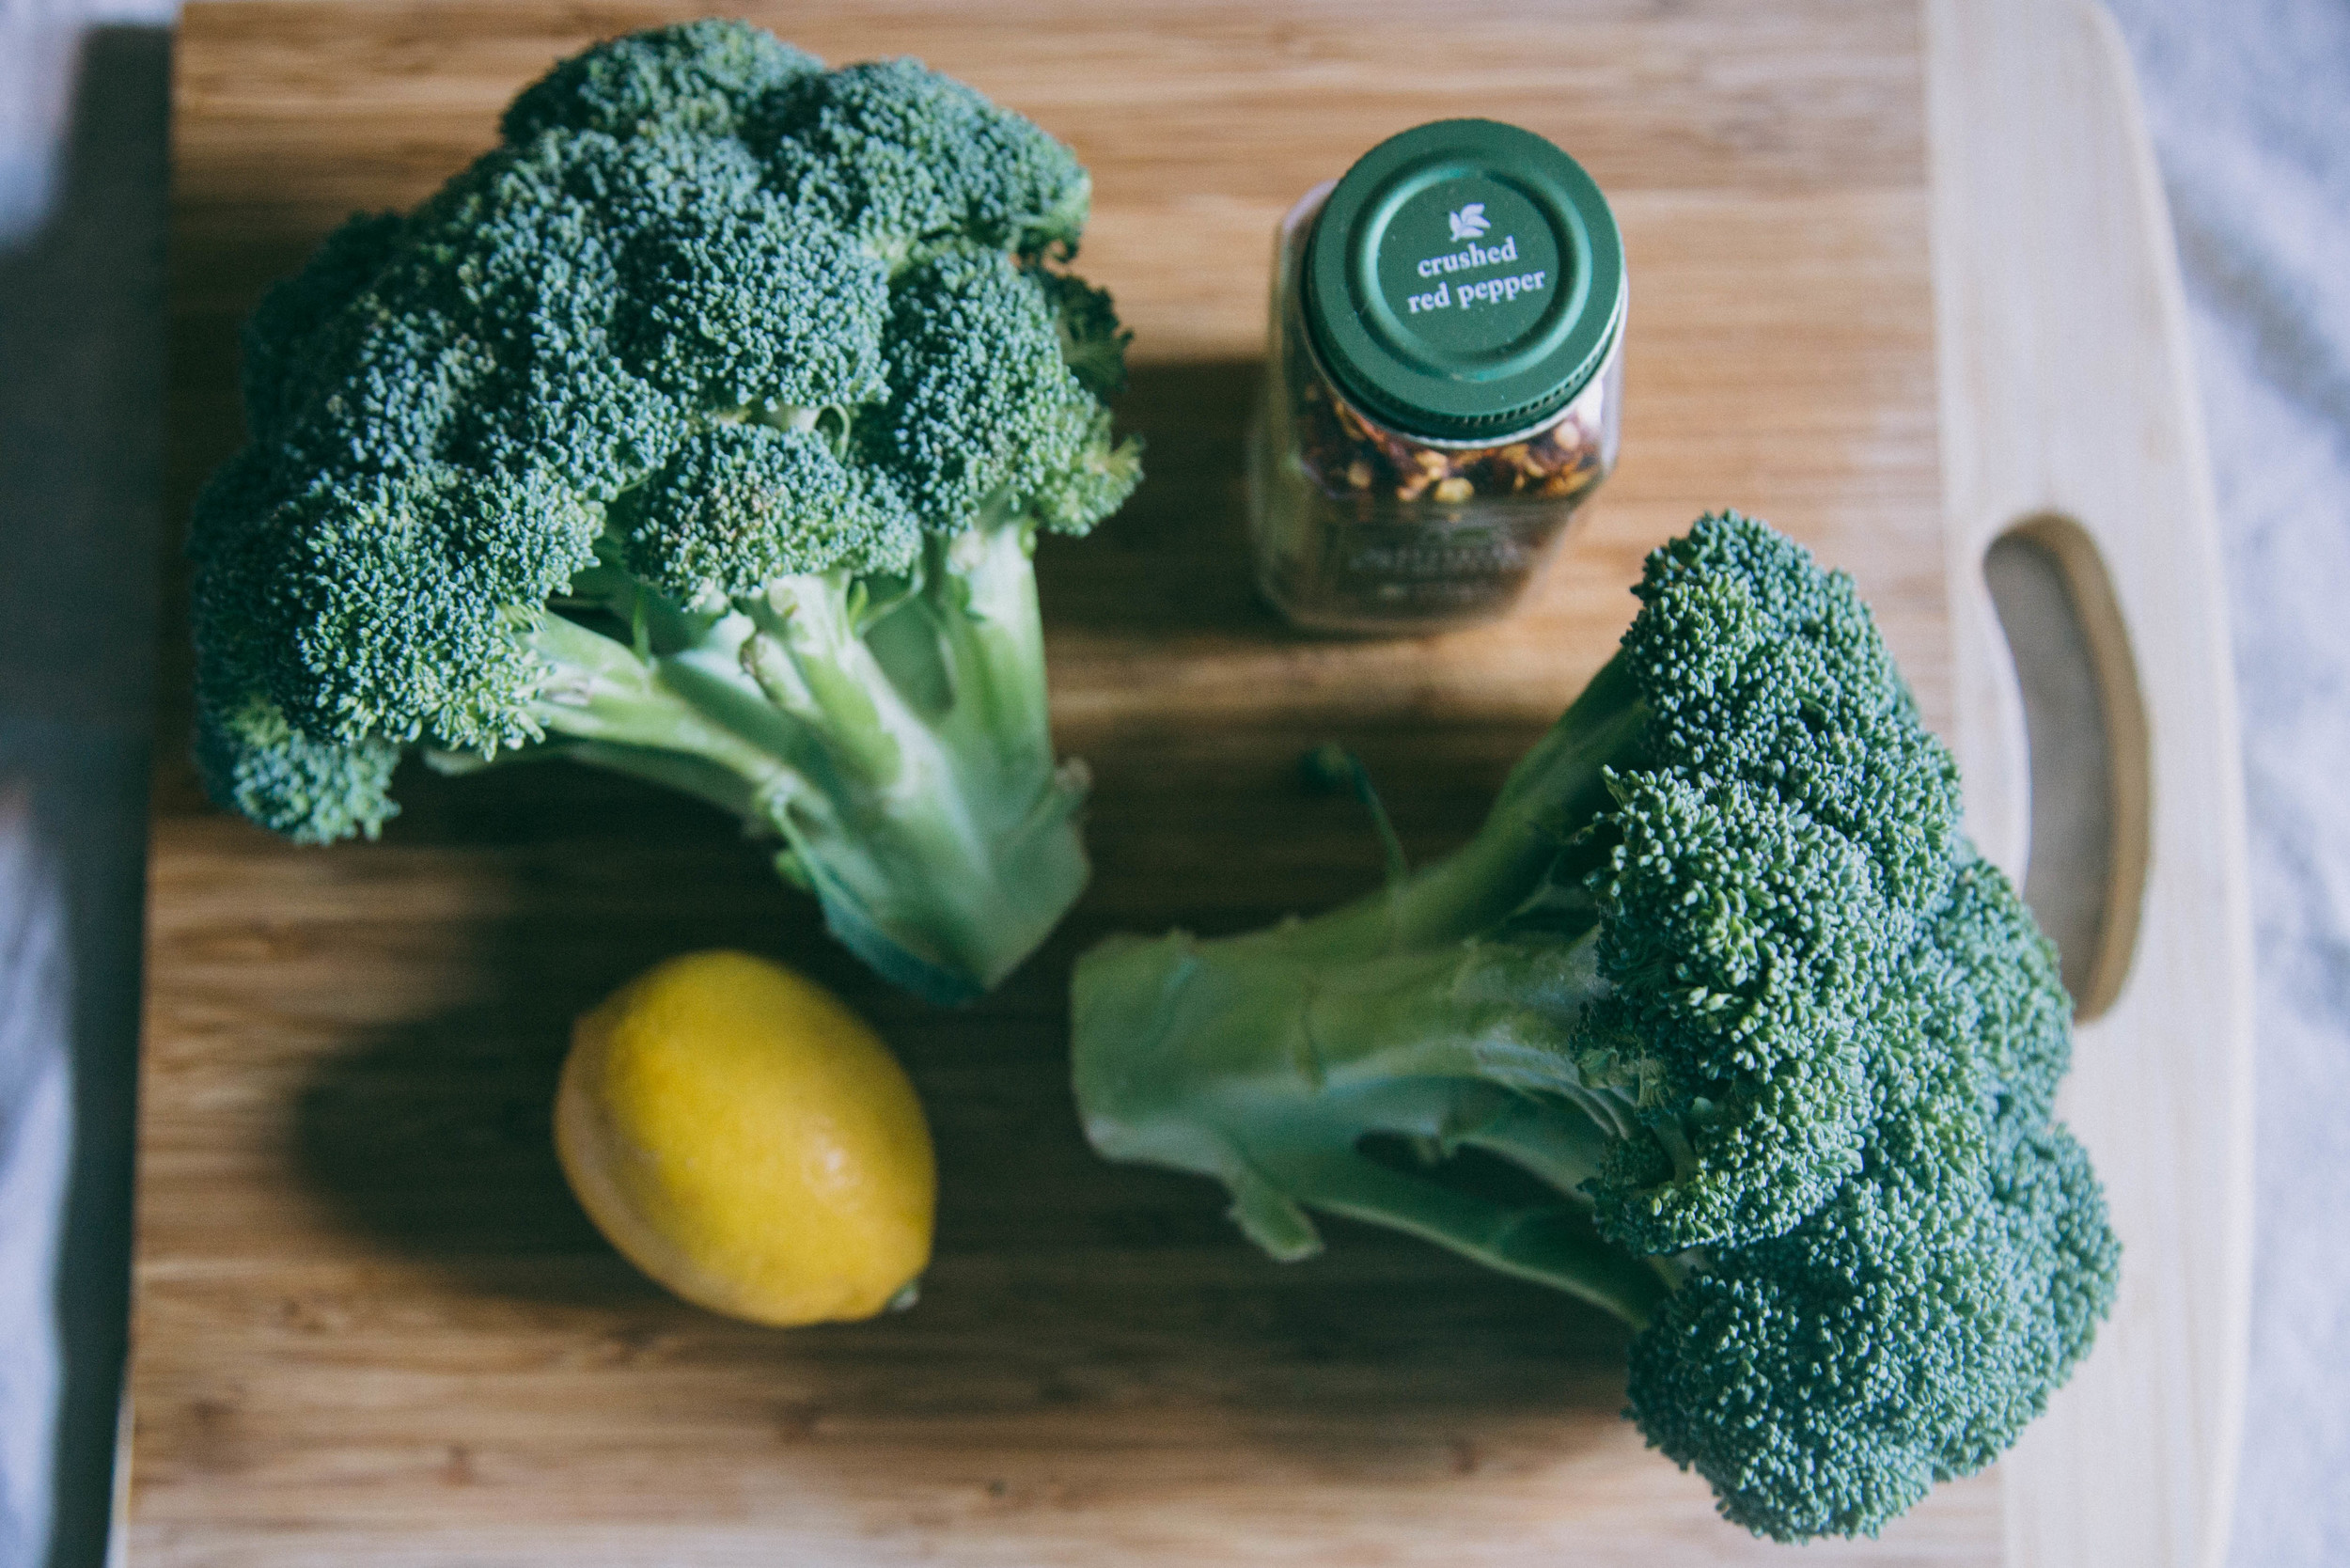
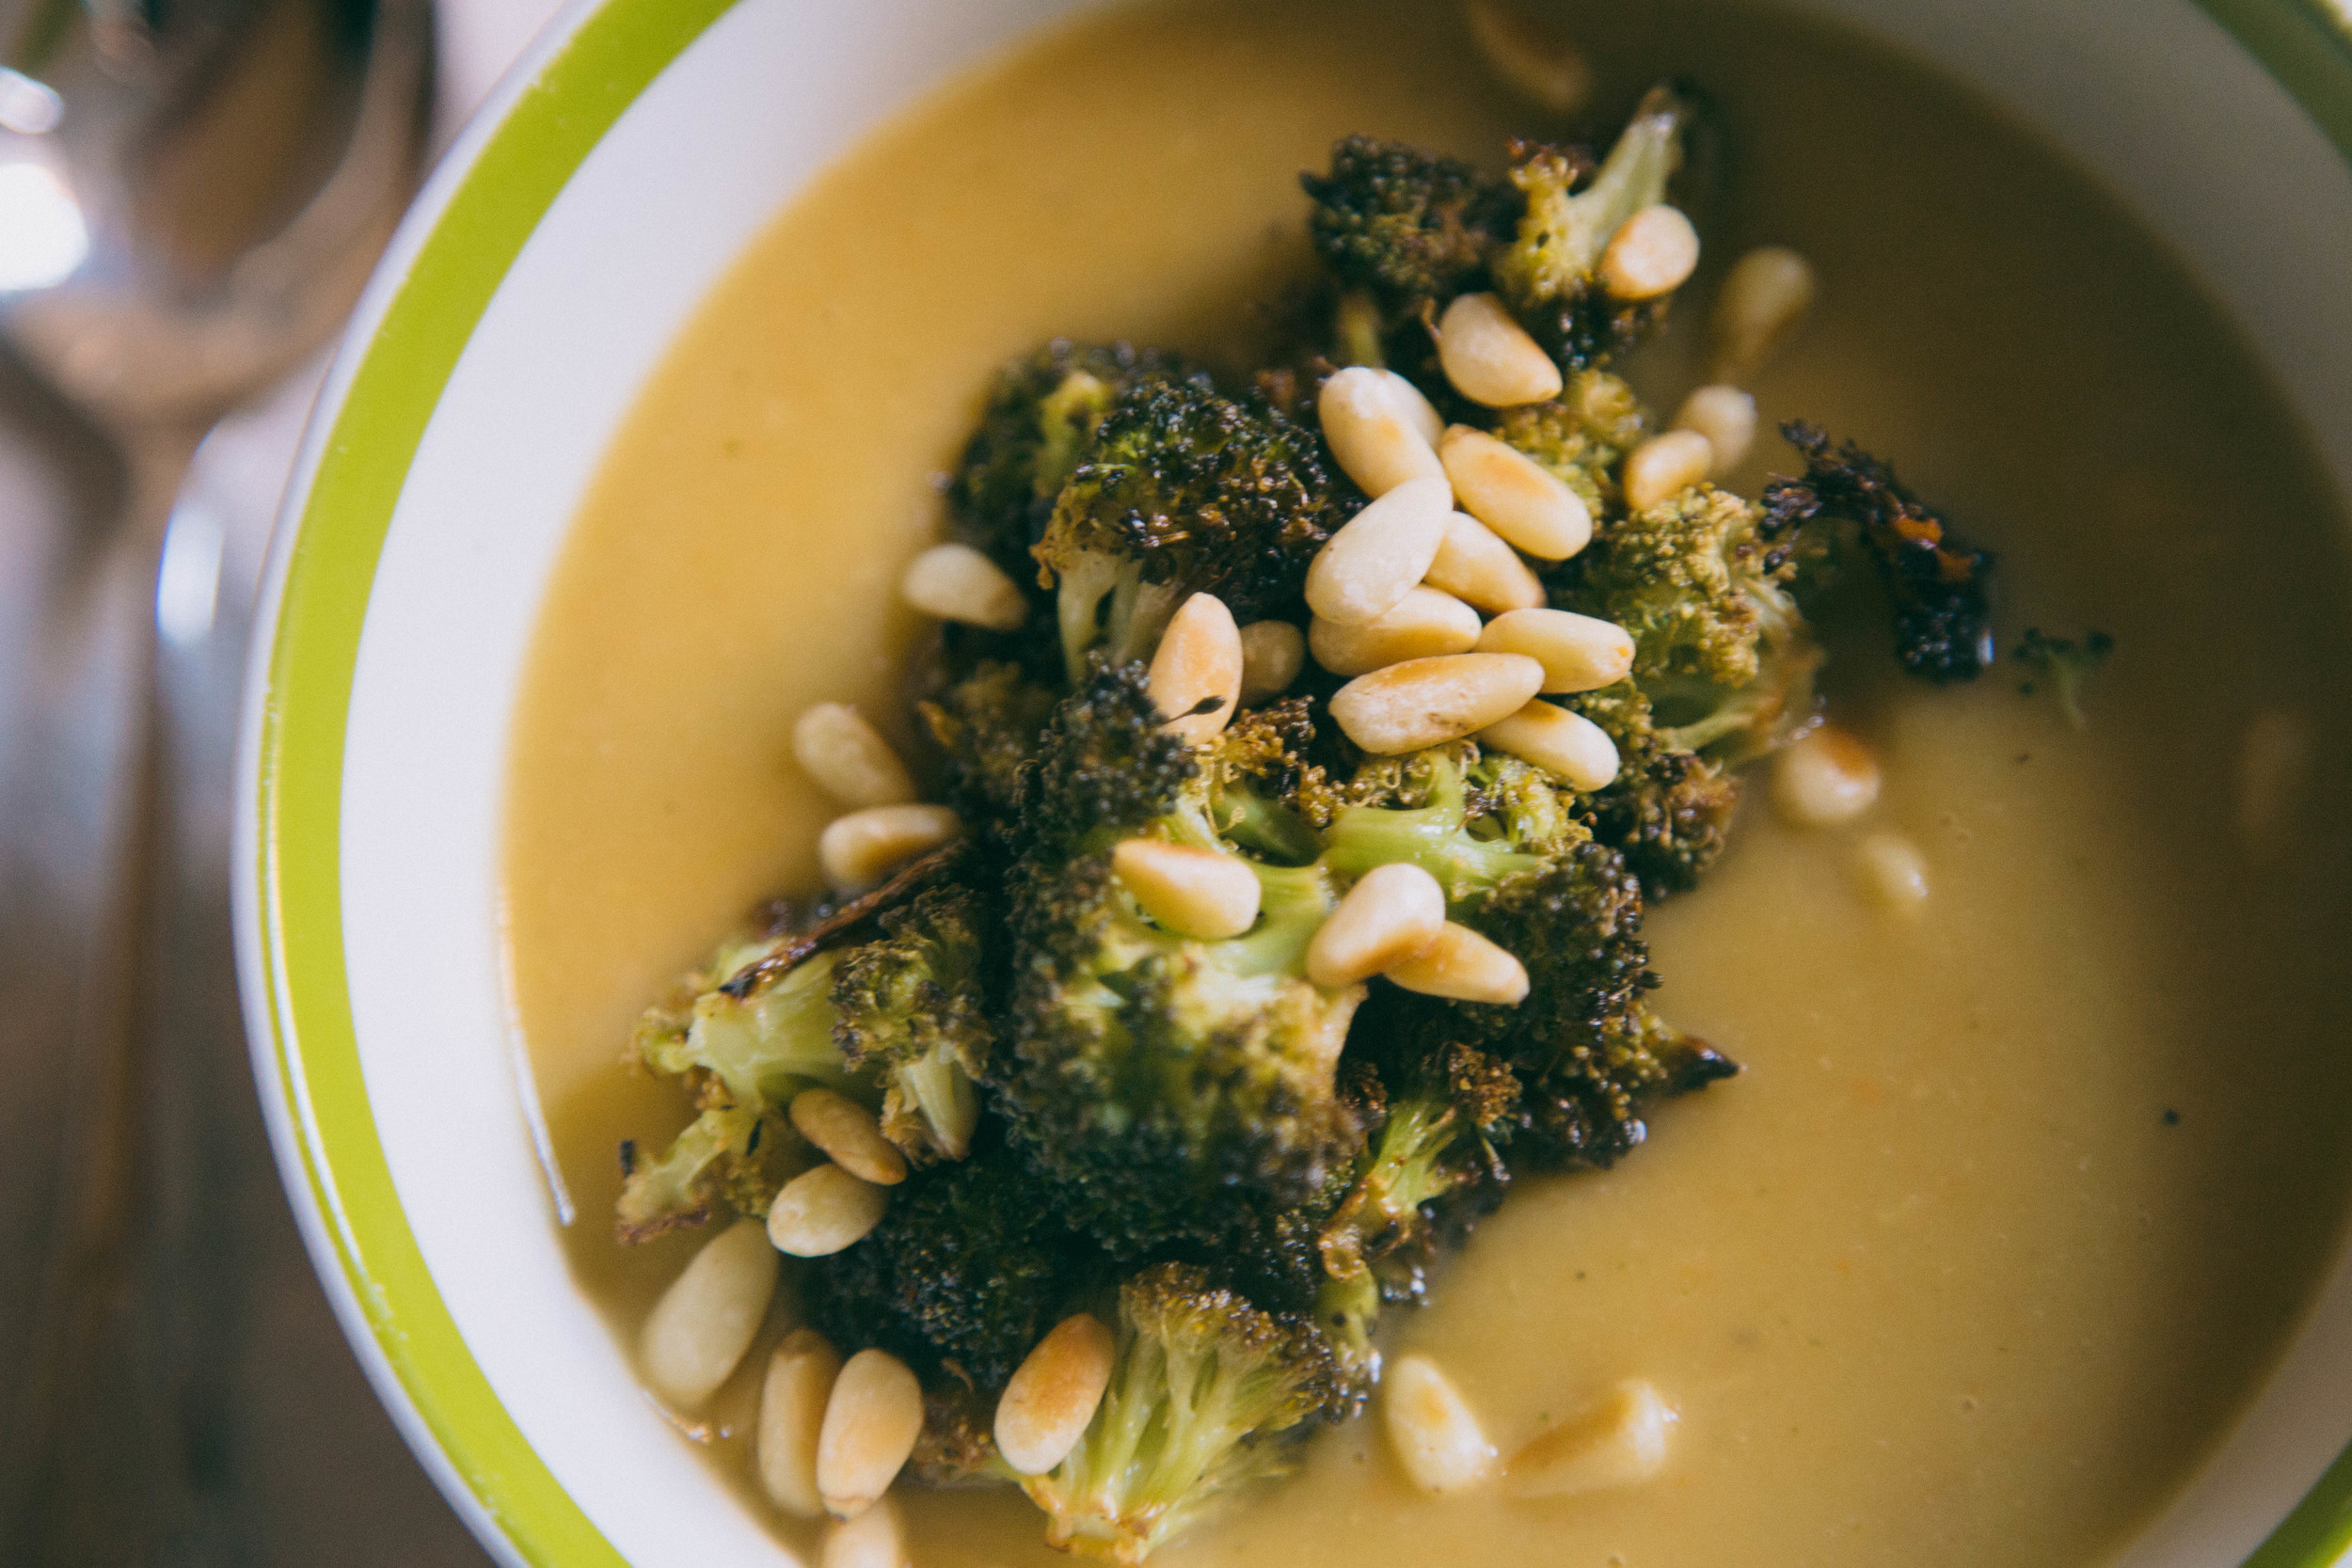
I believe soup is made in the toppings. Whether it's a dollop of crème fraîche or a handful of roasted nuts, adding something extra to a comforting bowl of soup can make it into a delicious rounded meal. Perfect for lunch. Perfect for dinner. Perfect for breakfast...? (Okay I'm still working on that one).
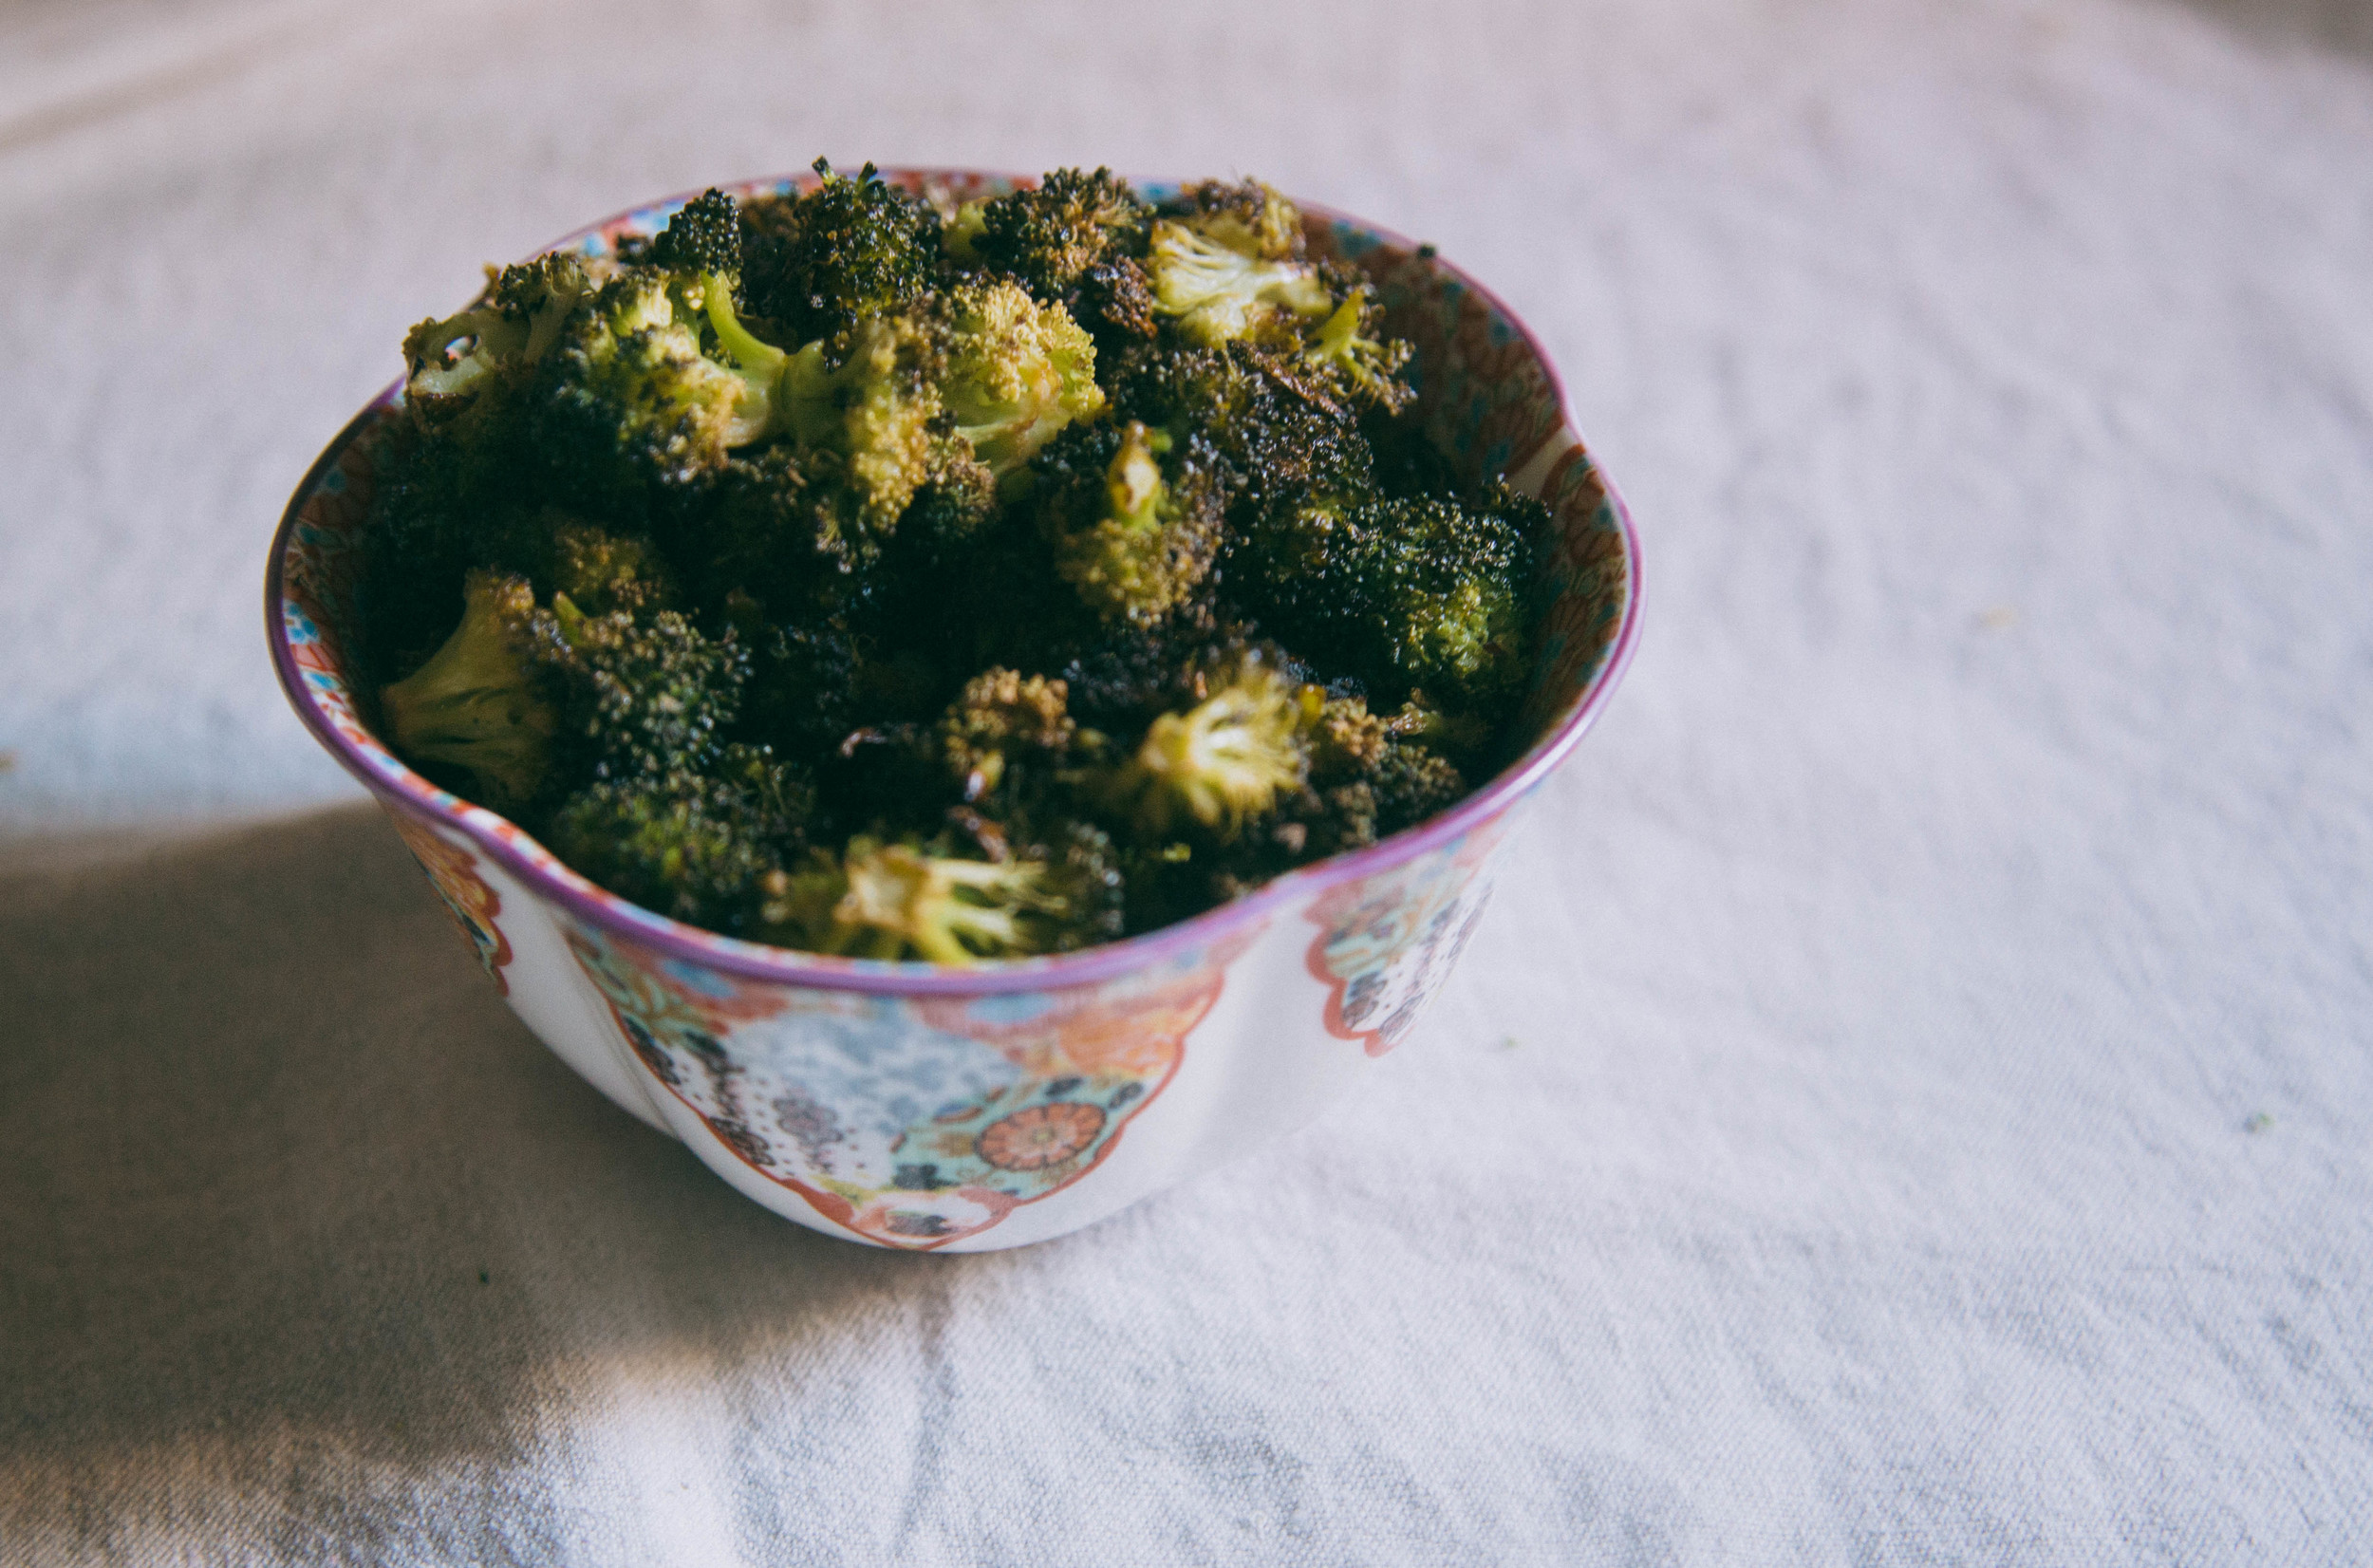
I'm all about the toppings in this recipe. Mini-crunchy-spicy-lemony-roasted broccoli bites with some toasted pine nuts? Yes, please. Plus, not having any florets in the soup means you get a much smoother consistency because there aren't tiny broccoli kernels floating around refusing to be blended. AND you don't throw anything away. Every last bit of broccoli gets munched. Great if you're me, terrible if you're my broccoli hating brother.
This is a pretty simple soup recipe that you can play around with depending on what's in your fridge. Got some carrots? Throw 'em in. My roommate also made a version of this with a head of cauliflower instead of broccoli and it turned out great.
Steps
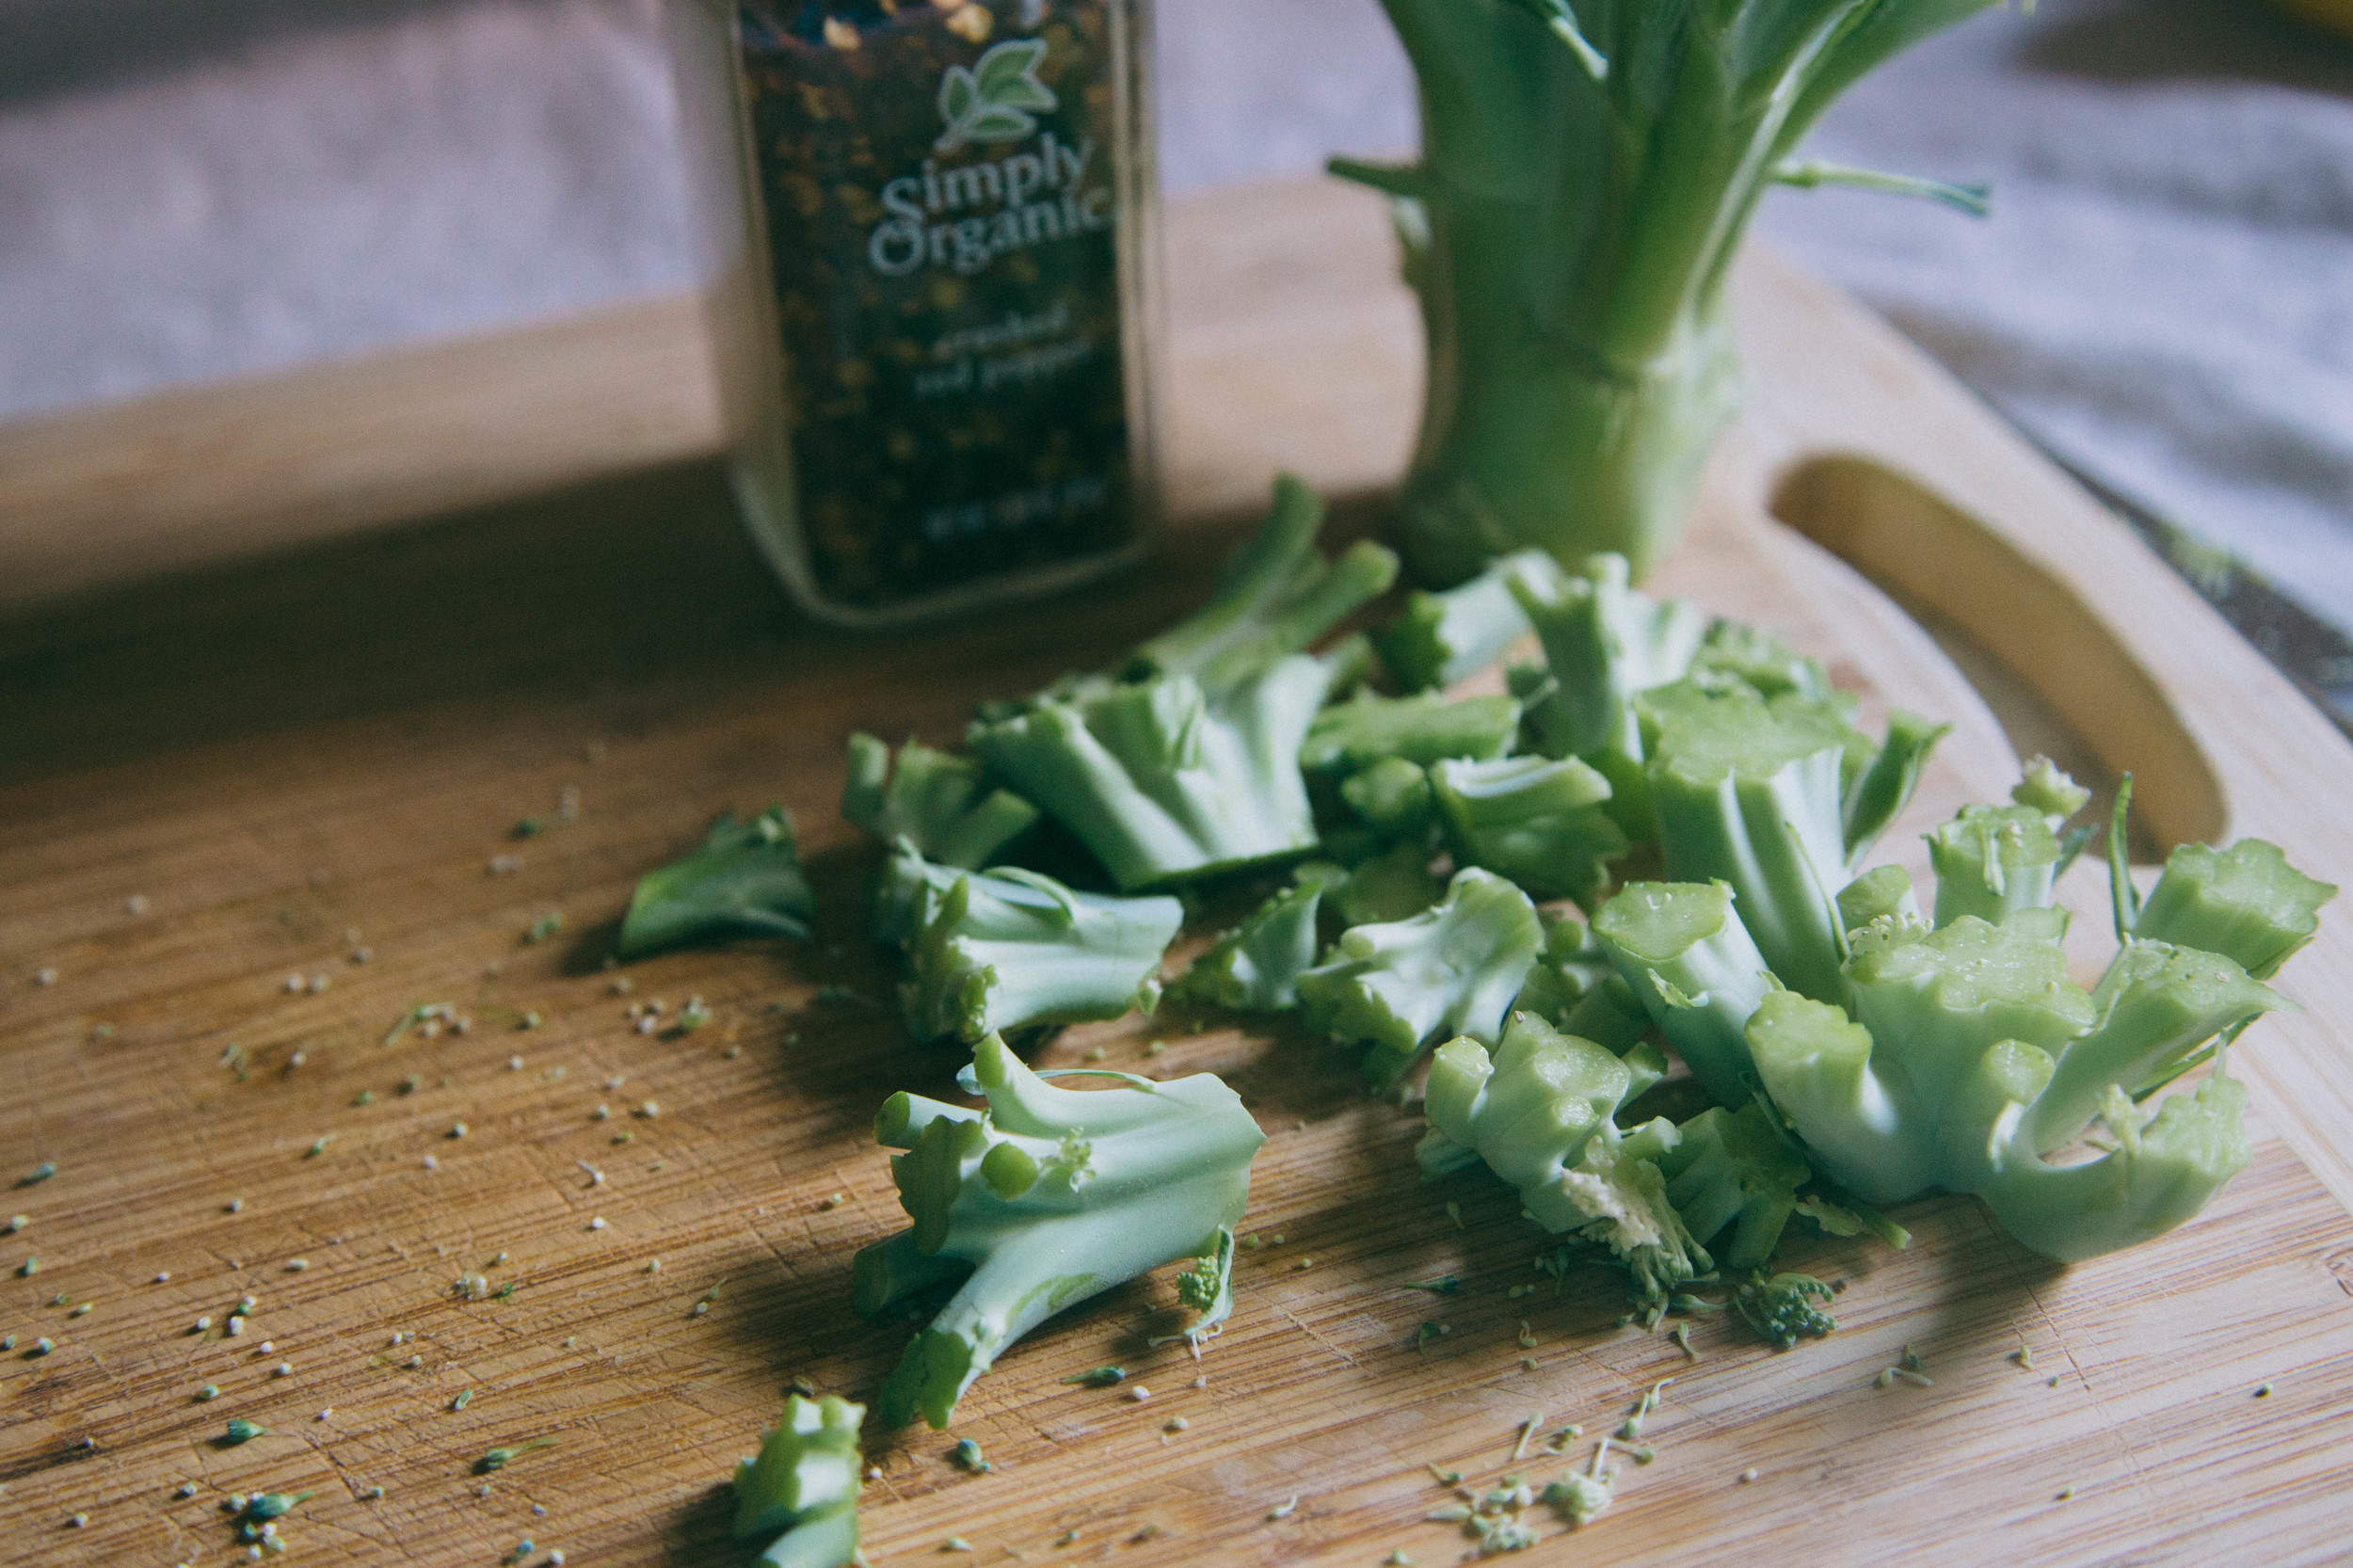
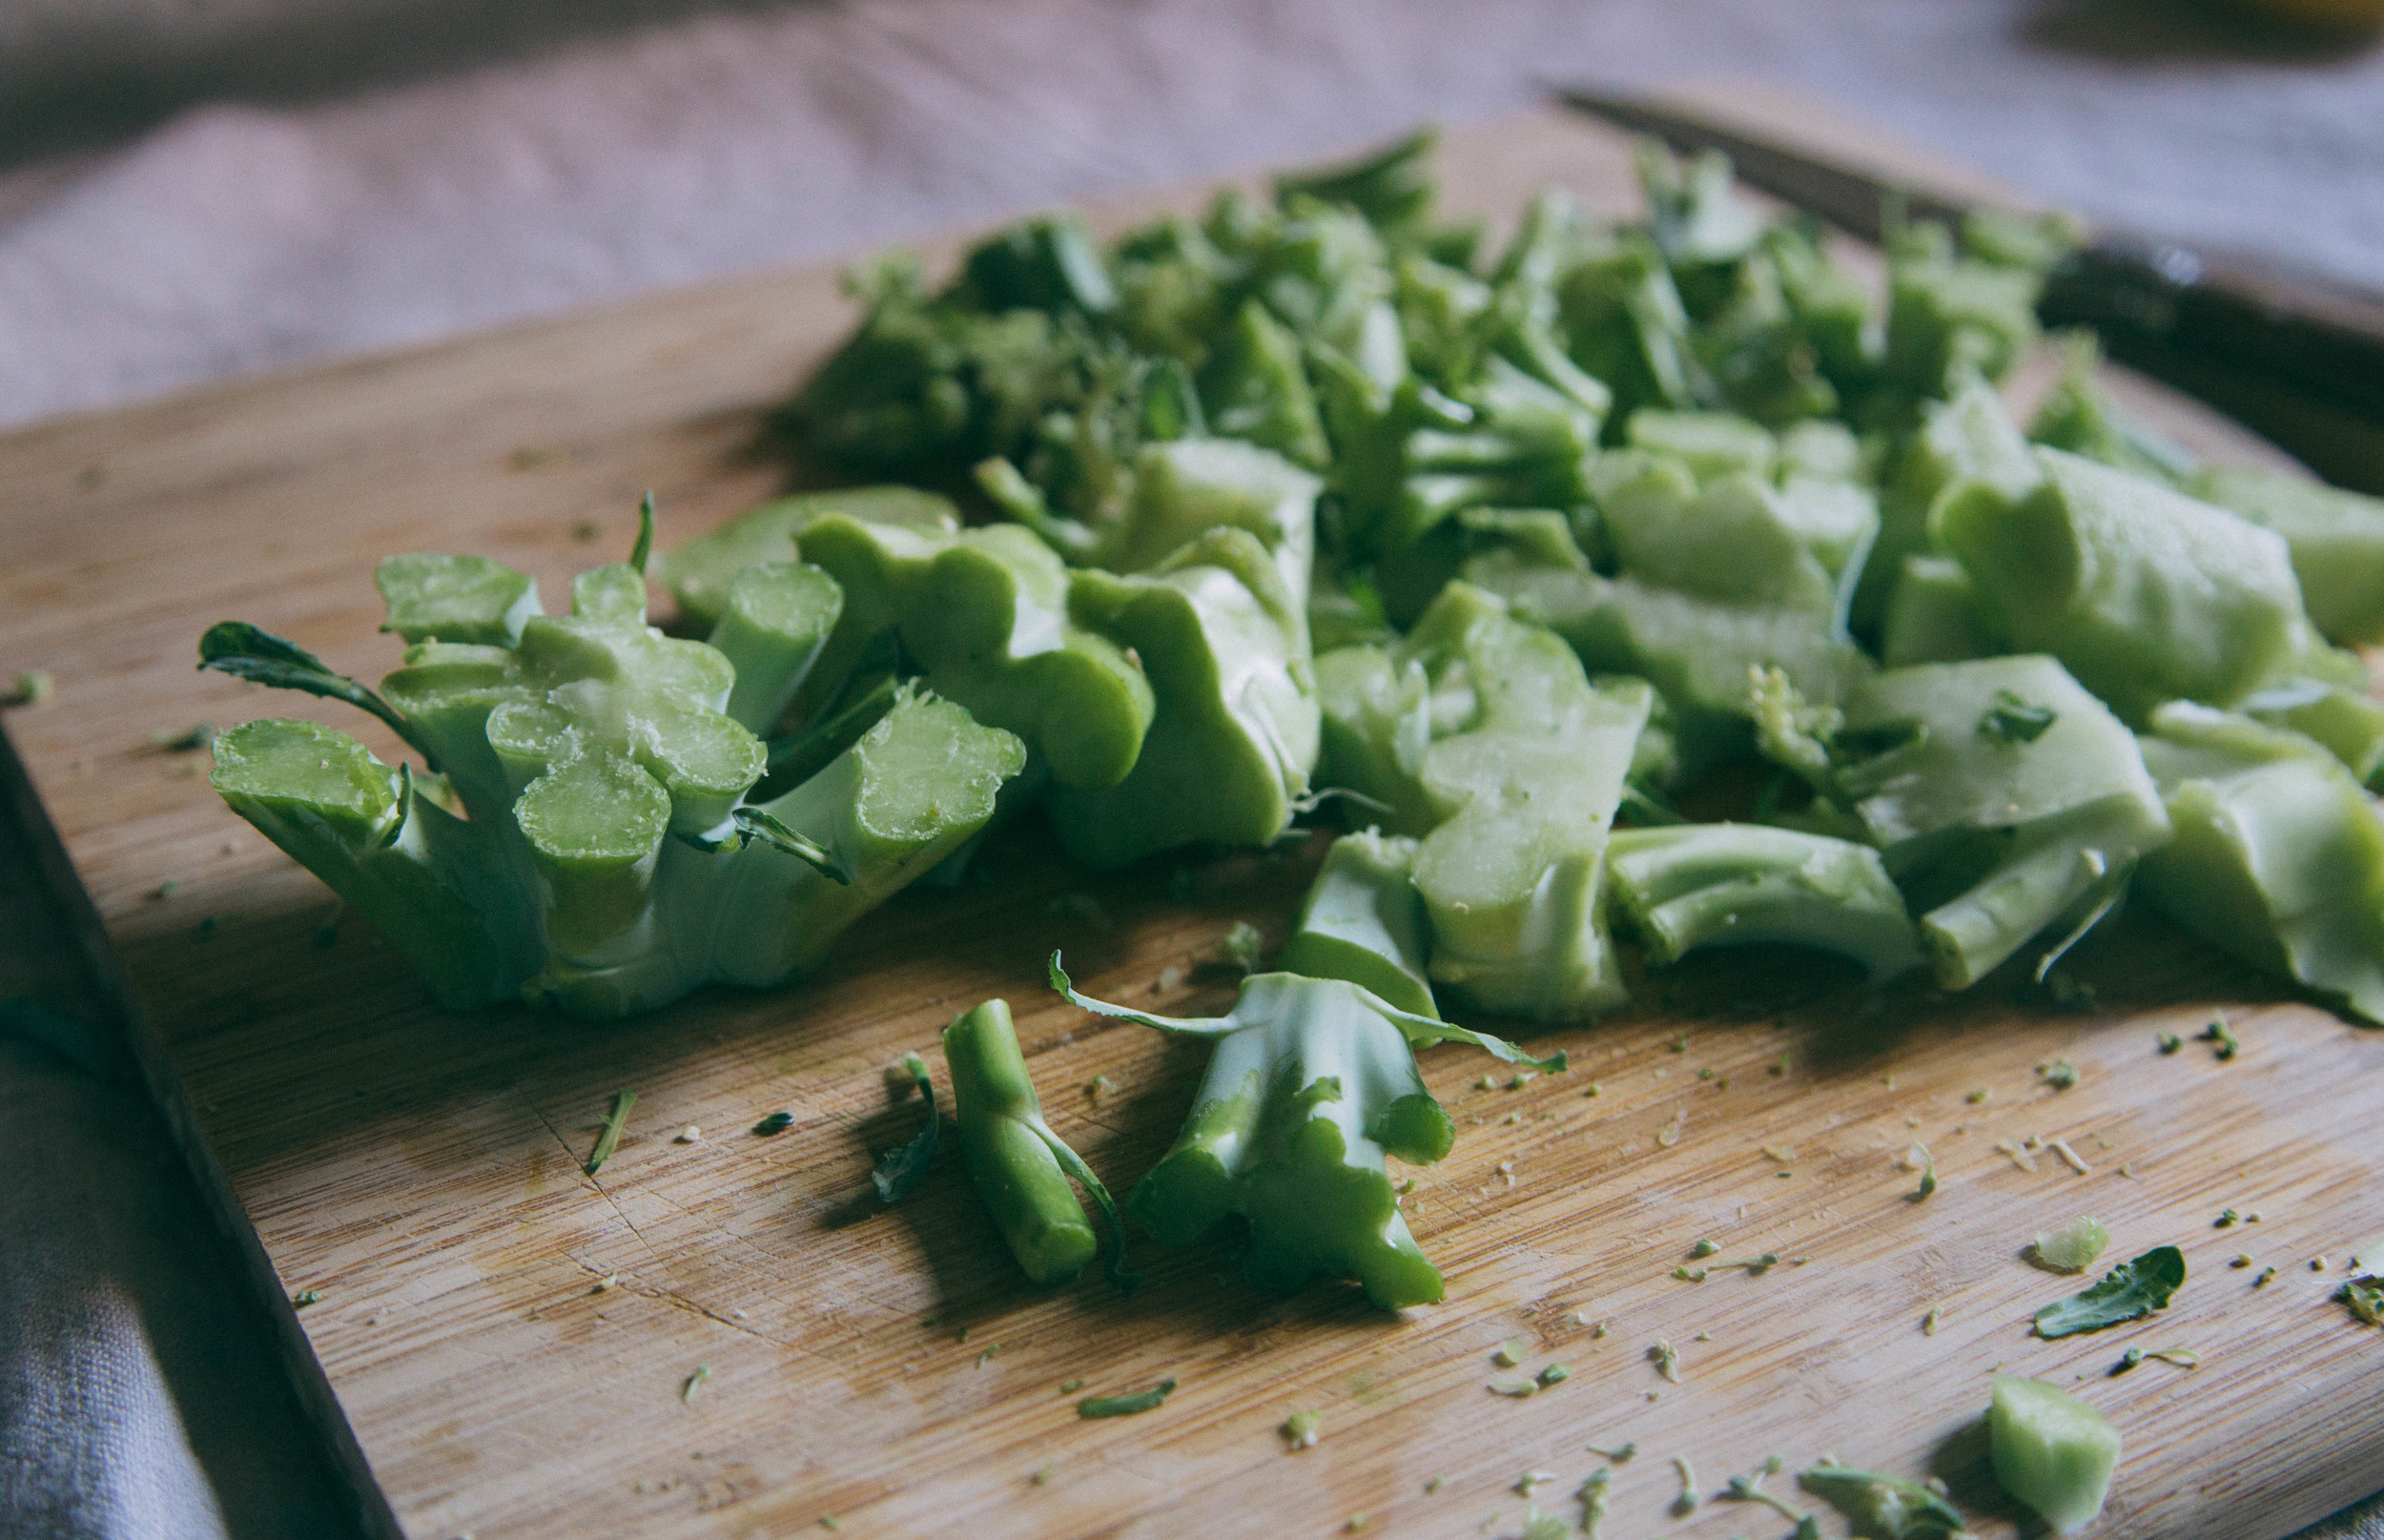
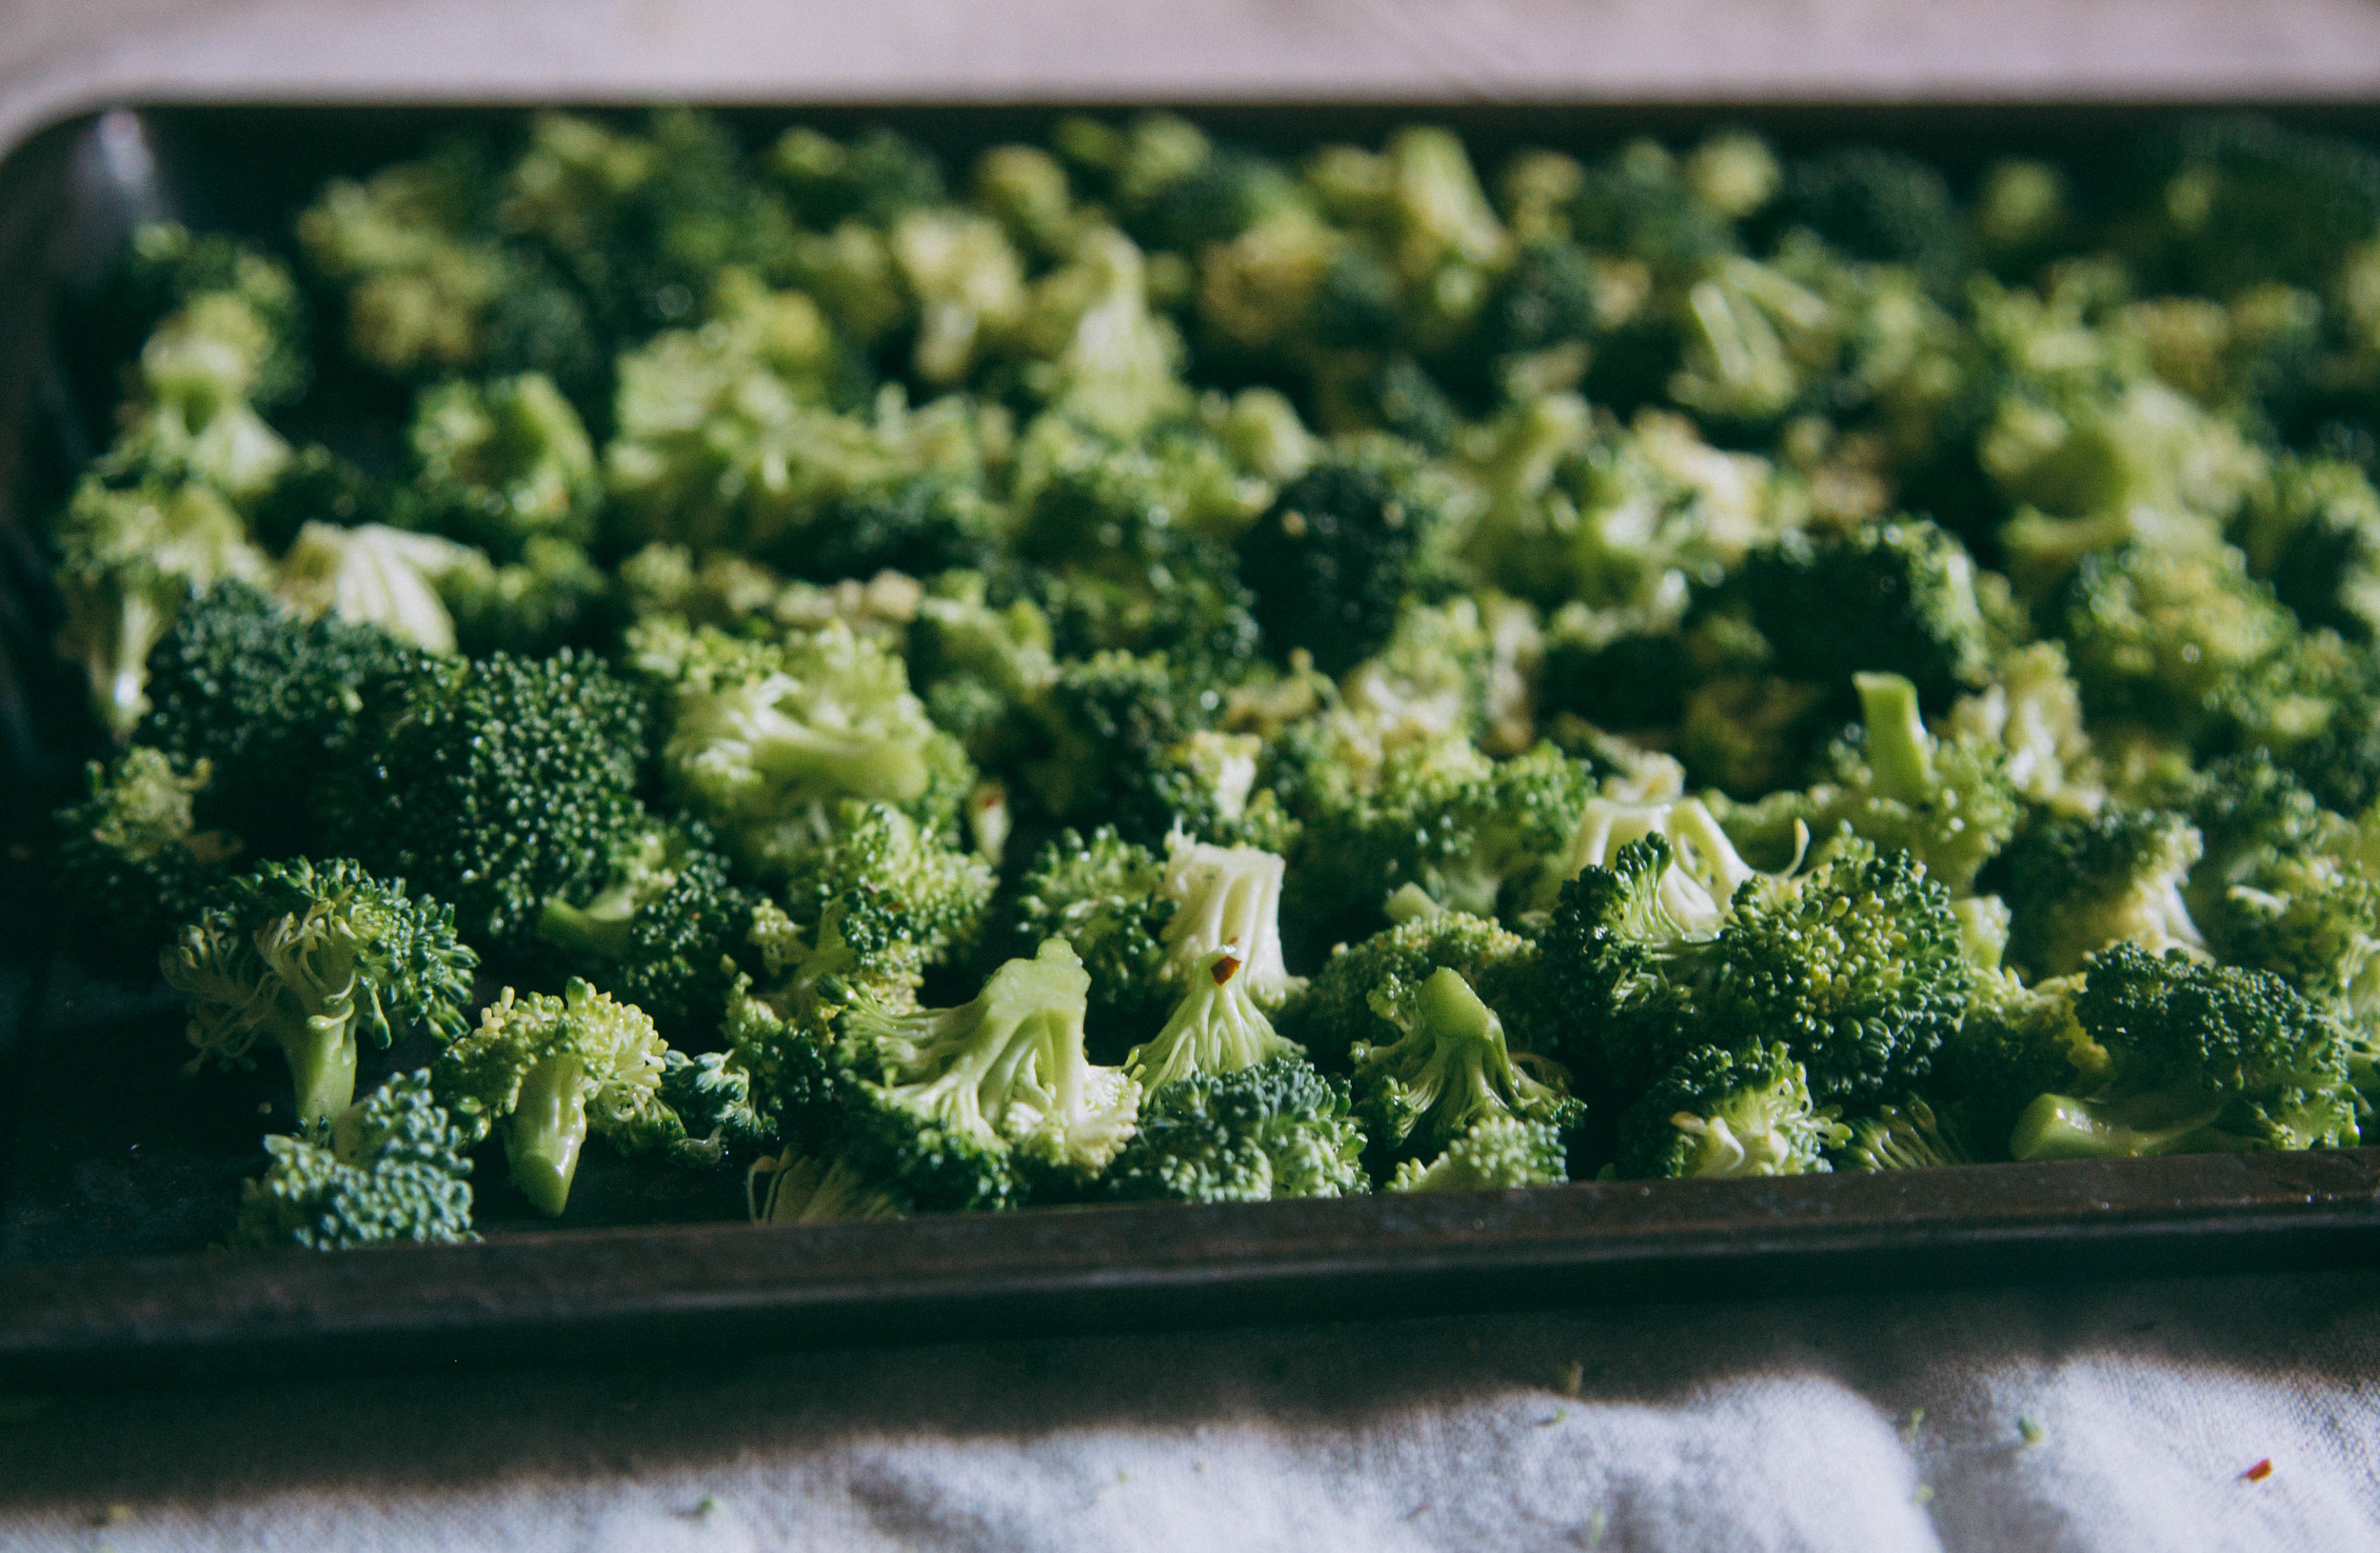
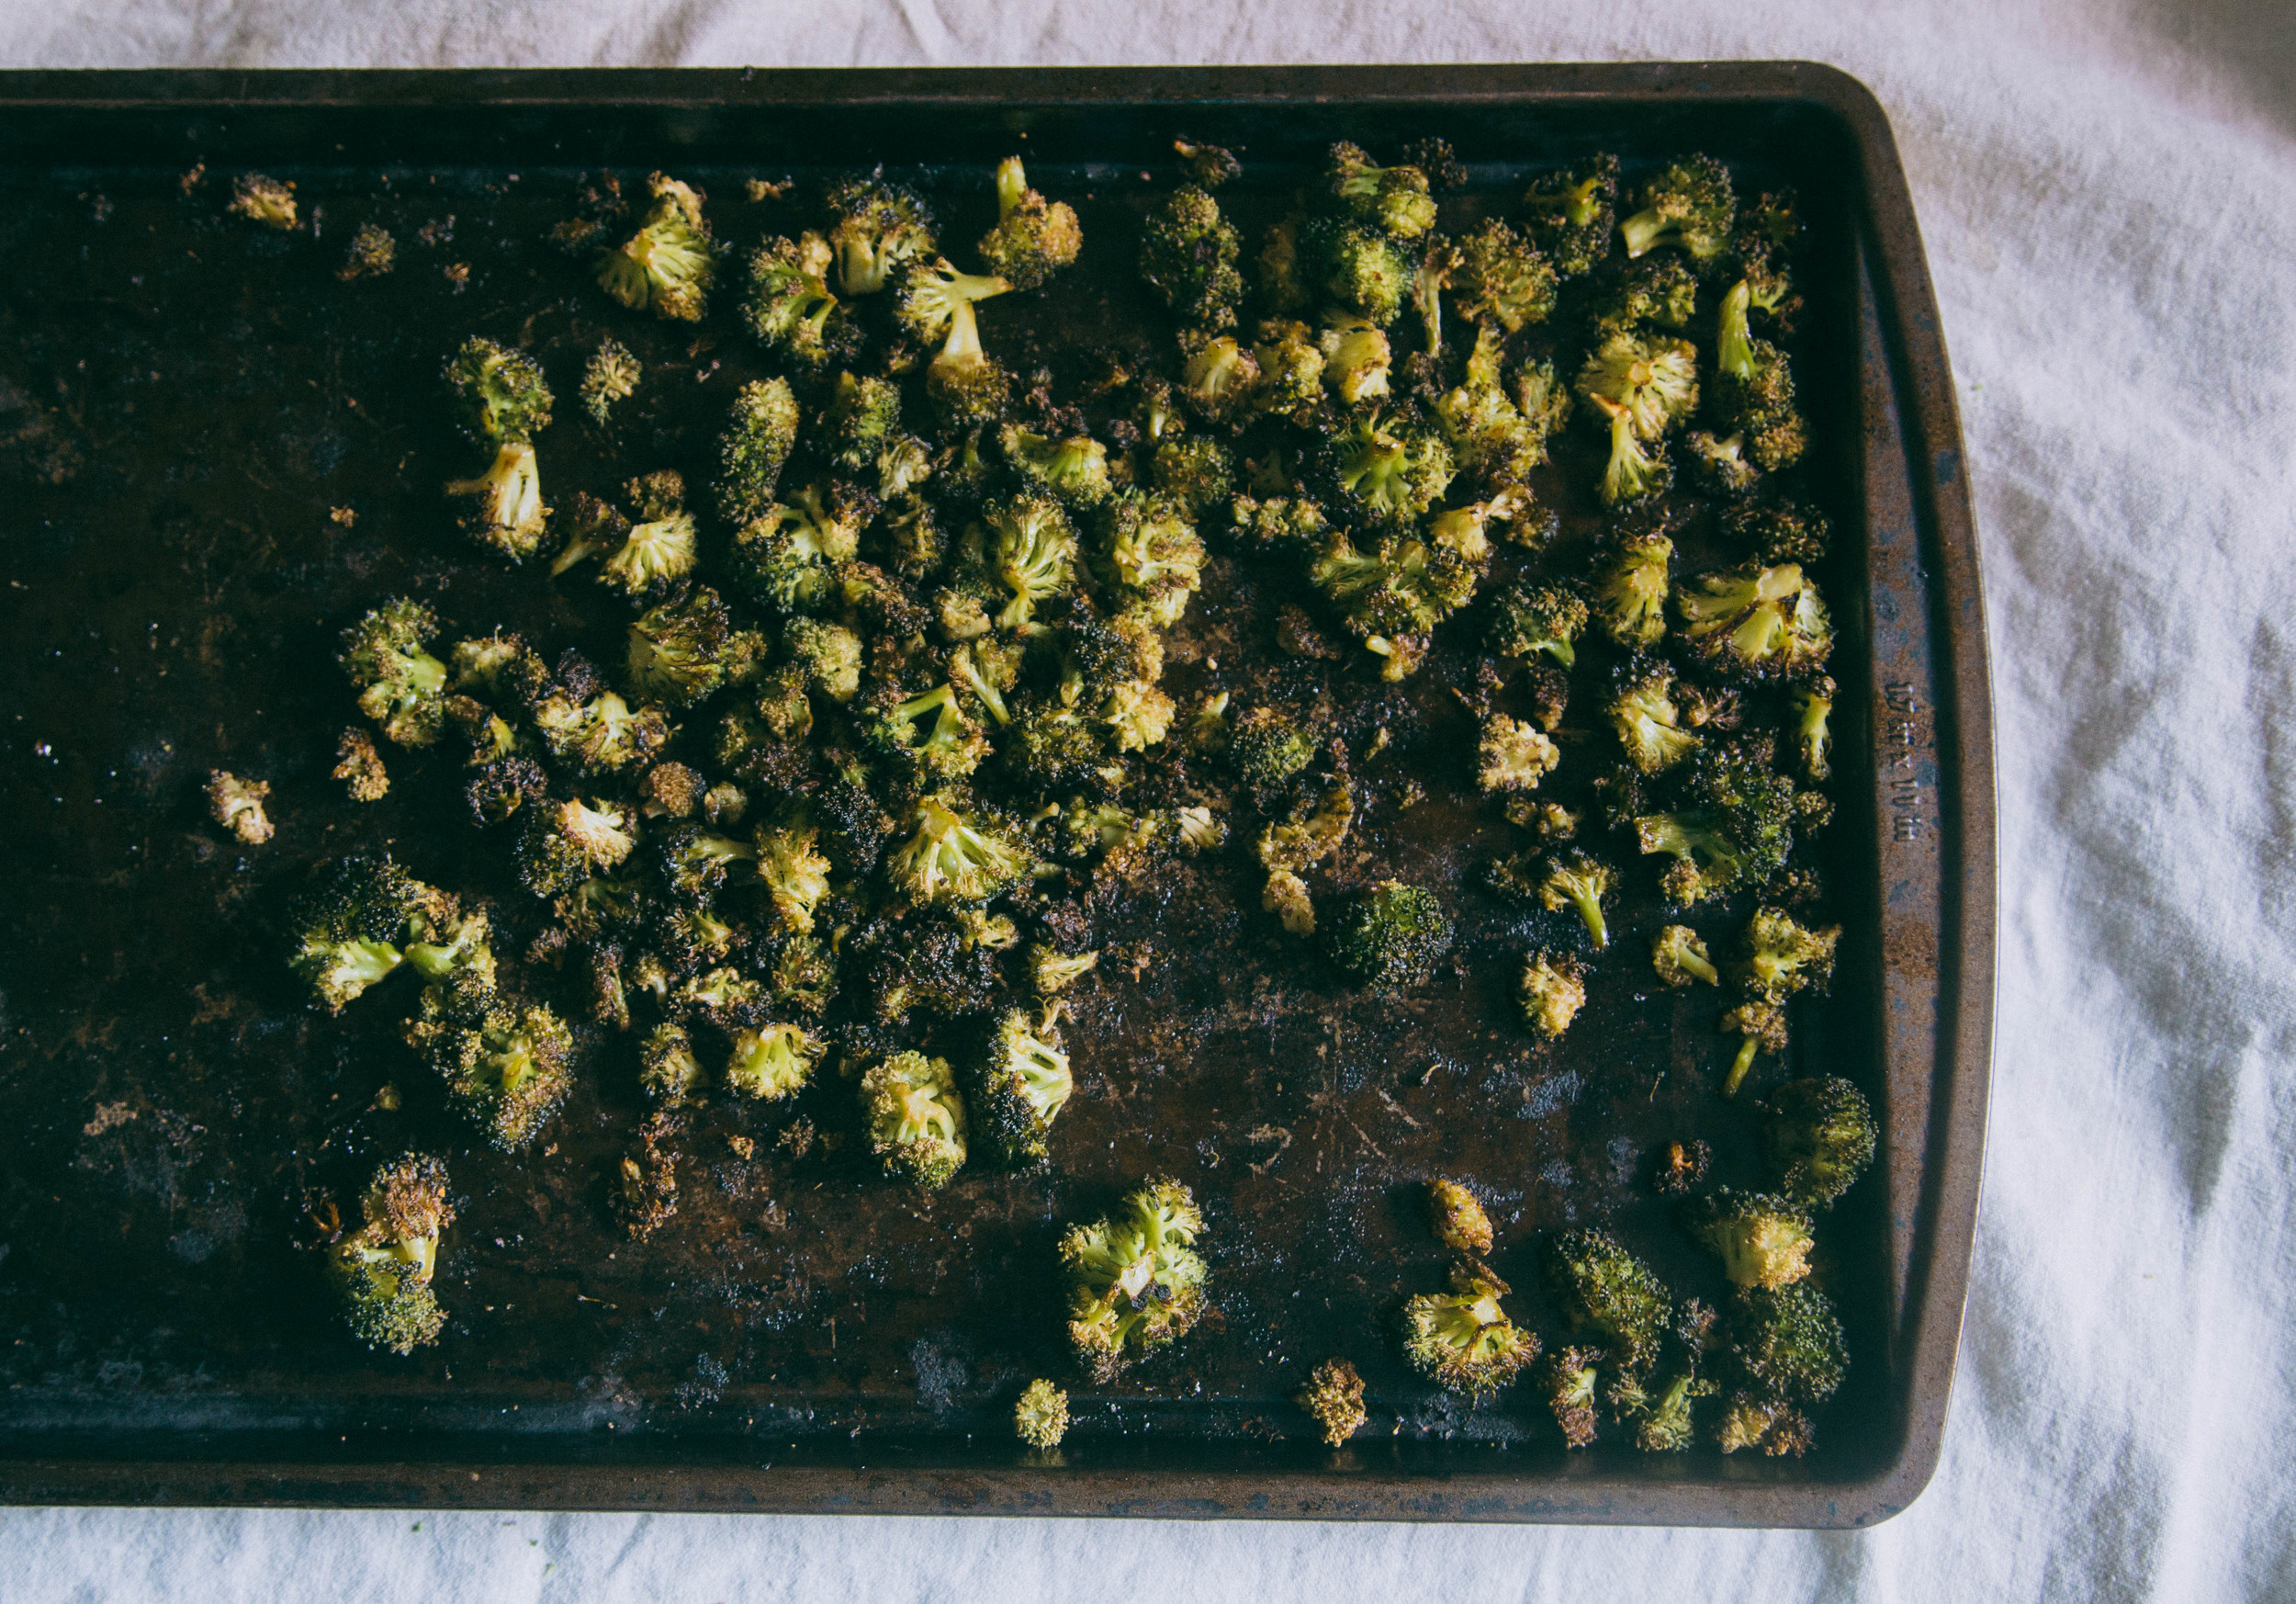
Preheat the oven to 450F. Cut the stems off the broccoli and set aside. Chop the florets into bite-sized pieces. On a baking tray mix the florets with juice from 1/2 the lemon, a good drizzle of olive oil, chili flakes, salt & pepper. Roast in the oven until crispy, turning half way through (approx. 20 mins total time, but watch them, you want to take them out just before they start to burn).
Dice the onion and garlic and sauté in olive oil on a medium heat. Roughly chop broccoli stems and potato, add these to the pan and season generously with salt & pepper. Sauté briefly then add the vegetable stock (adding more if you prefer a thinner soup). Bring to a boil, then simmer until broccoli stems and potato are tender.
Remove from the heat and blend until smooth. Add the other 1/2 of the lemon juice and adjust seasoning to taste. In a small pan, gently toast the pine nuts. To serve, ladle soup into bowls and top with crispy broccoli and toasted pine nuts.
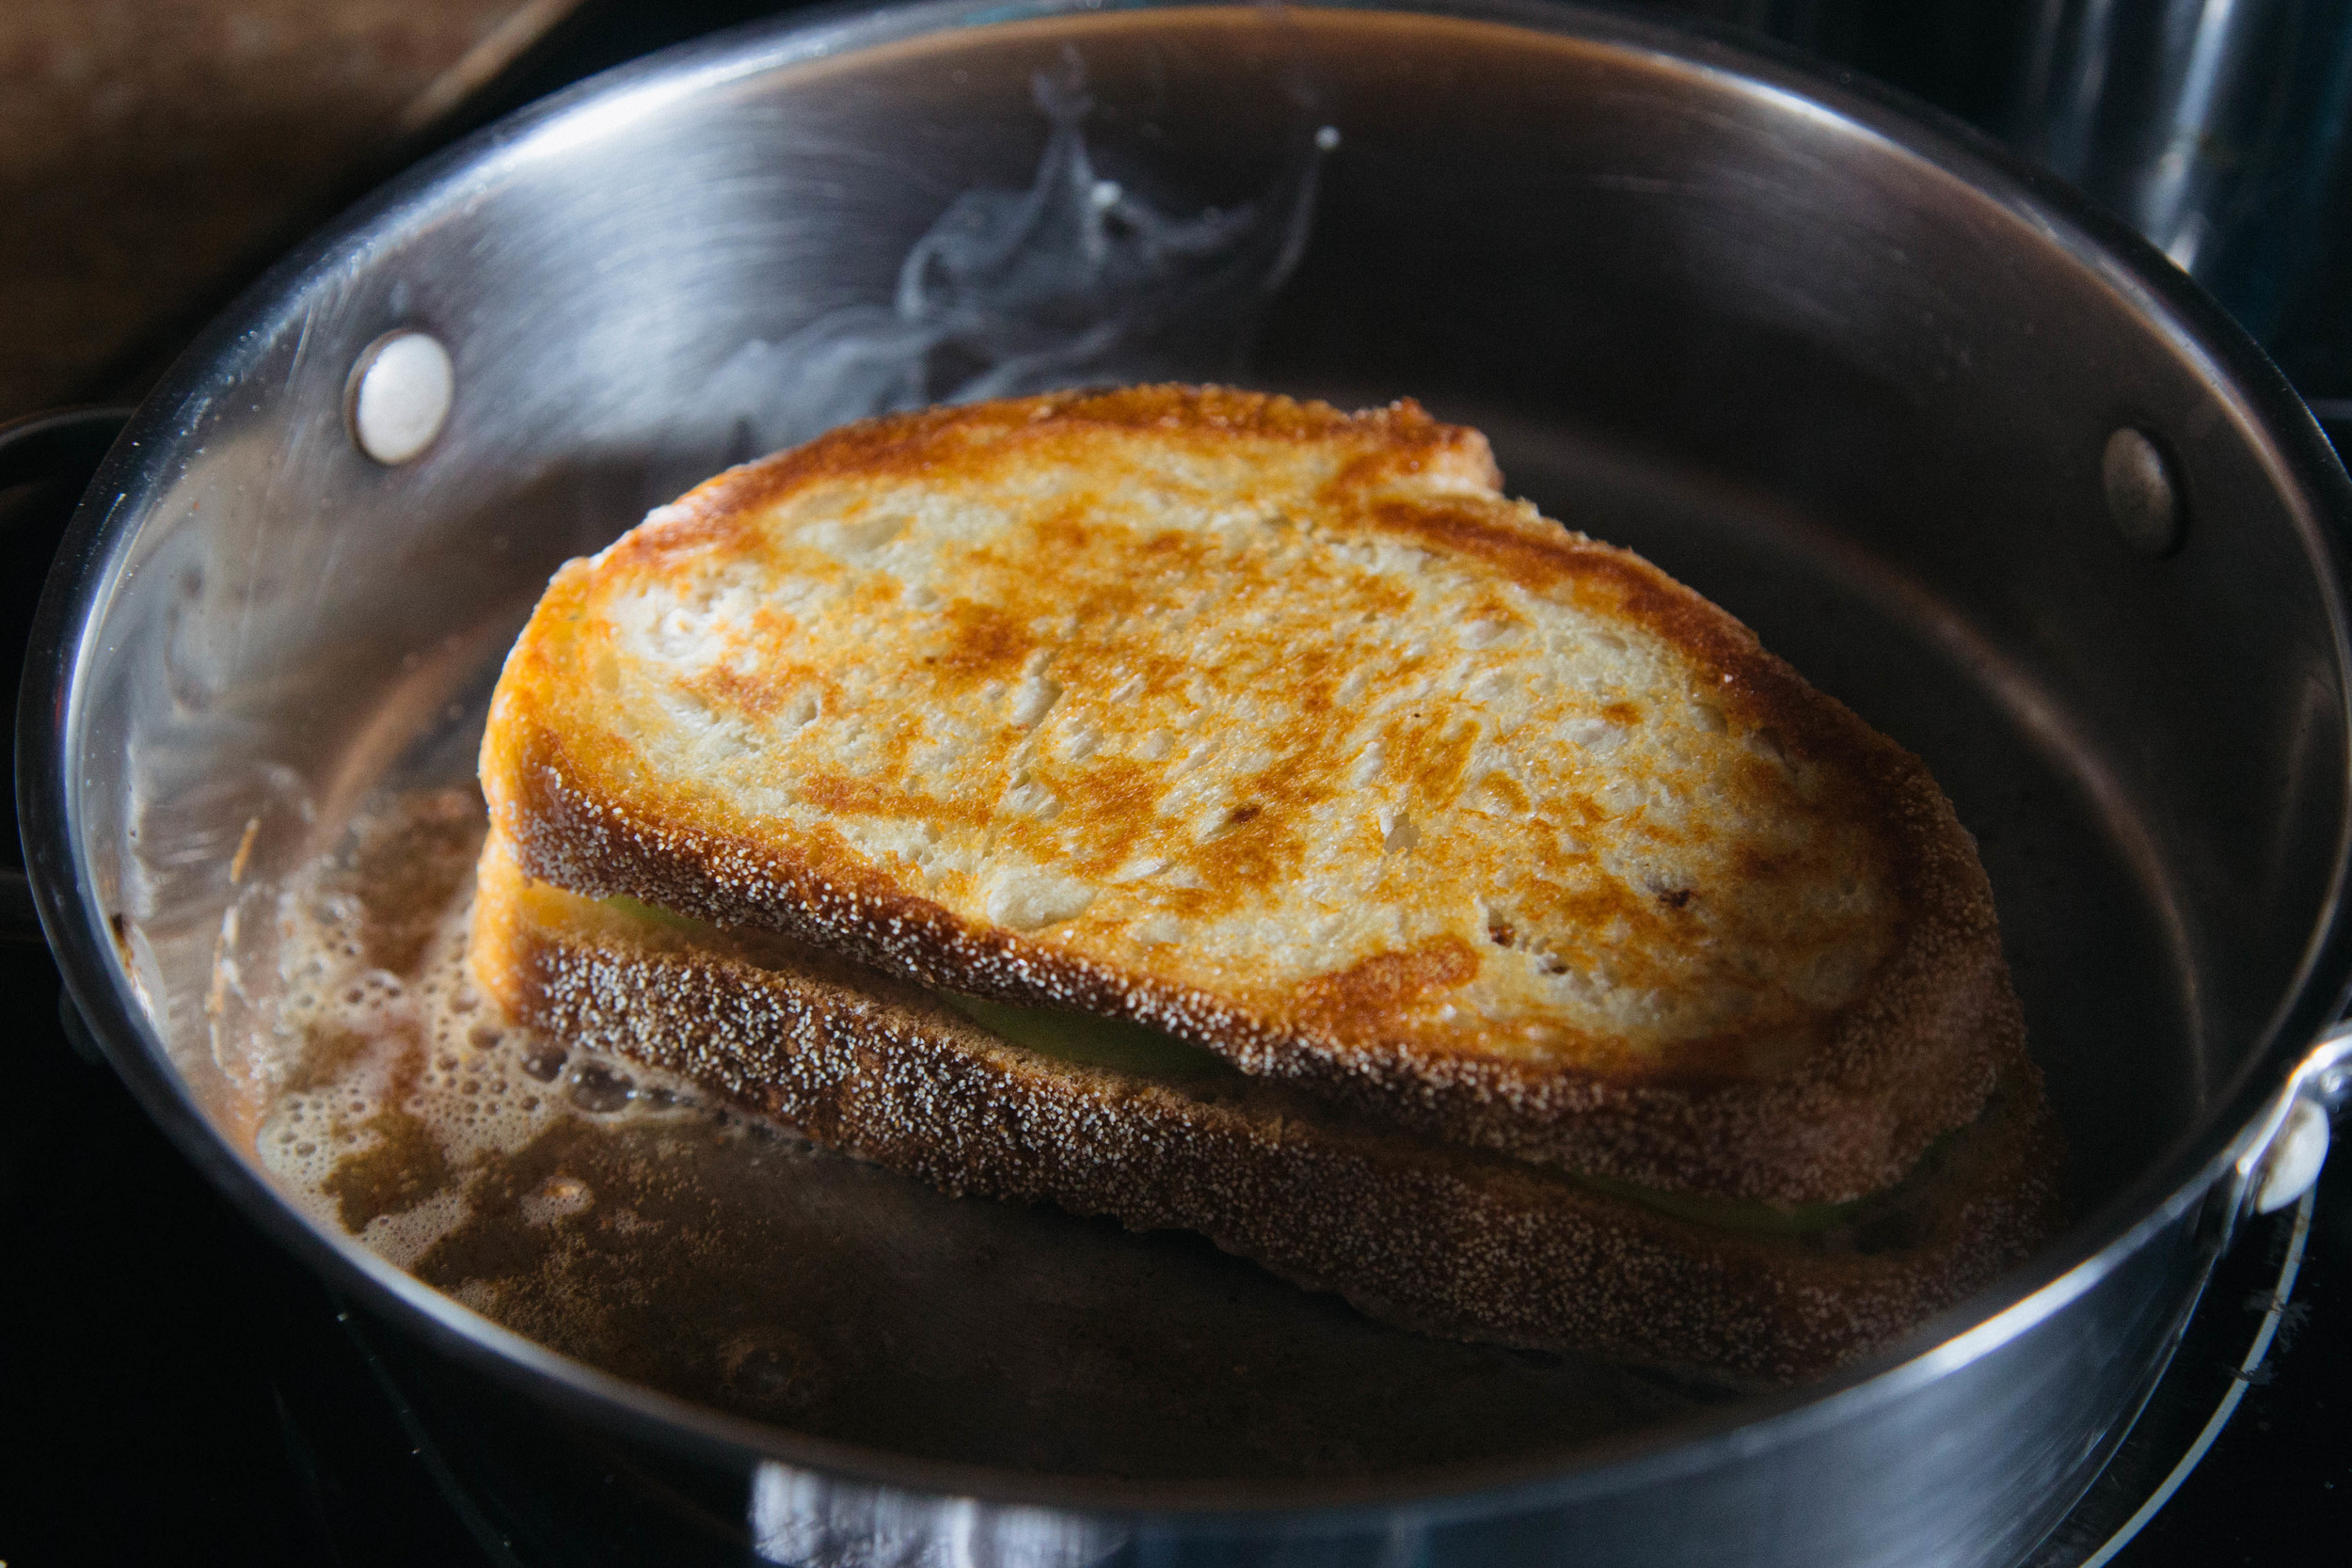
Is there anything more comforting than a grilled cheese? Every time I make a grilled cheese, I'm like why don't I eat these ALL THE TIME?!? and then I remember that balance and not eating all the carbs and fat is important blah blah blah. But since my last post was a kale/quinoa salad and my next post will be a broccoli soup, I figure a little grilled cheese is fine.
I used to spend my summers working in French deli. For three months every year, I ate like a queen. Café au lait, macaroons, pain au chocolate, madeleines, baguette.... and that was usually before lunch. When lunch hit we would grab a loaf of bread, some ham or pâté, mustard, whatever cheese we fancied and feast. We had a panini press but the deli owner firmly believed that melted cheese was for children, so we never used it... except when he was gone. I firmly believe that melted cheese is for everyone and I'm pretty sure this sandwich proves it.
Steps
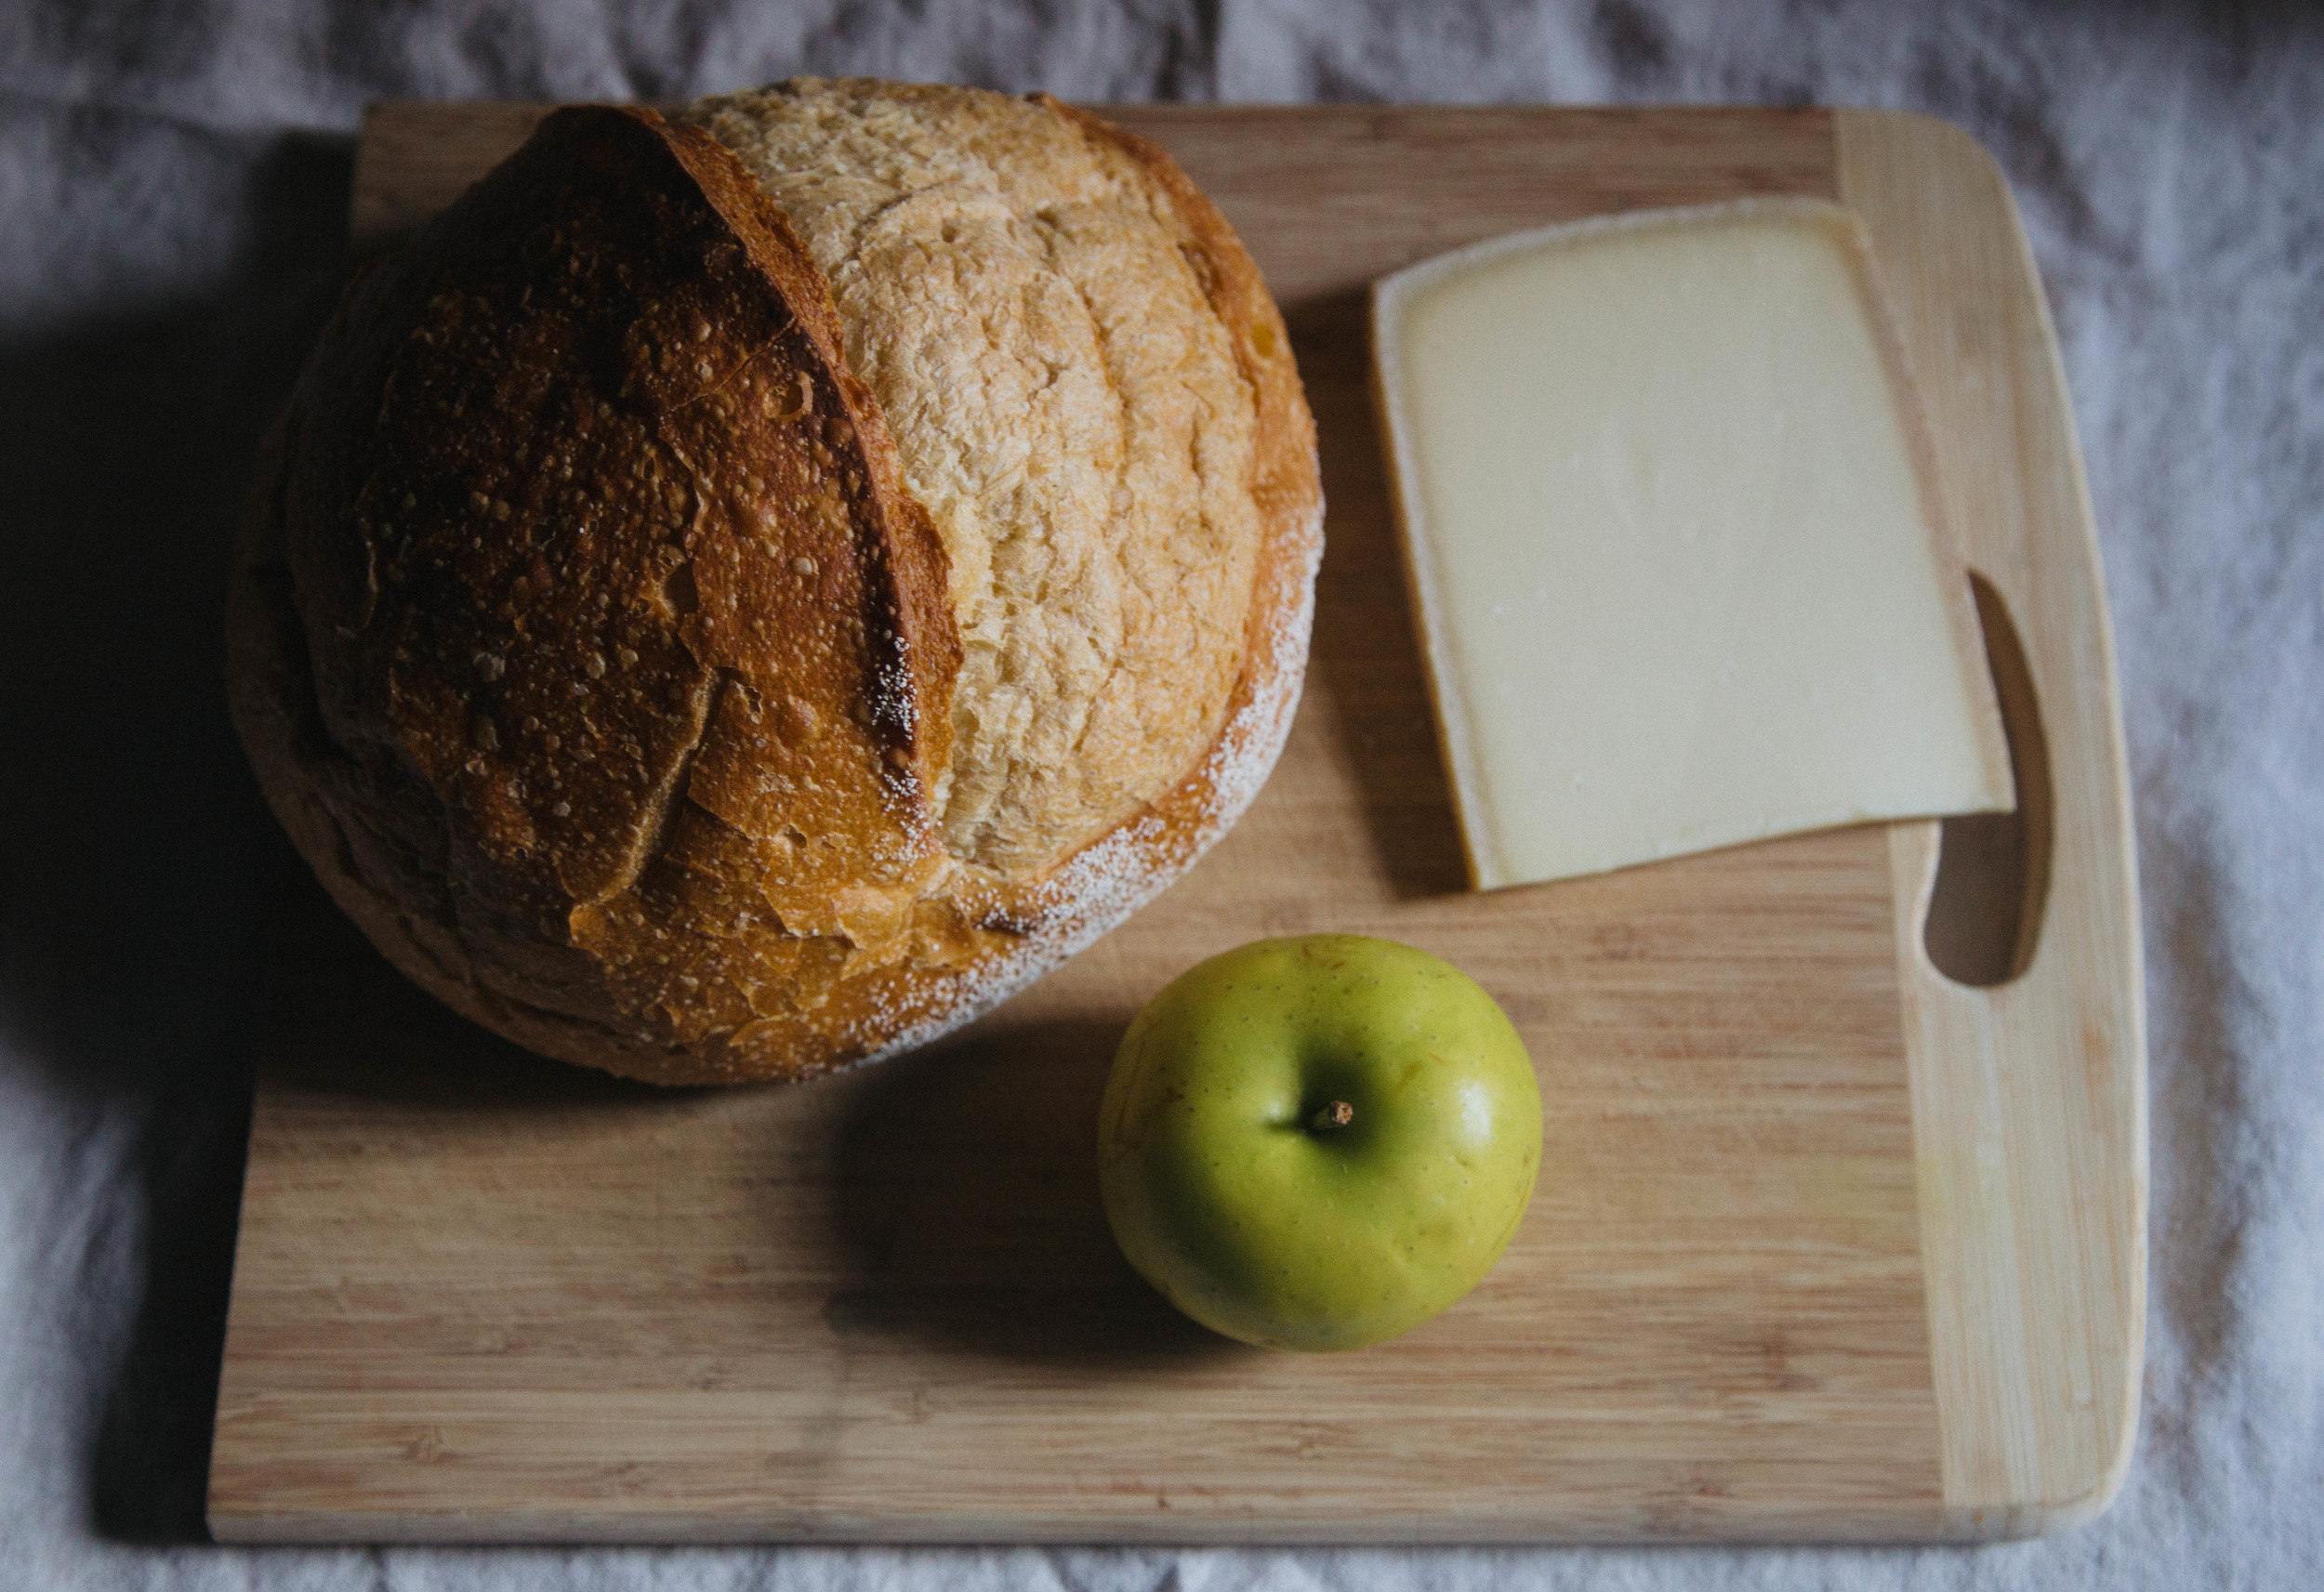
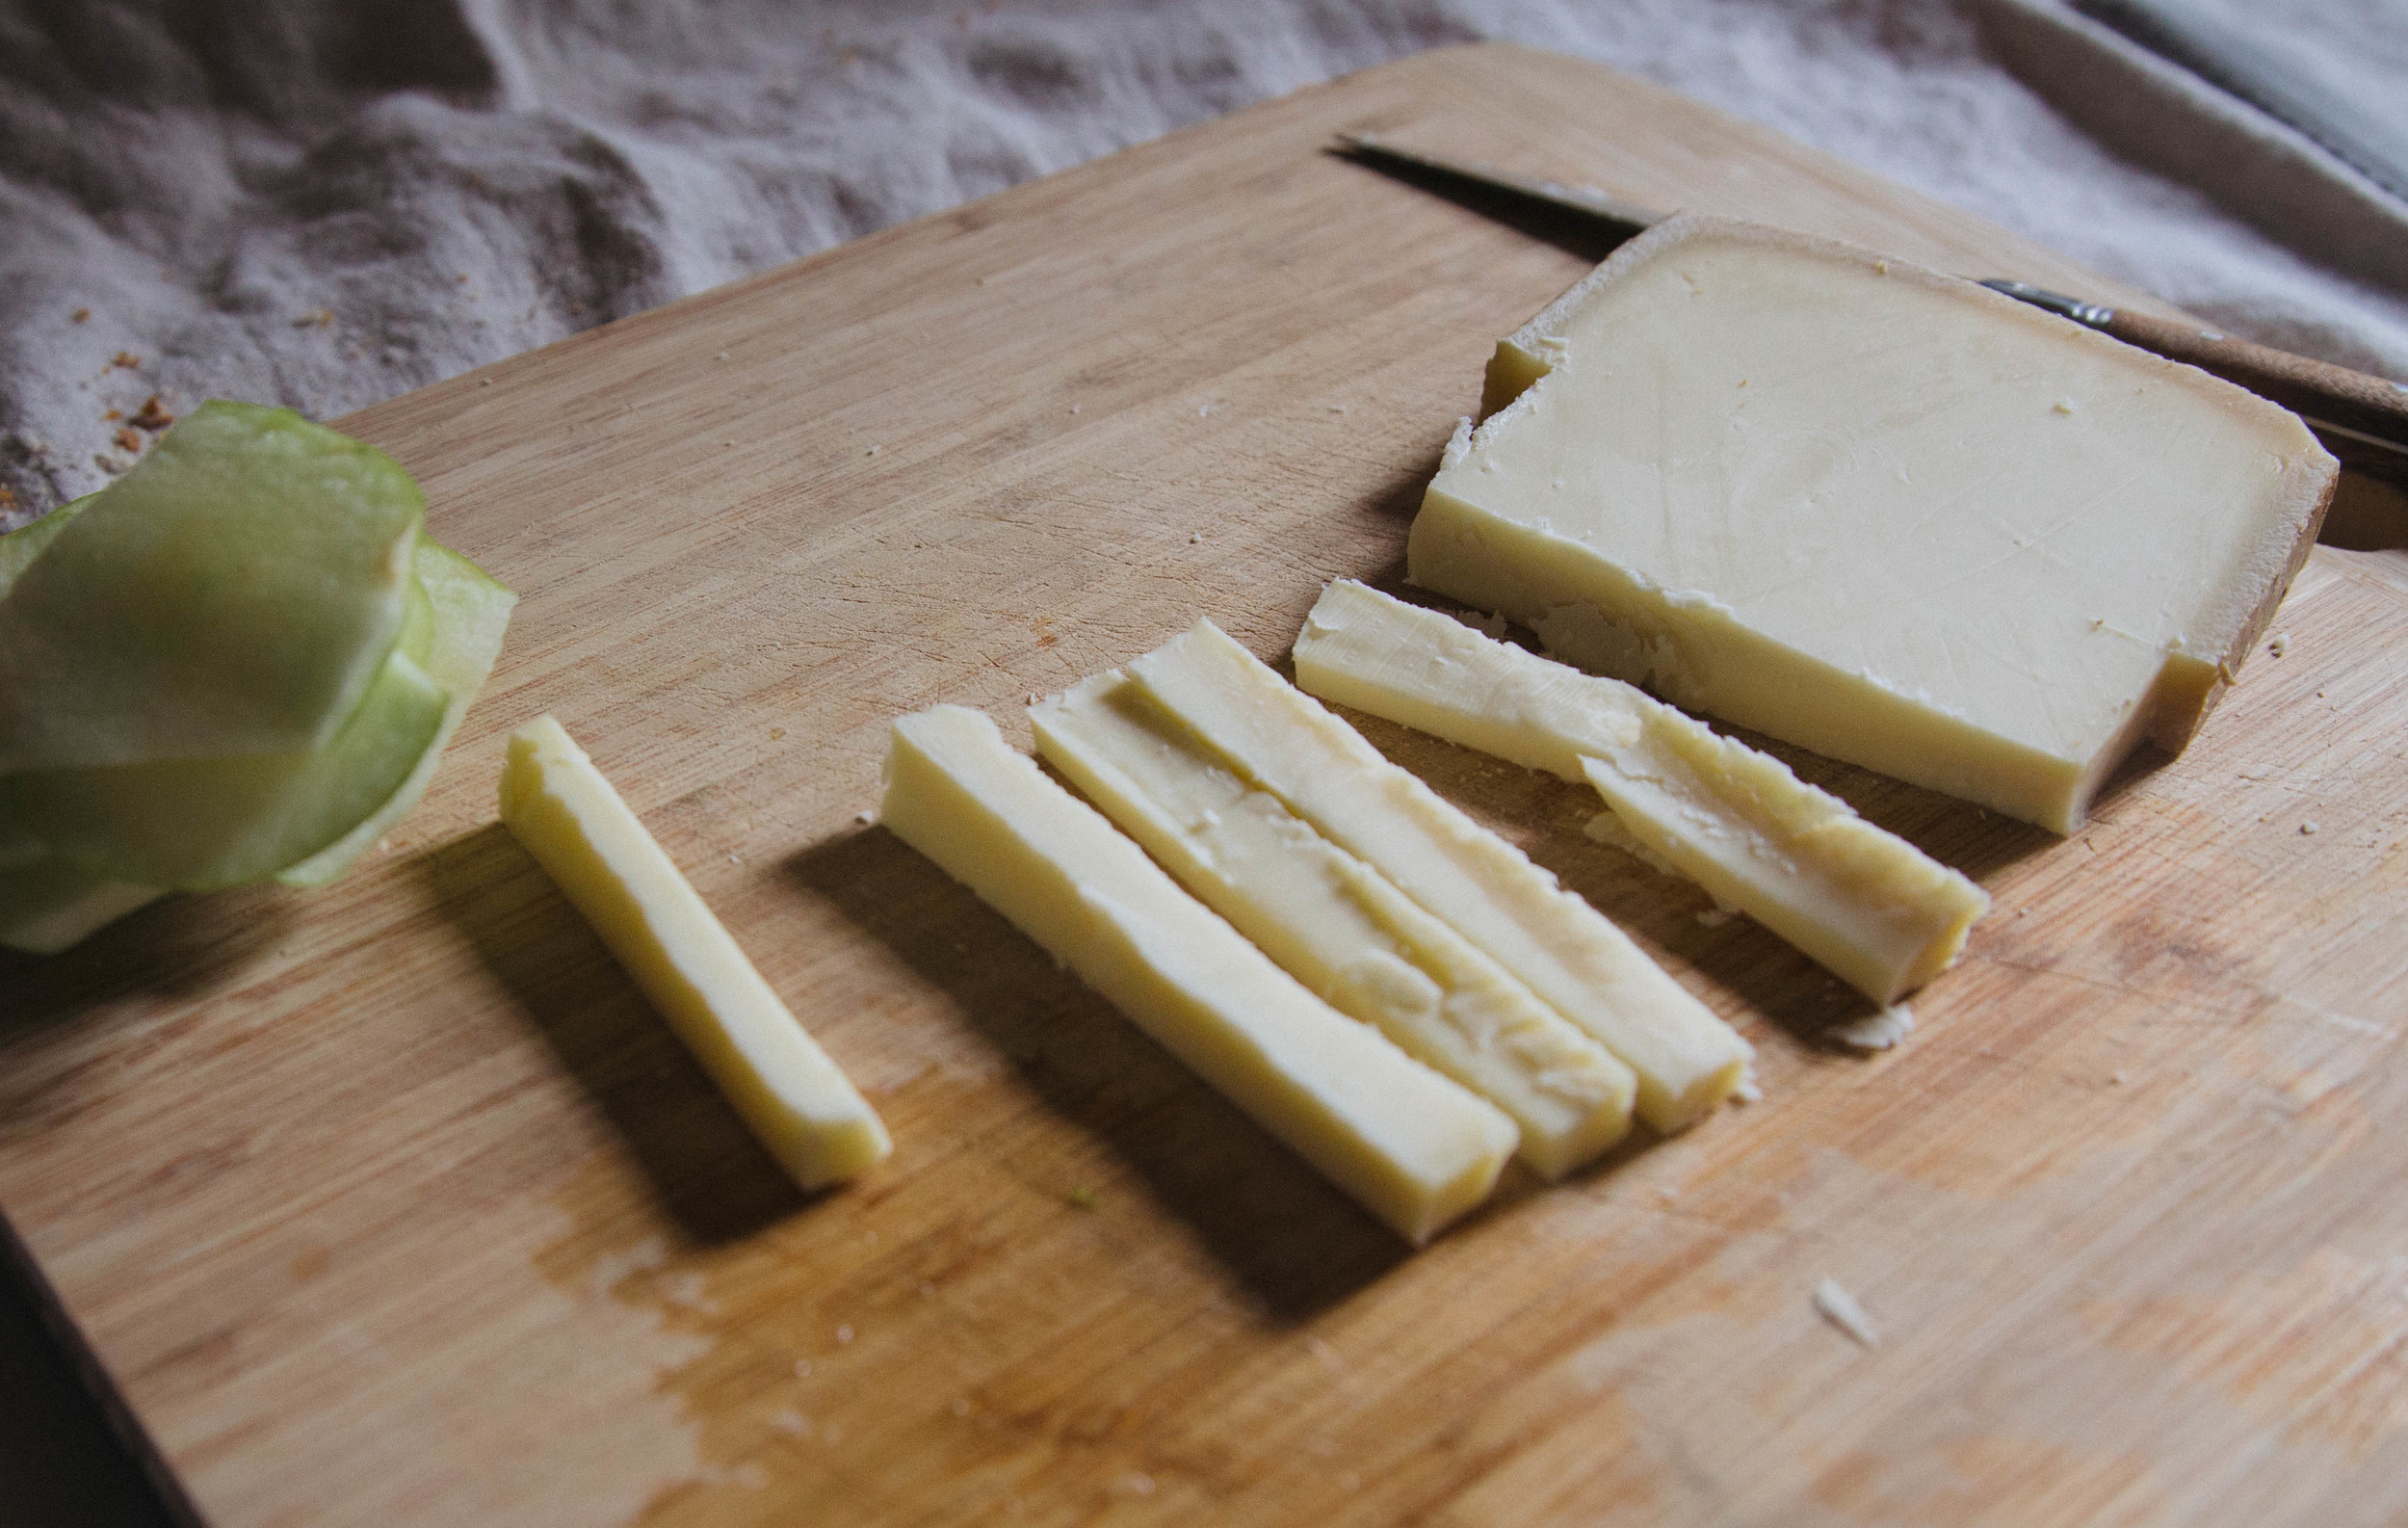
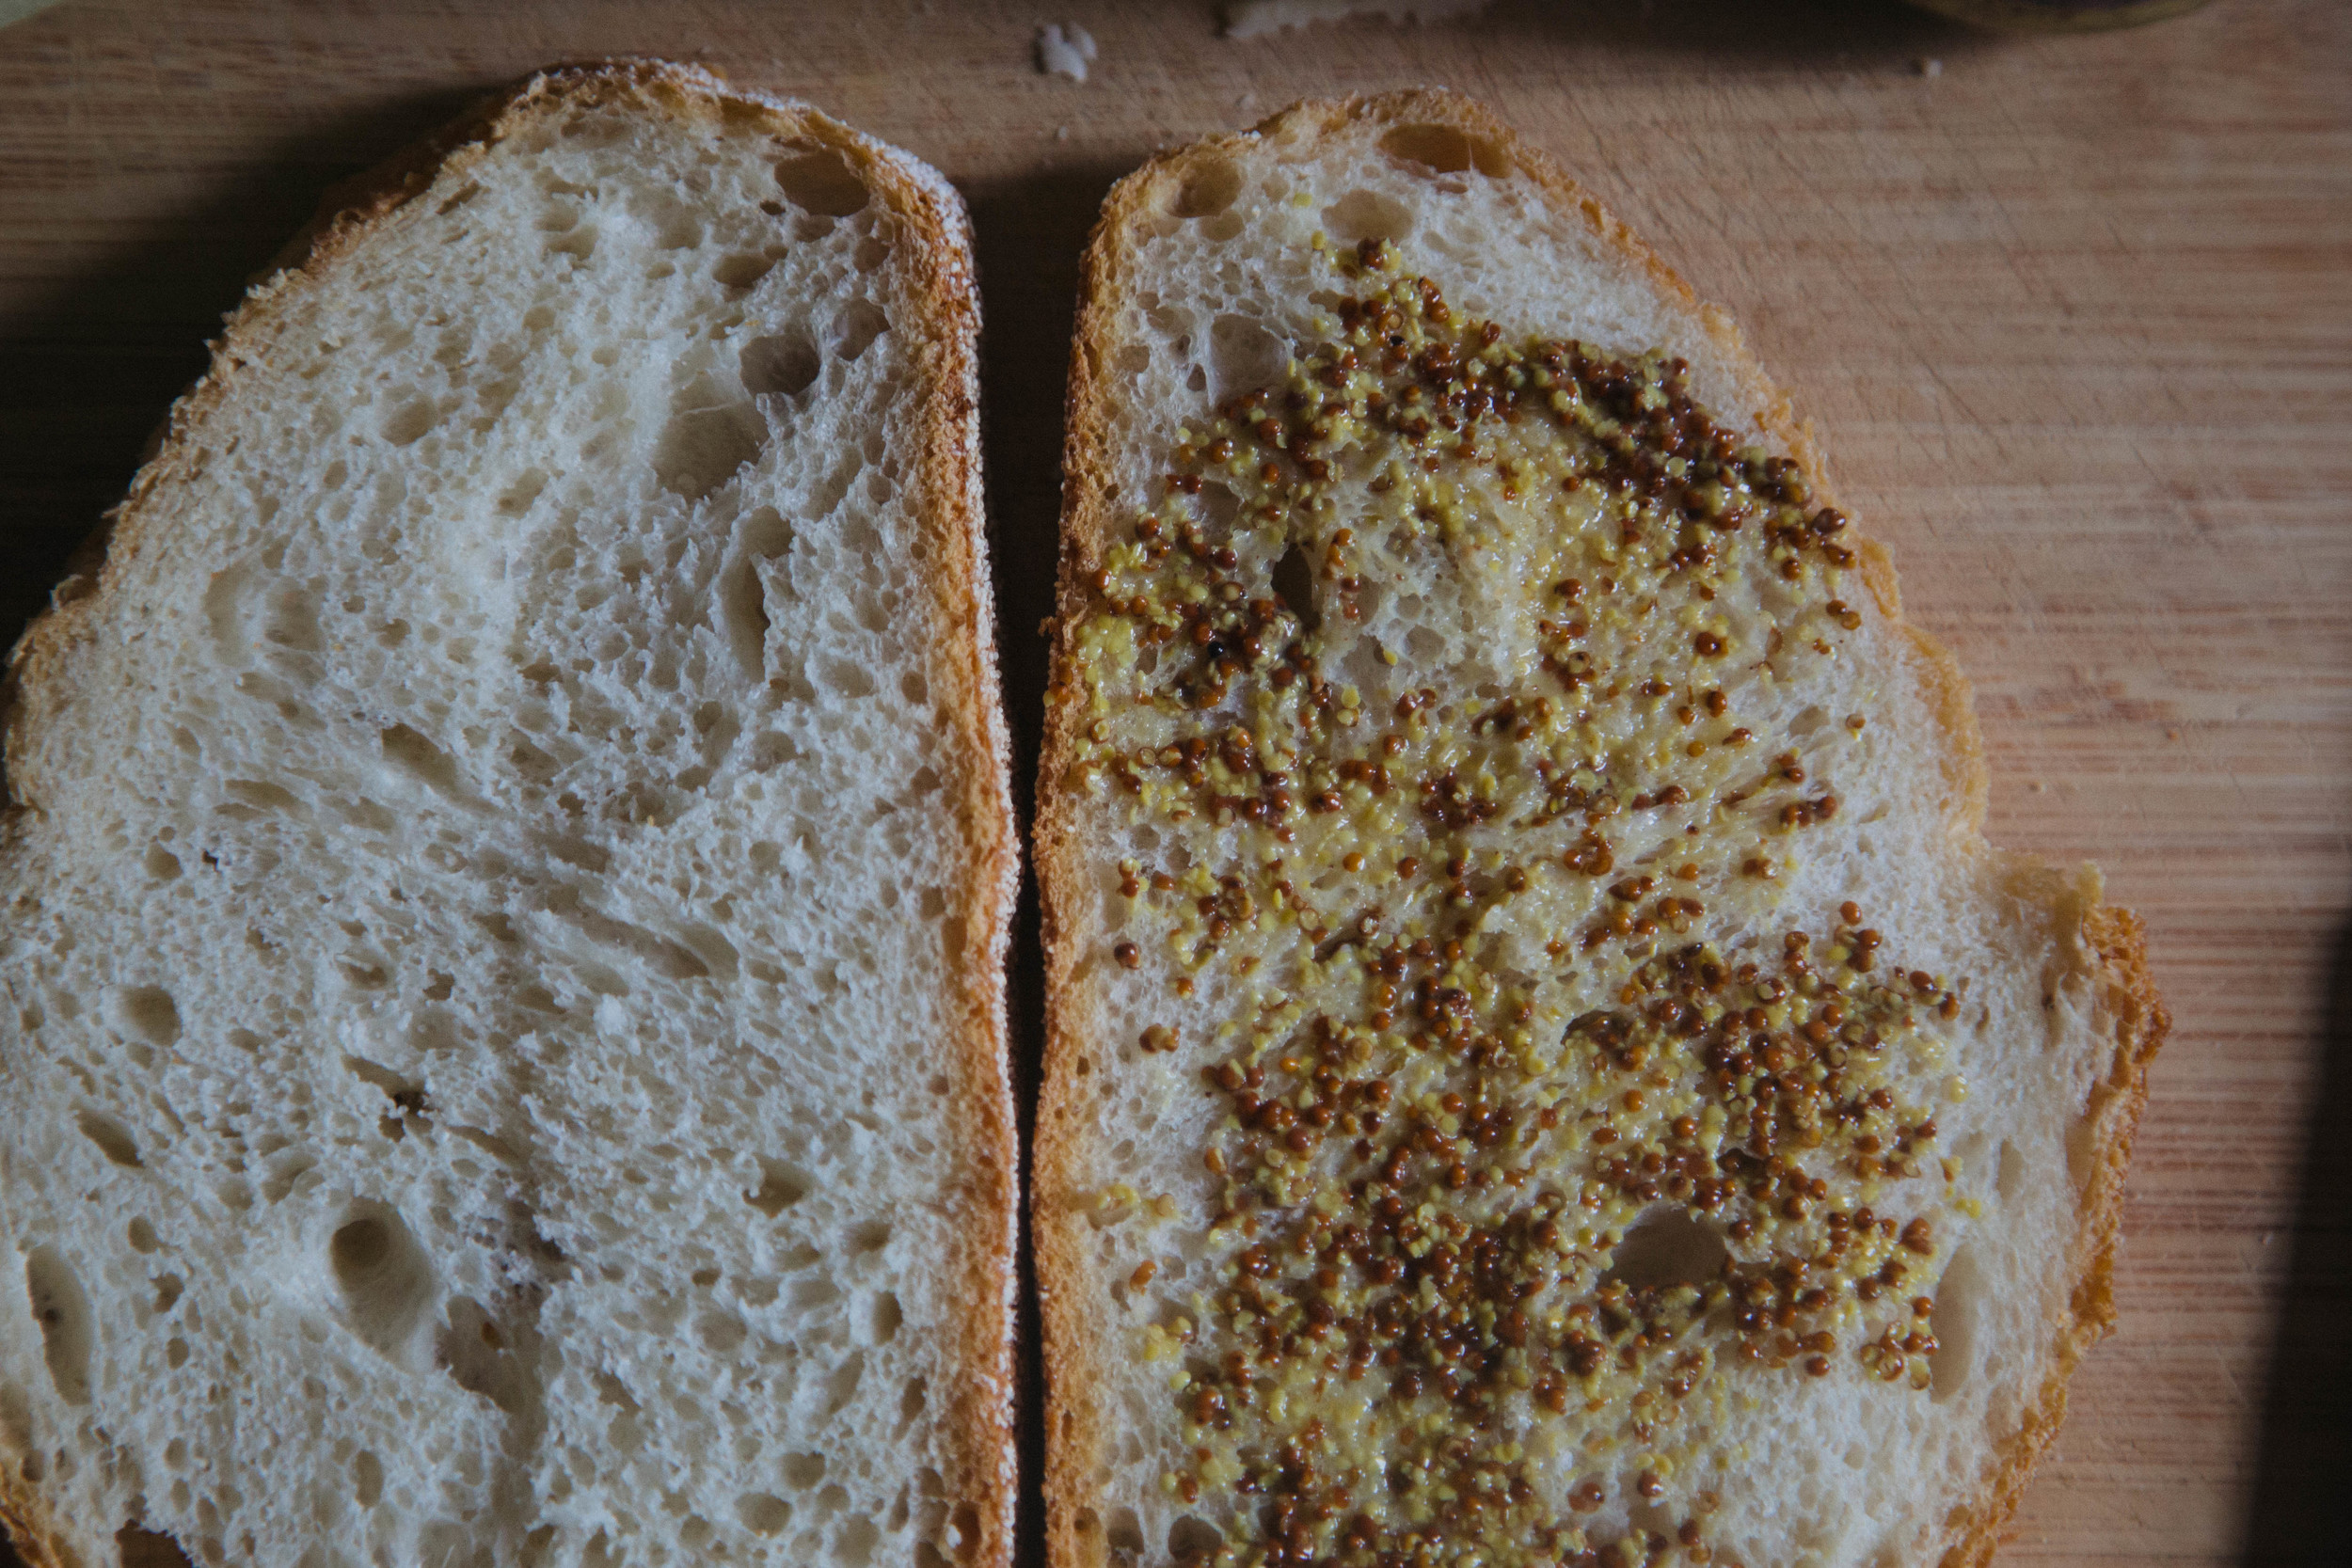
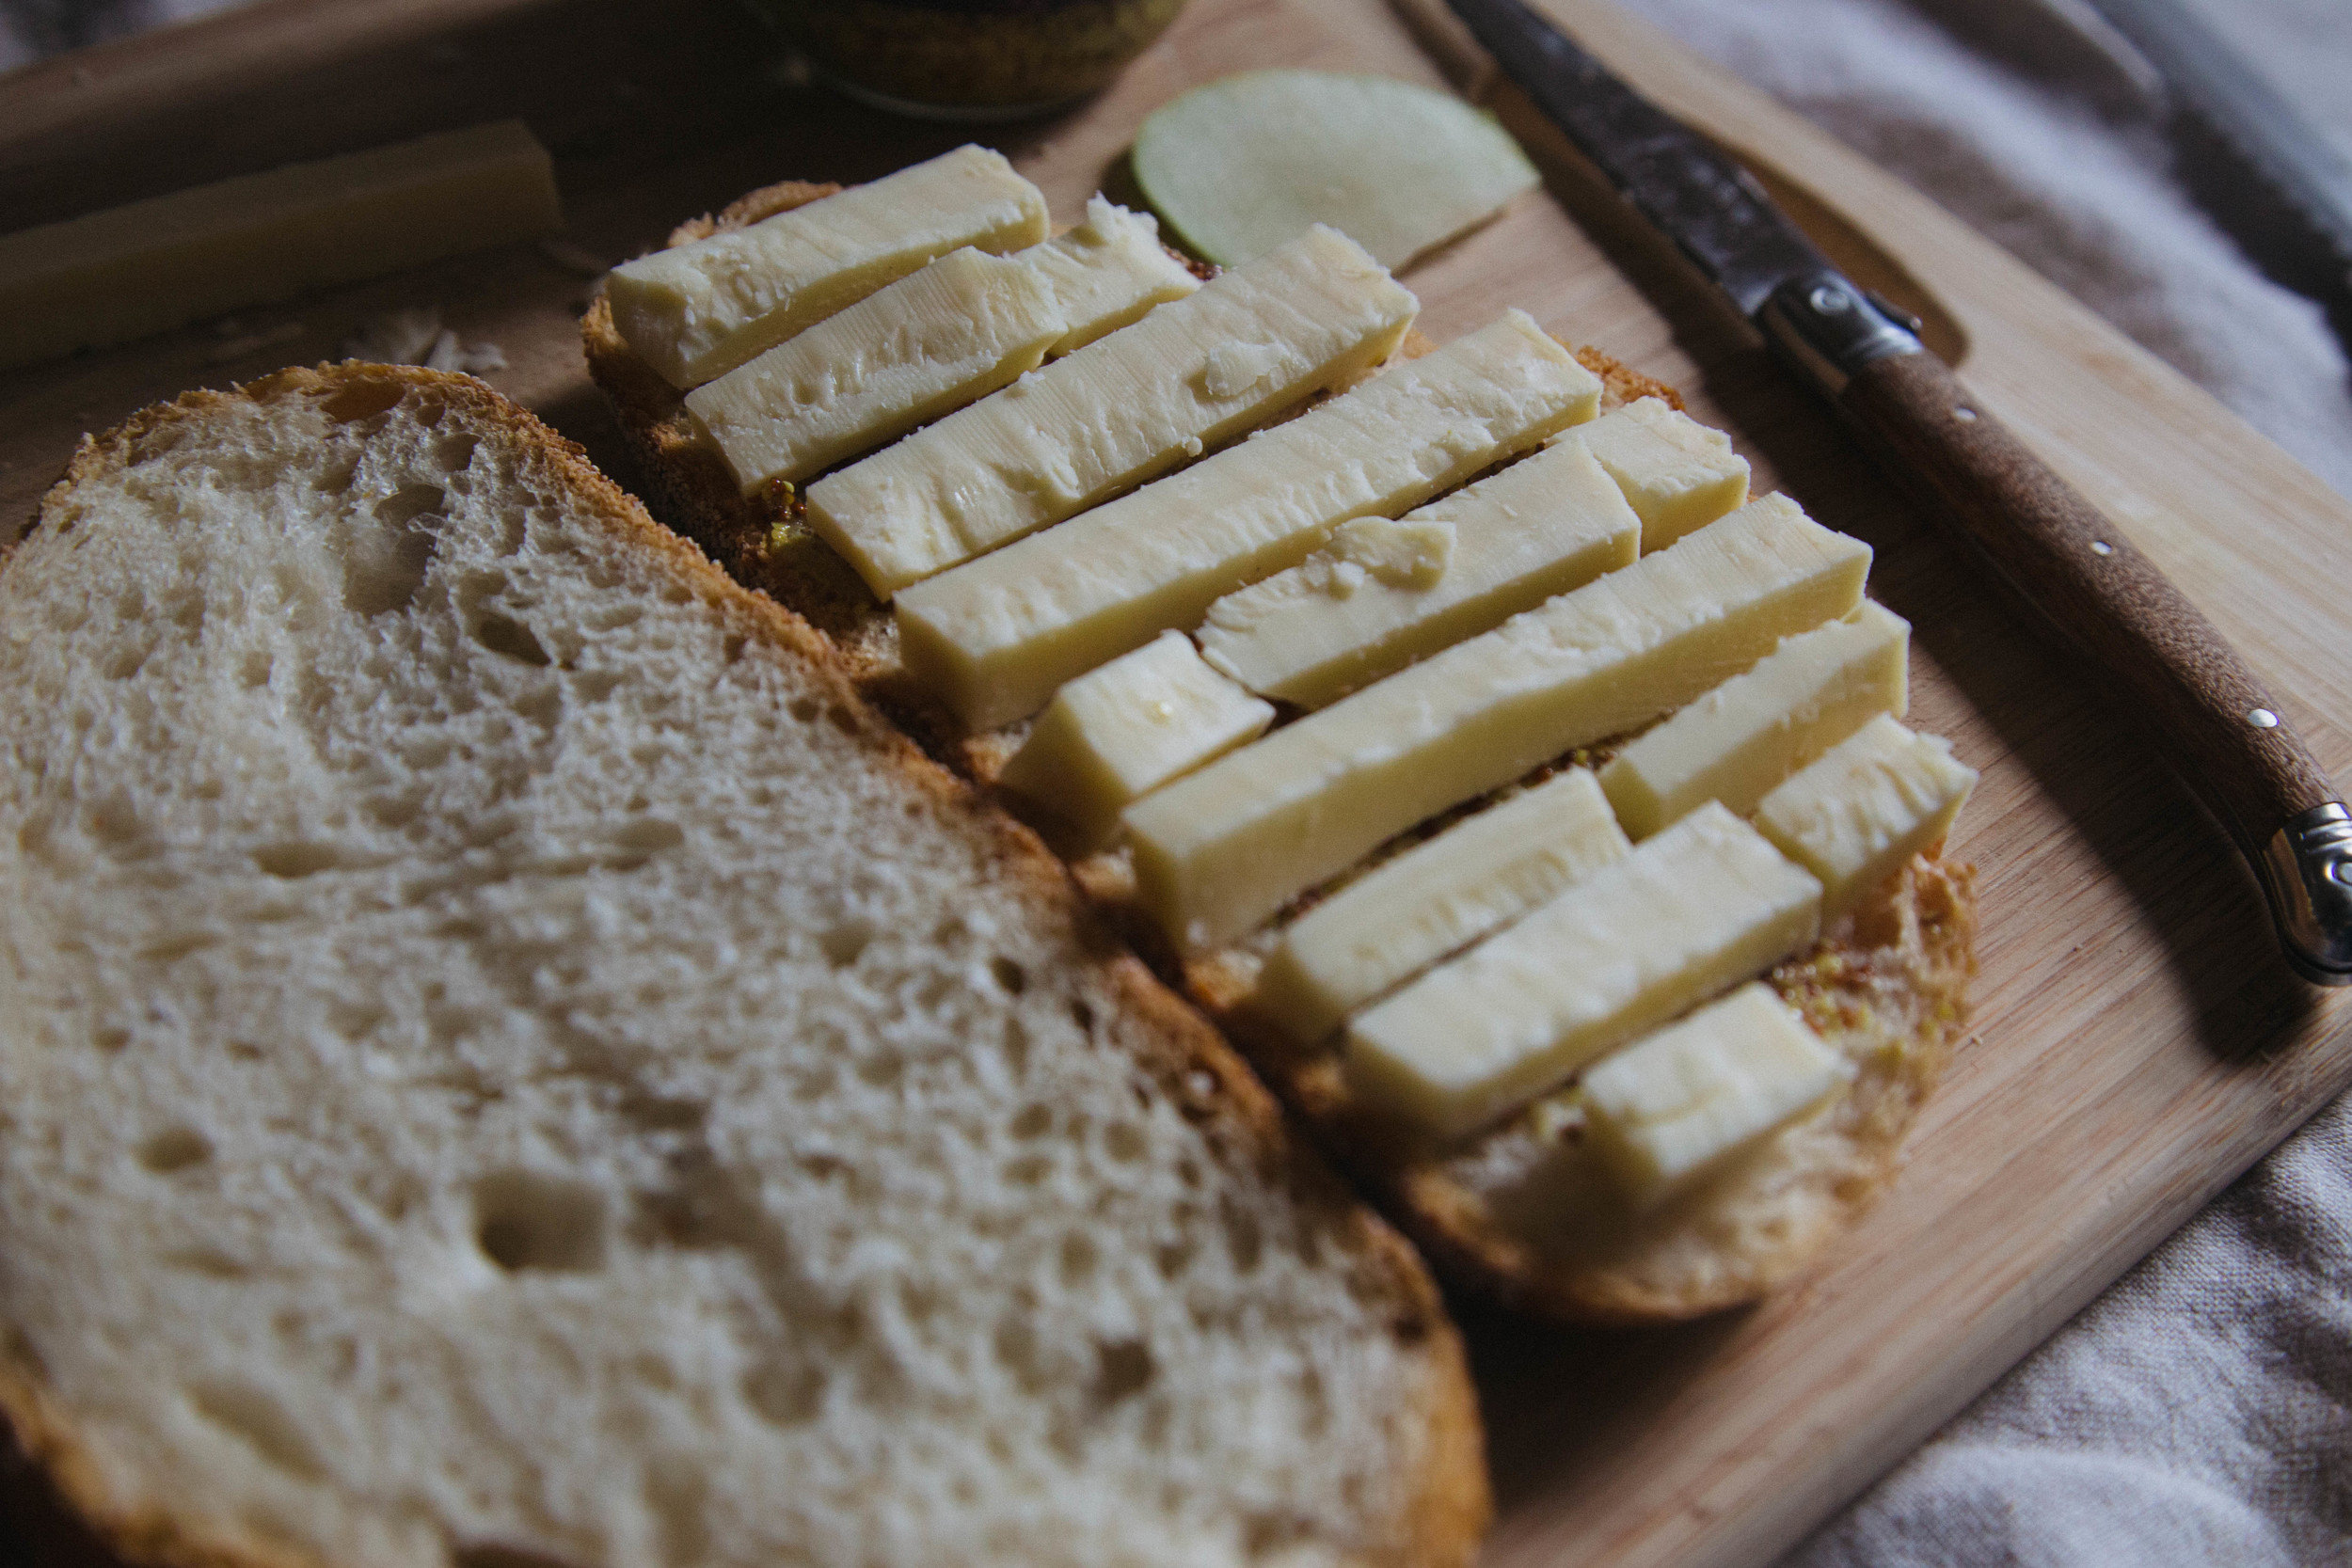
Slice the sourdough and spread one side with mustard. Slice the apple and the cheese. Arrange apple and cheese slices on the sourdough.
On a low-medium heat, melt a knob of butter in a pan. Place the sourdough in the pan and toast the sandwich for 2 - 3 minutes or until golden brown, pressing down with a spatula (or use the bottom of a smaller pan to squash the bread). Flip and repeat, adding more butter if needed.